The Users page allows administrators to create new users, edit existing users and deactivate users in Elements.
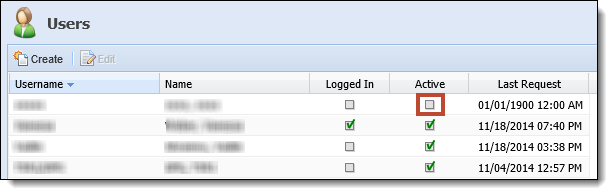
From System Management, select Users. A list of users configured in the system is displayed.
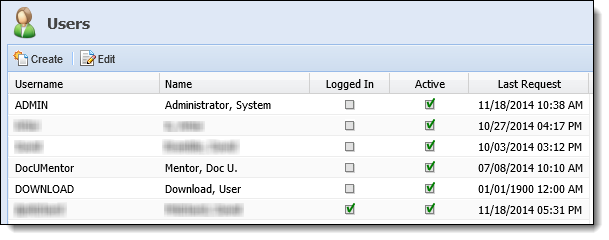
Information on this page is displayed in the following columns:
| Column | Description |
| Username | Displays the user's username. |
| Name | Displays the full name of the user. |
| Logged In | Displays if the user is currently logged in to Elements. if the user is currently logged in to Elements. |
| Active | Displaysif the user is currently an active user. |
| Last Request | Displays the last date and time the user logged into Elements. |
Listed below are the user attributes and the actions that can be taken while managing users in Elements.
User Attributes
All users are comprised of the same attributes, separated into tabs.
General
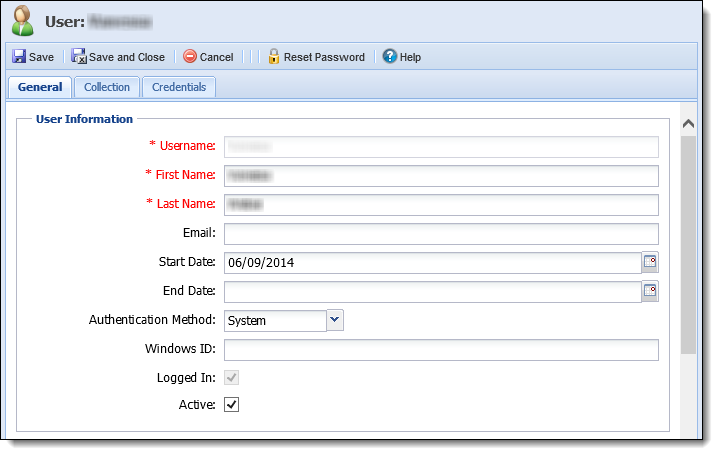
General attributes contain the basic information pertaining to the user and are defined on the General tab. This tab has four sections - User Information, Password, Permission and Access.
User Information
This section contains fields to define the user's information and basic settings.
Enter information using the fields defined below.
| Field | Description | ||
| Username | Enter a unique username for the new user. Any alphanumeric string with a maximum of ten characters can be used. All letters are saved in upper case. | ||
| First Name | Enter the user's first name. This field is required. | ||
| Last Name | Enter the user's last name. This field is required. | ||
| Enter the user's email address. A notification is sent to this address once the user has been created. | |||
| Start Date | Using the calendar icon, select the first date the user has access to Elements. This defaults to the current date, giving the user immediate access to the system. This field is optional. | ||
| End Date |
Using the calendar icon, select the expiration date of the username. This field is blank by default. This field is optional.
|
||
| Authentication Method | Select System from the drop-down if the user should manually log in to Elements with a username and password. Select Windows from the drop-down if the user should log in to Elements through Windows Authentication. | ||
| Windows ID | If Windows is the selected Authentication Method, enter the user's Windows ID. This field is disabled if the Authentication Method is System. | ||
| Logged In | Displays a checkmark if the user is currently logged in to Elements. This field cannot be edited. | ||
| Active | Select this checkbox to activate the user in Elements. |
Password
This section contains fields to define the user's password.

Enter password information using the fields defined below.
| Field | Description | ||
| Last Change Date | This field displays the date the user's password was last changed. This field is blank for new users. | ||
| Next Change Date |
Using the calendar icon, select the date the user is required to change their password. This defaults to the current date.
|
||
| Locked | Displays a checkmark if a user exceeds their maximum number of login attempts and cannot access Elements. Uncheck this box to unlock the user. |
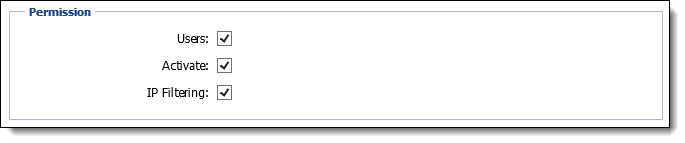
Permission
This section contains fields to define what the user is able to do in Elements.
Enter permission information using the fields defined below.
| Field | Description |
| Users | Select this checkbox for the user to have the ability to create/edit other users. |
| Activate | Select this checkbox for the user to have the ability to activate other Elements such as Asset Recovery or Insurance. |
| IP Filtering | Select this checkbox for the user to have access to IP Filtering functionality. Please see the IP Filtering topic of this guide for more information. |
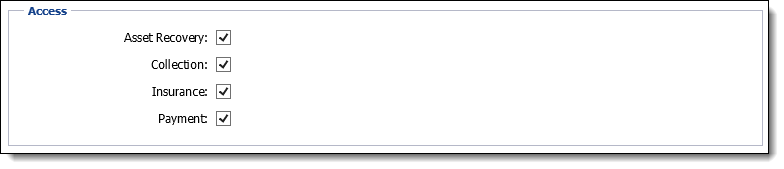
Access
This section contains fields to define the Element(s) to which the user has access.
 |
The options displayed vary based on the Elements configured for the institution. |
Collection
Collection attributes define the worklists to which the user has access as well as their follow-up warnings and the security profile to which they belong. This tab has three sections - Worklists, Follow-ups and Security Profile.
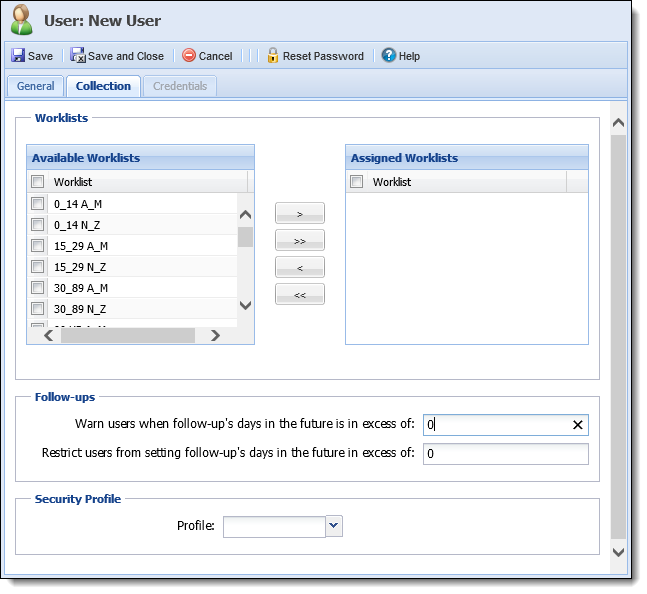
Worklists
In the Worklists section, select the box to the left of each worklist name in the Available Worklists list and use the arrow buttons to move them to the Assigned Worklists list. Worklists in the Assigned list appear on the home dashboard for the user and make up the user's list of work.
|
More than one user can be assigned to a worklist and parameters are in place to prevent users from accessing the same account at the same time. |
Follow-ups
If desired, in the Follow-ups section, define the following attributes:
|
Leave both values at 0 to not use this feature for the user. |
| Field | Description |
| Warn users when follow-up's days in the future is in excess of | Define the number of days beyond the current date that a warning message is triggered to alert a user that the follow-up date is too far in advance. The user receives the warning, but is still able to save the date. |
| Restrict users from setting follow-up's days in the future of excess of | Define the number of days beyond the current date that a warning message is triggered to alert a user that the follow-up date is too far in advance. The user receives the warning and is not able to save the date. |
|
Limitations can be set on follow-up dates at the Client Group, Loan Group and User levels. Where more than one limitation applies for a specific loan, the most restrictive limit is applied. |
Security Profile
In the Security Profile section, select the Security Profile from the drop-down to which the user belongs.
Credentials
Credential attributes define third party credentials for the user.
|
This tab is only enabled once a new user has been Saved. |
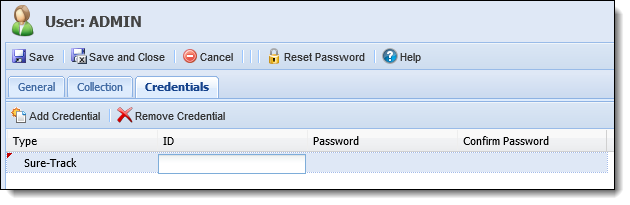
For more information on the Credentials tab, please see the Additional User Credentials topic of this guide.
Creating a User
- To create a new user, click
 . The User Maintenance window appears.
 - Enter the attributes on each of the tabs then click
 or
or  to save the new user. Click
  to disregard the new user.
Editing a User
- To edit a user, double-click the user or click to highlight the user within the grid on the Users page and click
 . The User Maintenance window appears.
 - Modify any attributes on the tabs, except for the User ID. This value cannot be changed.
If the user being edited is currently logged in, the changes take effect the next time the user logs in to Elements.
- Click or to save the changes. Click to disregard the changes.
Resetting a Password
- To reset a user's password, double-click the user or click to highlight the user within the grid on the Users page and click . The User Maintenance window appears.
- Click
 . The user's password is reset to "password" and the Next Password Change Date is set to the current date. The user is required to change their password the next time they log in.
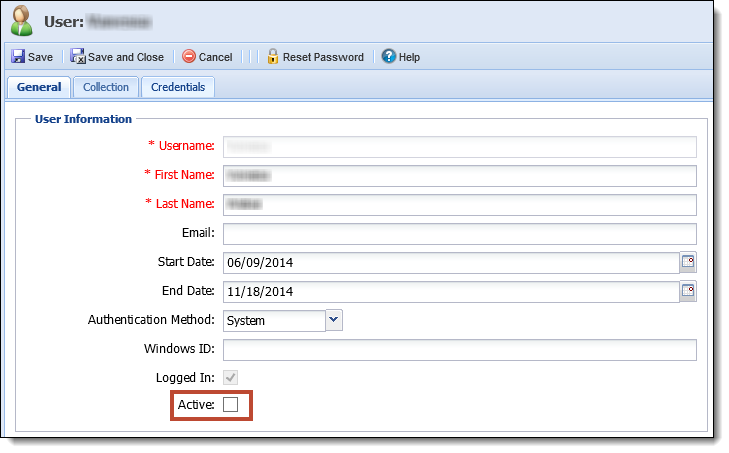
Deactivating a User
Existing users cannot be deleted but they can be deactivated. Deactivating a user prevents them from being able to log into Elements. It also keeps their user information in Elements and allows administrators to easily see which users have access to Elements.
|
The Users Detail Report and the Users Collection Detail Report have been added to Elements as predefined reports to track users. Please see the Reports section of this guide for more information on these reports. |
- To deactivate a user, double-click the user or click to highlight the user within the grid on the Users page and click . The User Maintenance window appears.
- Deselect the Active checkbox in the User Information section of the General tab. Upon deselection of the Active checkbox, the current date is automatically populated in the End Date field.
A date can be manually entered into the End Date field without deselecting the Active checkbox. Manually entering a date in the future automatically deactivates the user on that date.
- Click or to save the changes. Click to disregard the changes.
- Once deactivated, the user's name still appears in the Users page but the Active checkbox is deselected to indicate the user is no longer active in Elements.
- To reactivate a deactivated user, double-click the user or click to highlight the user within the grid on the Users page and click . The User Maintenance window appears.
- Select the Active checkbox in the User Information section of the General tab. The date is removed from the End Date field.
- Click or to save the changes. Click to disregard the changes. On the Users page, the Active checkbox is selected to indicate the user is active in Elements.