


The Application Navigator is located on the left-hand side of the workspace. It contains an Application Summary and a series of headings that displays an application’s Screens, Notifications and Comments.

The Applicant's Name appears at the top of the Left Hand Navigation Pane. The name is always displayed regardless of what workflow step the user is on.

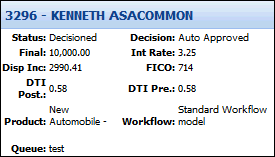
The Application Summary contains information specific to the current loan application such as Field Values (Rate/Purpose), Aggregates, Ratios and Scores. The values that populate within the Application Summary are configurable at the Loan Sub-Product level by a Framework Administrator. This information is always displayed and updates throughout the duration of the loan.
The Navigator panel contains all the screens assigned to the Loan Sub-Product’s workflow model. The Navigation panel contains two sections:
Workflow
The Workflow is located at the top of the Navigator tab. It is a predetermined series of screens that aids users in the application process. The Screens that appear within the Workflow are driven by the Workflow Model and are tied to the Loan Sub-Product.
This feature serves as a roadmap that dictates the proper order for completing an application. The first screen within a Workflow displays when a new application is created.

While navigating an application’s Workflow, users are able to click Next or Back to progress through the application. Users are also able to navigate a Workflow by selecting each screen individually rather than clicking Next or Back. While navigating a Workflow, the active Stage and all Screens within the Stage are displayed in bold text. The active Screen within the Workflow is highlighted.
 |
The workflow is not the mandatory order to complete an application. Users can ignore a Workflow and complete the application by manually selecting Screens from the Application Navigator. However, if an application is being completed by selecting the screens, Next and Back are not available. |
The Workflow includes the following stages:
|
The screens assigned to each category are configured in System Management>Lending>Screens by your administrator. Each stage may be configured with any screen desired by the institution, however, the stage names indicate the intended purpose. |
People and Collateral
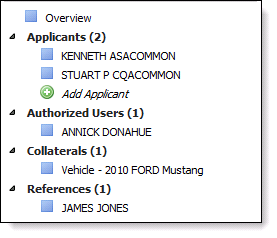
The People and Collateral section is located between the Workflow and Screens sections. This section contains an index of all People and Collateral associated with the application. Additionally, this section contains the Overview screen.
The Overview screen is a user-defined Application screen that provides users a quick summary of the application. This screen can be configured with informational fields and panels that display important application information, for example:
- Loan summary information such as Amounts, Decision and Status.
- Applicant summary information such as Name, Account Number and Risk Tier.
- Aggregates, Ratios, Scores and Review Indicators
- Core Messages
The Overview screen is also the default screen displayed when an in-progress loan application is re-opened.
The People and Collateral section displays all Applicants, Authorized Users, Collaterals and References associated with an application. In addition to displaying all People and Collateral records, users may be able to Add, Edit and Delete records from the application.
To manage People and Collateral records:
- Users are able to click the desired record. This is typically displayed as the Applicant's, Authorized User's or Reference's name or Subject Collateral.
- Users are able to click the Applicants, Authorized Users, Collaterals and References header. When selected, a screen will display where users are able to Add, Edit or Delete the Person or Collateral record.
- Users are able to Add a Person or Collateral by clicking Add Applicant, Authorized User, Collateral or Reference from the People and Collateral Section.
|
The Applicants, Authorized Users, Collaterals and References collections only populate if corresponding screens are mapped to the Workflow Model. |
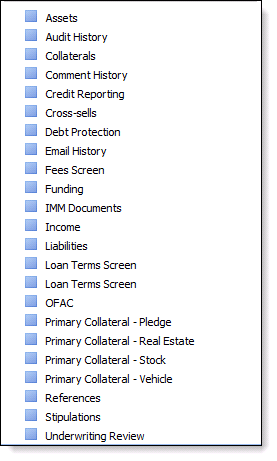
Screens
The Screens section is located at the bottom of the Navigator. It contains a list of all screens available in an application’s workspace. All of the Screens that appear in this section are listed in alphabetical order.
Depending on the configuration of the Workflow Model, Framework users may be able to process an application by selecting screens from this list. However, while processing an application by manually selecting screens, the Decision button does not appear in the Screen Toolbar of the final screen required to originate the application; it appears only if Workflow is being used. To submit these applications to Underwriting, the user must select Decision (or Approve/Decline) from the Application Toolbar.
|
Screens are driven by the Workflow Model and tied to the Loan Sub-Product. Screens and Workflow do not need to include the same screens. The Screens section can contain screens that are not assigned to Workflow. |
To assign screens and workflows, refer to the Workflow Model section within the Administrator Guide.
The Notifications tab displays all informational and validation messages that have been called by rules when an application is saved, calculated or called by actions. Notifications help users complete all required application information and quote the most accurate calculations.
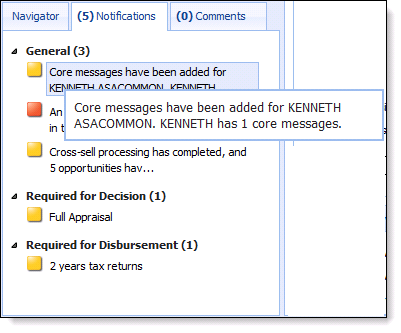
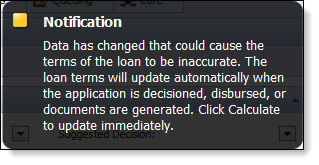
When Notifications generate, the tab header updates with the total number of Notifications that need to be cleared. Additionally, when notifications generate, a pop-up notification appears in the application workspace. Notifications remain stored within the Notifications tab, until they are dismissed or cleared.
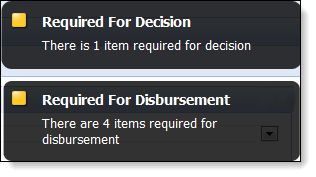
It is possible for multiple Notifications to be generated simultaneously, which could cause a great deal of clutter within the workspace. For this reason the Required For Decision and Required For Disbursement categories receive consolidated messages that alerts users how many items exist for decision or disbursement.
Once users navigate to the Notifications tab in the Application Navigator, they are able to view the Notifications that have been generated.
The General Notification category contains various types of validations, alerts, stipulations and To-Dos that remain outstanding for the processing of the application. All system generated notifications appear in this category.
Notifications in this category may include:
- Calculations must be refreshed
- Cross-sell opportunities exist
- OFAC processing failure
|
Users are able to Dismiss General Notifications if the application is locked by another user. |
 Required for Decision and Required for Disbursement Notifications
The Required for Decision and Required for Disbursement categories contain validations and stipulations that must be completed prior to rendering a decision or disbursement. These validations may include To-Dos.
To-Dos are a series of validations or stipulations that are called by rules when an application is saved. To-Dos permit rule authors to guide users to enter the data that may be missing or other actions that must be taken before an application can be decisioned or disbursed. To-Dos can also be assigned to specific screens and can prevent applications from being decisioned or disbursed with incomplete information. For example, a To-Do can be written to call attention to an applicant’s length at the current address if it is not long enough. Failure to add a previous address will prevent the application from being decisioned/disbursed.
|
If a To-Do is linked to a screen, users are able to access the linked screen even if they do not have permission to view the screen. |
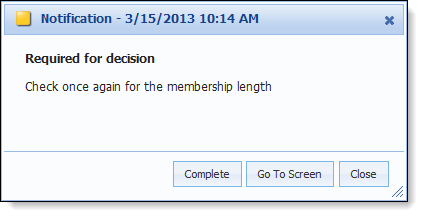
Manual To-Dos are not data-driven validations, which automatically update when linked information is updated within the application. In order to clear a Manual To-Do, users with the appropriate permission must access the Notifications tab, select the Notification/Manual To-Do and click the Complete button in the Notification pop-up.
Unlike a traditional To-Do, Manual To-Dos are not linked to specific data. The only way a Manual To-Do may be removed is by completing it.
 |
Once a Manual To-Do is completed, the information is updated in the database. A Manual To-Do will not re-generate even if information changes on the application that would normally cause a Manual To-Do to generate. |
Manual To-Dos can be added to Workflow Validation categories such as: Decision, Disbursement, Post Disbursement and Post Decline.
|
To-Dos are not stored in the Audit Log. Once they are cleared, the To Do is removed from the application. |
In addition to populating in the Application Navigator and Workspace, To-Dos populate in a To-Dos panel. This panel is typically assigned to application screen types in the Underwriting and Approval categories.
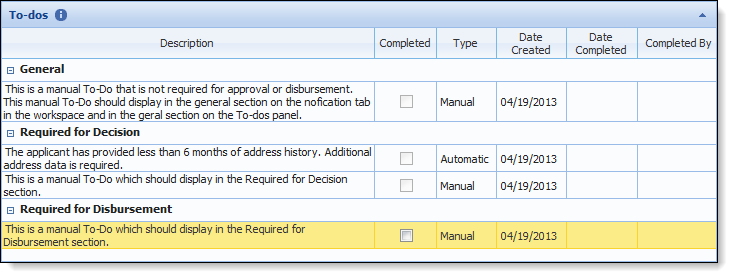
Although both types of To-Dos populate in this panel, only Manual To-Dos are able to be cleared. Automatic To-Dos are only able to be cleared by completing the missing information that caused the validation failure.
Required for Decision
The Required for Decision Notification category is a repository for To-Do Validations that must be cleared prior to submitting an application to Decision processing.
Notifications in this category may include:
- Credit report missing
- Length of Employment
- Full appraisal stipulation
Required for Disbursement
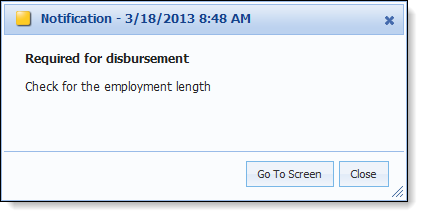
The Required for Disbursement Notification category is a repository for To-Do Validations that must be cleared prior to Disbursing an application.
Notifications in this category may include:
- Length at address
- Proof of insurance stipulation
|
For more information on creating Notifications, refer to the Rules section in the Administrator Guide. Notifications are able to be generated by Validation Rules. |
The Comments tab allows users to View and Create Comments that are assigned to the current application. The corresponding number within the tab header updates with the total number of Comments assigned to the application when a comment is created.
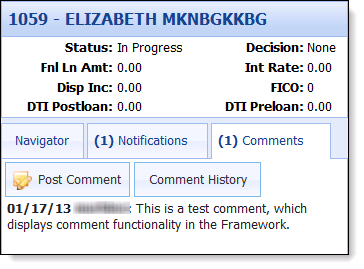
Post Comment
Users are able to post a comment on an application. When selected, the Post Comment screen appears. In addition to the free-form text field used to record the comment, the Post Comment screen contains the following fields:
| Field Name | Description |
| Internal Comment | This box is set to active by default. If the box is not selected, the comment is displayed internally as well as sent via an interface (e.g. CUDL, WebLoan) to the third party (e.g. Dealer, Member). |
| Text Box | This is where a user's comment is entered. |
Once all applicable fields have been completed, the user has two options at the bottom of the screen:
- Save – Allows a user to save a Comment to the current application.
- Cancel – Allows a user to leave the screen without saving a Comment.
Upon adding a Comment, the Comment is stored within the Comment History. The most recent Comments also populate within the Application Navigator Pane when the Comments tab is selected.
Comment History
Comment History enables users to view all of the Comments attached to the current application. When selected, the Comment History screen appears within the Workspace.
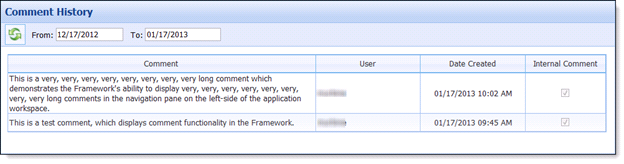
The Comment History populates within a grid and displays the following information:
- Comment
- User (posted by)
- Date Created (date/time)
- Internal Comment (yes/no)
At the top of the Comment History screen, users are able to perform the following actions:
- Refresh the Comment History screen. This allows new comments to populate within the grid.
- Select a Date Range to determine the comments that are displayed.
 See Also
Approval
To-Do Panel