Users may choose to utilize more than one Area within the Akcelerant Framework based on how the organization works. Areas can be used to consolidate related processes, screens, workflows and reports. How an Area is configured determines what aspects of the Workspace will be available to the user(s) that are working in that Area.
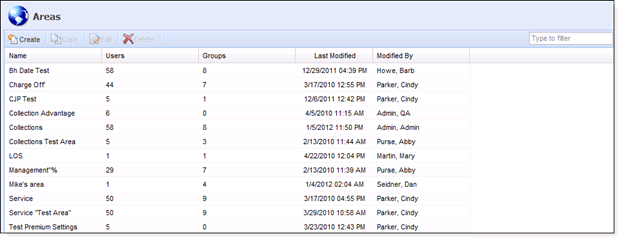
Users have the ability to Create, Copy, Edit and Delete areas.
General Tab
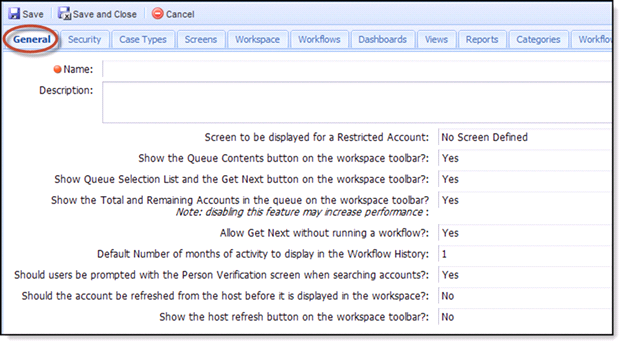
Under the General tab, the following settings can be applied when an area is accessed in the workspace:
|
Column Name |
Description |
|
Name/Description |
|
|
Screen to be displayed for a restricted account |
|
|
Show the Queue Contents button on the workspace toolbar |
|
|
Show the Queue Selection list and the Get Next Button on the workspace toolbar |
|
|
Should the total number of remaining accounts in the queue be displayed on the workspace page? |
|
|
Allow Get Next Account without a workflow? |
|
|
Default Number of months of activity to display in the Workflow History |
|
|
Should users be prompted with the Person Verification screen when searching accounts? |
|
|
Should the account be refreshed from the host before it is displayed in the workspace? |
|
|
Show the host refresh button on the workspace toolbar? |
|


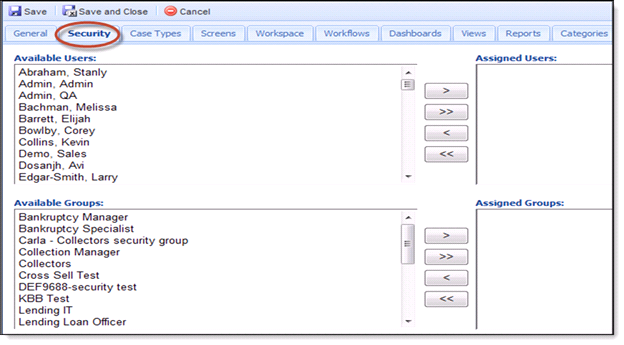
Security Tab
- Identify which Users and or/Groups are given access to view the area by moving the selection(s) from the Available Users/Groups to the Assigned Users/Groups window.
- Highlight one or more Users/Groups in the Available Users/Groups window and clicking the > button will move the Users/Groups to the next window.
- Clicking the >> will move all Users/Groups from the Available Users/Groups window to the Assigned Users/Groups window.
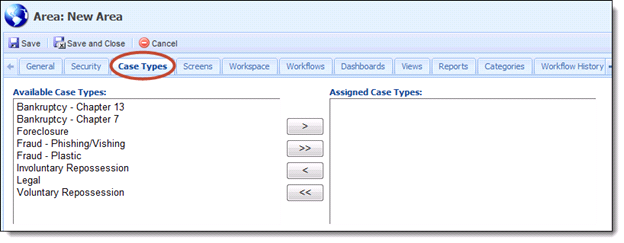
Case Types Tab
- Identify which Case Types are available for creation through the Create Case Tool in the Workspace by moving the selection(s) from the Available Case Types to the Assigned Case Types window.
- Users that have access to this area will be able to create Cases of any Type included in the Assigned Case Types window.
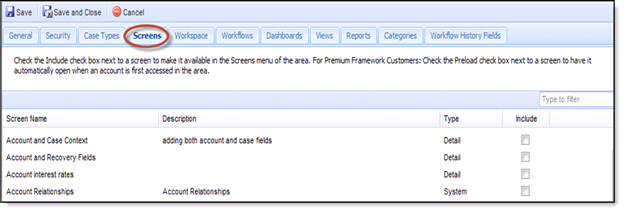
Screens Tab
- Identify which screens are available in the Area by marking the Include checkbox.
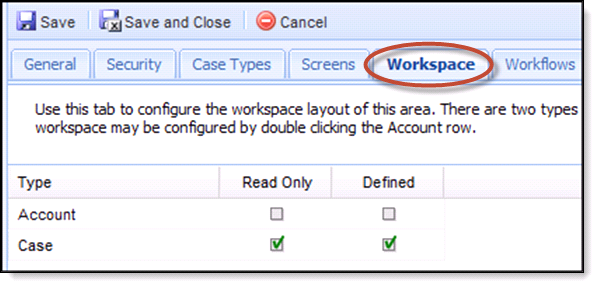
Workspace Tab
Use this tab to configure the workspace layout of this area. There are two types of workspaces - Account and Case.
| Account | The Account workspace is configured by double clicking the Account row. |
| Case | The Case workspace is predefined and may not be changed. |
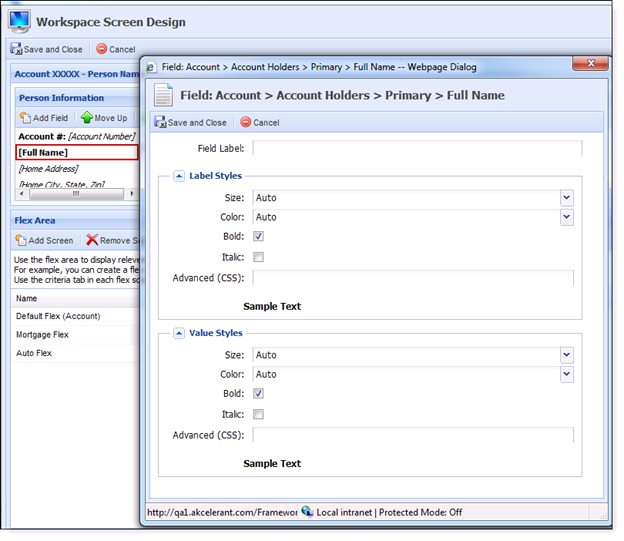
Personal Information Box
-
By double clicking on the account or case, users have the ability to design the workspace screen.
-
Double click on a field name and a Field Design page displays. On this page users are able to adjust the field label, label styles and value styles.
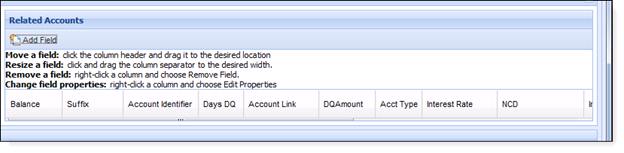
Related Accounts
In this section related accounts can be added and the field properties can be moved, resized, removed or changed.
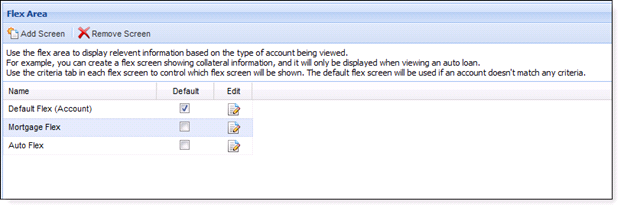
Flex Area
Use the flex area to add or remove a screen. The Flex Area is used to display relevant information based on the type of account being viewed. A flex screen can be created showing collateral information and it will only be displayed when viewing an auto loan. This flex screen displays when working an account. The default flex screen will be used if an account does not match any criteria.
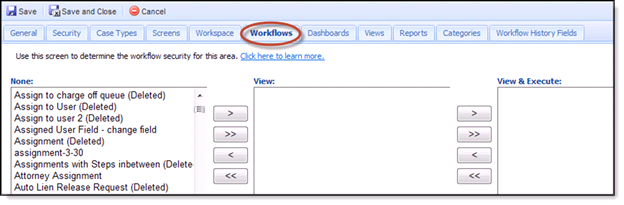
Workflows Tab
- Identify which Workflows are available to view or view & execute in the Area by moving the selection(s) from the Available Workflow to the View window and then to the View and Execute window.
- Highlight one or more Workflows in the Available Workflows window and clicking the > button will move the Workflow(s) to the next window (whether that be View or View and Execute).
- Clicking the >> will move all workflows from one window to the next.
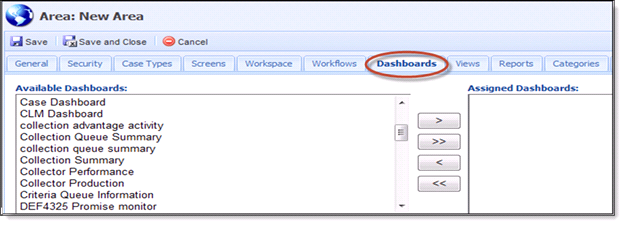
Dashboards Tab
-
Identify which Dashboards are available in the Area by moving the selection(s) from the Available Dashboard to the Assigned Dashboard window.
-
Highlight one or more Dashboards in the Available Dashboards window and clicking the > button will move the Dashboard(s) to the next window.
-
Clicking the >> will move all dashboards from the Available Dashboards window to the Assigned Dashboards window.
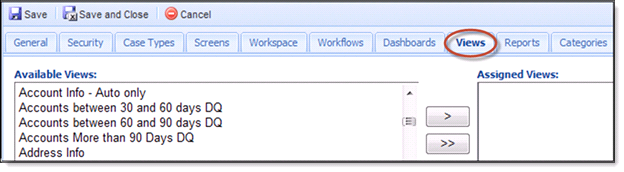
Views Tab
- Identify which Views are available in the Area by moving the selection(s) from the Available Views to the Assigned Views window.
- Highlight one or more Views in the Available Views window and clicking the > button will move the Views(s) to the next window.
- Clicking the >> will move all views from the Available Views window to the Assigned Views window.
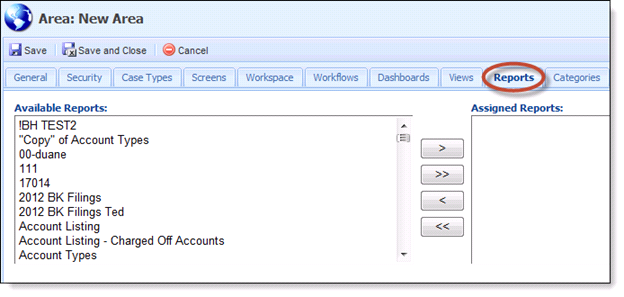
Reports Tab
- Identify which Reports are available in the Area by moving the selection(s) from the Available Reports to the Assigned Reports window.
- Highlight one or more Reports in the Available Reports window and clicking the > button will move the Reports(s) to the next window.
- Clicking the >> will move all reports from the Available Reports window to the Assigned Views window.
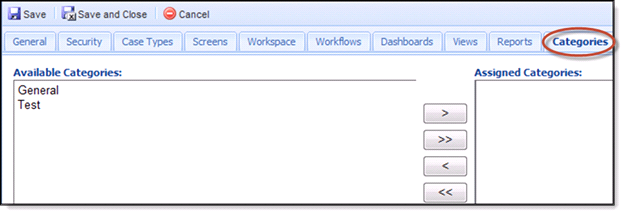
Categories Tab
- Identify which Categories are available in the Area by moving the selection(s) from the Available Categories to the Assigned Categories window.
- Highlight one or more Categories in the Available Categories window and clicking the > button will move the Categories to the next window.
- Clicking the >> will move all categories from the Available Categories window to the Assigned Categories window.
Workflow History Fields Tab
- Check the Include checkbox next to the field to have it displayed on the Workflow History grid in the workspace of this area.
- The order the fields will be displayed (left to right) below (top to bottom). To change the order of the fields, drag and drop the rows.
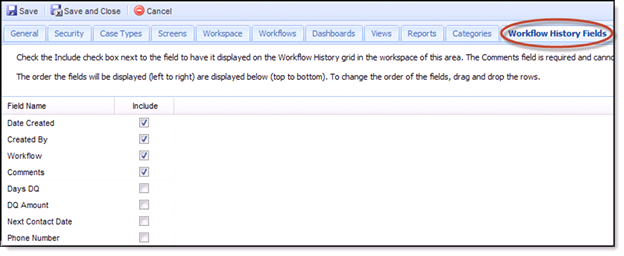
The Comments field is required and cannot be unchcecked.
