


Event Processing
Event Processing provides an institution the ability to pair predefined events and actions together. When a defined event occurs, the corresponding action automatically fires. All events are raised after the actions are complete and are processed in the background. For example, cross-sell processing, an action, can be tied to application approval, an event. In this example, the approval of an application triggers cross-sells to generate in the background while a user continues processing the application.
Additionally, rules can be assigned to the event and action pair for added clarification and control over Applications. These rules can be created under the “Event Processing” category to indicate if the action(s) should be executed.
To view a demonstration of this feature, click here.
Event Processing can be accessed by navigating to System Management>Lending>Event Processing.
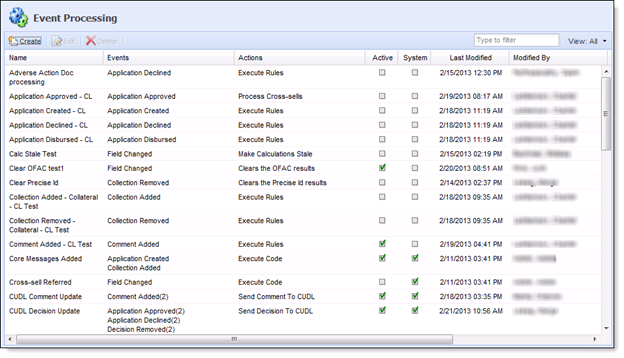
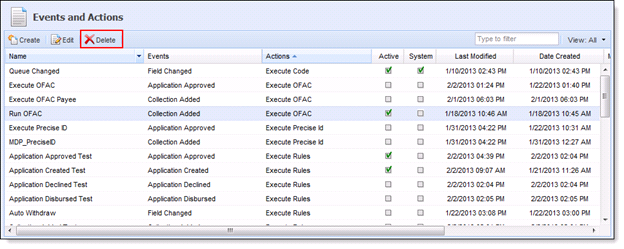
From the Event Processing Administrator screen, users are able to Create, Edit and Delete event and action pairings. A list of existing events and actions populate on the Event Processing home screen.
The Framework provides “system-defined” event and action pairs. These pairs mostly include identifying the fields which would make the calculations or fees stale. Institutions are able to disable these pairs and create their own.
 |
When creating an Event Processing pair it is recommended to pair multiple actions to an event if action priority is a concern as opposed to creating two separate Event Processing pairs. For example, a user may choose to have two actions fire when an Applicant is added. One action may be "Pull Credit" and the other may be a rule which prompts the Framework not to pull credit if the applicant is less than 18 years old. If these actions are not contained in the same Event pair, the actions may not fire in the intended order. Pairing these Actions within one Event ensures that priority is handled as intended, as long as Actions are ordered properly within the Event. |
Creating an Event Processing Pair
Events and actions are “self-contained” entities that need to be paired together to be used effectively. Users are able to pair the events with actions, which provide users the flexibility to perform crucial tasks at an appropriate time in the application life cycle.
The Framework also contains a series of pre-defined Even and Action pairs. System-defined events and actions can be disabled but not edited.
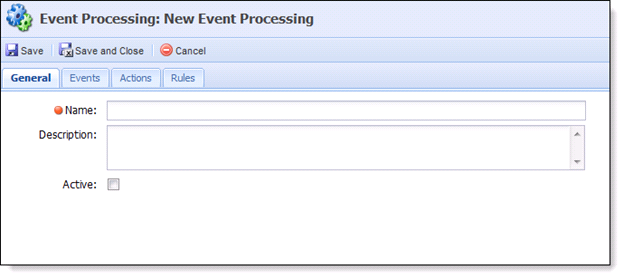
Clicking Create opens the Event Processing screen in a new window. The Event Processing screen contains the following tabs:
 General Tab
The General tab allows a user to provide basic information about the event and action pairing. Users are also able to enable/disable an event and action pairing within the General tab.
The following fields are available in the General tab:
| Field | Description |
| Name | Enter the name for the Event. |
| Description | Enter a description for the Event. |
| Active check box | Select the Active check box so that the Event pair will be active in an application. |
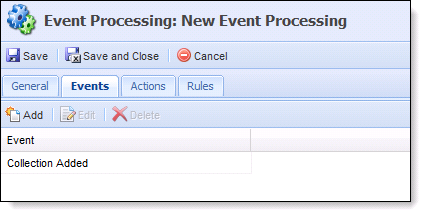
The Events tab is where an Event can be assigned. An Administrator is able to assign a system-defined or user-defined Event. Once an Event is chosen, the administrator can choose to edit the event type for the specific events and actions pair being created.
The Events Tab contains a toolbar at the top of the screen that allows users to perform the following actions:
| Icon | Title | Description |
|
|
Add | Allows a user to add an event to the Event Processing pair. |
|
|
Edit | Allows a user to edit the event assigned to the Event Processing pair. |
|
|
Delete | Allows a user to delete an event from the Event Processing pair. |


Adding Events
Clicking Add opens the Select Event Type window. Use the Event Type drop-down to select the event that triggers the ensuing action.
The following is a list of system-defined Events:
| Event | Description |
| Application Approved | Will be raised whenever is approved (Auto or LO Approved). |
| Application Created | Will be raised whenever a new application is created in the Framework. |
| Application Disbursed | Will be raised whenever an application is disbursed. |
| Application Declined | Will be raised whenever an application is declined. |
| Collection Added | Will be raised whenever a collection is added. For example, Applicant, Collateral, Fee, Payee. |
| Collection Removed | Will be raised whenever a collection member is removed. |
| Comment Added | Will be raised whenever a new comment is added on an application. |
| Decsion Removed | Will be raised whenever a decision is removed from a previously approved or declined application. |
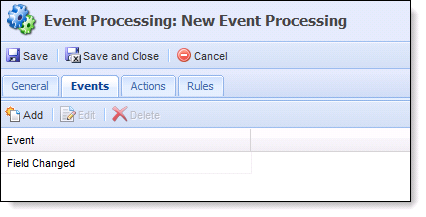
| Field Changed | Will be raised whenever a field changes. |
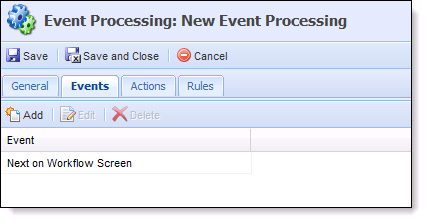
| Next on Workflow Screen | Will be raised whenever Next is clicked on the Workflow screen |
Select the desired event and click OK to finalize the event selection. Click Cancel to return to the Events tab without saving an event.
NOTE: More than one event may be added to the event and action pairing. If more than one event is added, the event pairing is treated as an “Or Statement” meaning that if either event occurs, the action triggers.
Most events are straightforward, however, events such as Collection Added, Collection Removed, Field Changed and Next on Workflow Screen require additional input.
Collection Added or Removed Events
A Collection is a group of like entities such as Applicants, Addresses, References and Payees.
Selecting the Collection Added or Collection Removed events opens the Select Collections screen in a new window.
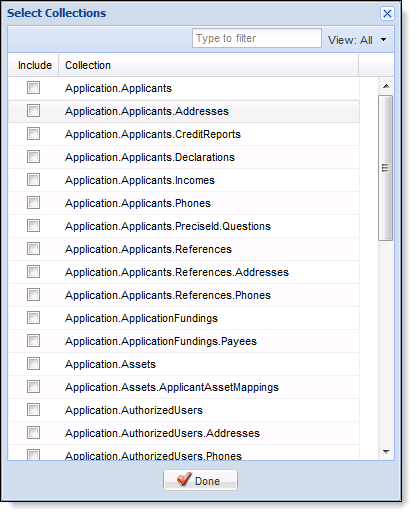
The Select Collection screen displays a list of all the Collections in the Framework’s lending solution. Select the desired collection(s) and click Done to finalize the selected collection(s).
 |
Multiple collection types may be added to an event, however, the Event is displayed as Collection Added or Collection Removed. It is recommended that the pairing’s Name and/or Description indicates the collection(s) that are being used. |
Field Changed Events
Selecting the Field Changed event opens the Select Fields screen in a new window.
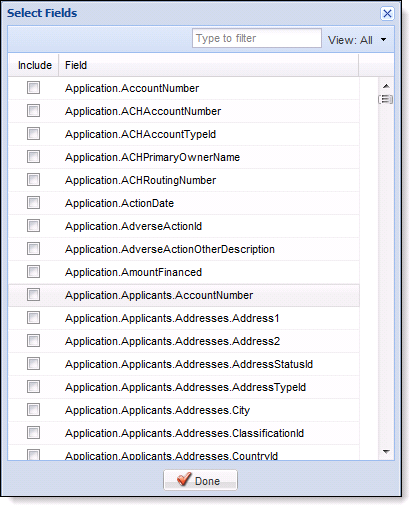
The Select Fields screen displays a list of all of the Fields in the Framework’s lending solution. Select the desired field(s) and click Done to finalize the selected field(s).
|
Multiple fields may be added to an event, however, the Event will be displayed as Field Changed. It is recommended that the pairing’s Name and/or Description indicates the field(s) that are being used in this pairing. |
Next on Workflow Screen
Selecting the Next on Workflow Screen event opens the Select Workflow Screens screen in a new window.

Select Workflows Screen displays all of the Workflow screens assigned to each Workflow Model. Select the desired Workflow screen(s) and click Done to finalize the selected screen(s).
|
Multiple Workflow screens across various Workflow Models may be added to an event, however, the Event displays as Next on Workflow Screen. It is recommended that the pairing’s Name and/or Description indicates the screen(s), Workflows(s) and Workflow Model(s) being used in this pairing. |
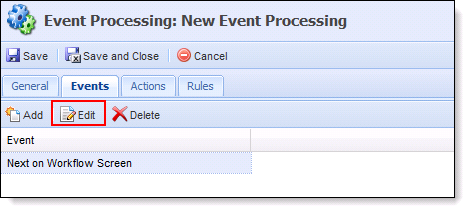
Editing Events
Administrators are able to modify an existing event by clicking Edit in the Events tab within the Event Processing pair.
Make the desired modifications. Once the modifications are complete, click Save and Close.
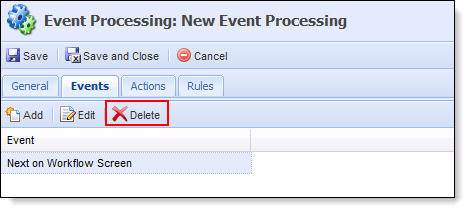
Deleting Events
Administrators are able to delete an existing event by clicking Delete in the Events tab within the event and action pairing.
The Actions tab is where an Action is assigned to an Event. An Administrator is able to assign a system-defined or user-defined Action.
The Events Tab contains a toolbar at the top of the screen that allows users to perform the following actions:
| Icon | Title | Description |
|
|
Add | Allows a user to add an event to the Event Processing pair. |
|
|
Edit | Allows a user to edit the event assigned to the Event Processing pair. |
|
|
Delete | Allows a user to delete an event from the Event Processing pair. |
Adding Actions
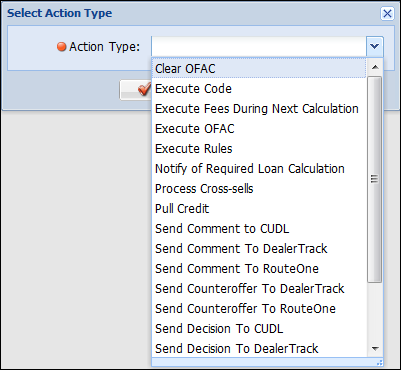
Clicking Add opens the Select Action Type window. Use the Event Action drop-down to select the action that is triggered by the previously selected event.

The following is a list of system-defined Actions:
| Actions | Description | ||
| Clear OFAC | Clears OFAC results. If this is tied to a non-payee field change/collection member added/collection member deleted, it will clear OFAC for all applicants. If there are only events for changes on a payee, it will only change the payees that have had changes. | ||
| Clear Precise Id | Clears Precise Id results. If this is tied to a non-applicant field change/collection member added/collection member deleted, it will clear Precise Id for all applicants. If there are only events for changes on an applicant, it will only change the applicants that have had changes. | ||
| Execute Code | Execute system-defined or custom code to perform certain actions. This will also be used to inform third parties (like CUDL, RouteOne, and so on) about changes to the application. | ||
| Execute OFAC |
Executes the OFAC test for all Payees (If not explicitly excluded). If the OFAC fails, it will add a notification to inform the user to go to the OFAC screen to review the results. |
||
| Execute Fees During Next Calculation | Indicates that fees are out of date. Usually paired with “Field Change” or “Collection Member Added” events to indicate to the user to reassess the application fees. | ||
| Execute Precise Id |
Executes the Precise Id test. If the process fails, it will log a notification to inform the user to go to the “Precise ID” screen to answer knowledge based questions.
|
||
| Execute Rules |
Executes the configured rules. The rules executed via this action will be able to perform the following actions:
|
||
| Notify of Required Loan Calculation | Returns a notification that indicates users the calculations are out of date. | ||
| Process Cross-sells | This action generates the cross-sells for the application. | ||
| Pull Credit | This action initiates credit report processing for the applicants associated with the application. Credit reports are pulled according to the defaults configured in loan product definitions. | ||
| Send Comment To CUDL | Updates CUDL with the current application information. By default, a system Event and Action pair causes this to happen when a CUDL application has a comment. | ||
| Send Comment To DealerTrack | Updates DealerTrack with the current application information. By default, a system Event and Action pair causes this to happen when a DealerTrack application has a comment. | ||
| Send Comment To RouteOne | Updates RouteOne with the current application information. By default, a system Event and Action pair causes this to happen when a RouteOne application has a comment. | ||
| Send Counteroffer To DealerTrack | Updates CUDL with the current application information. By default, a system Event and Action pair causes this to happen when a DealerTrack application has a Counteroffer. | ||
| Send Counteroffer To RouteOne | Updates CUDL with the current application information. By default, a system Event and Action pair causes this to happen when a RouteOne application has a Counteroffer. | ||
| Send Decision To CUDL | Updates CUDL with the current application information. By default, a system Event and Action pair causes this to happen when a CUDL application is Decisioned. | ||
| Send Decision To DealerTrack |
Updates CUDL with the current application information. By default, a system Event and Action pair causes this to happen when a DealerTrack application is Decisioned. |
||
| Send Decision To RouteOne | Updates CUDL with the current application information. By default, a system Event and Action pair causes this to happen when a RouteOne application is Decisioned. | ||
| Send Disbursement To CUDL | Updates CUDL with the current application information. By default, a system Event and Action pair causes this to happen when a CUDL application has been Disbursed. | ||
| Send Disbursement To DealerTrack | Updates CUDL with the current application information. By default, a system Event and Action pair causes this to happen when a DealerTrack application has been Disbursed. | ||
| Send Disbursement To RouteOne | Updates CUDL with the current application information. By default, a system Event and Action pair causes this to happen when a RouteOne application has been Disbursed. |
Select the desired action and click OK to finalize the action selection. Click Cancel to return to the Actions tab without saving an action.
|
More than one action may be added to the event and action pairing. If more than one action is added, the pairing is treated as an “And Statement.” If an event occurs, all actions will trigger. If multiple events and multiple actions are paired, all actions trigger if one event occurs. |
Most actions are straightforward, however, actions such as Execute Code and Execute Rules require additional input.
Execute Code Actions
Selecting the Execute Code action type opens the Edit Action – Execute Code screen in a new window.
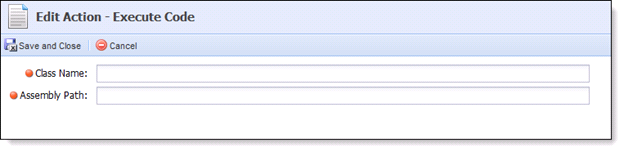
Complete the Class Name and Assembly Path fields to assign the code that relates to the custom action.
|
The Execute Code action is for development purposes only. |
Execute Rules Actions
Selecting the Execute Rules action type opens the Edit Action – Execute Rules screen in a new window.
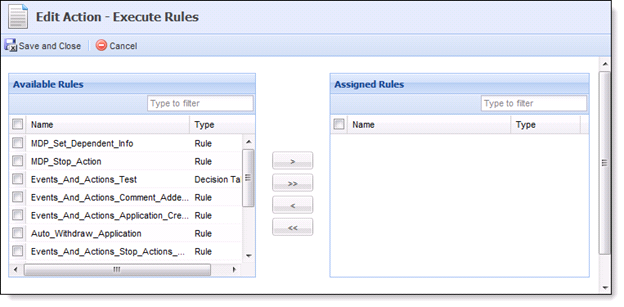
Assign the desired Event Processing rule(s).
|
Only rules written in the Event Processing category are able to be assigned by the Execute Action type. |
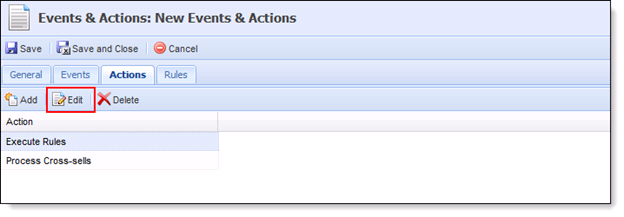
Editing Actions
Once an Action is chosen, the administrator can choose to edit the action type for the specific Event Processing pair being created by clicking Edit in the Actions tab within the event and action pairing.
Make the desired modifications. Once the modifications are complete, click Save and Close.
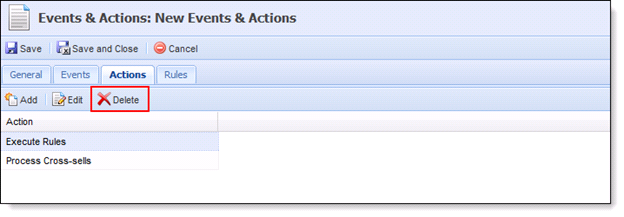
Deleting Actions
Administrators are able to delete an existing Action by clicking Delete in the Actions tab within the Event Processing pair.
The Rules tab allows the administrator to set qualifiers for the Event Processing pair.
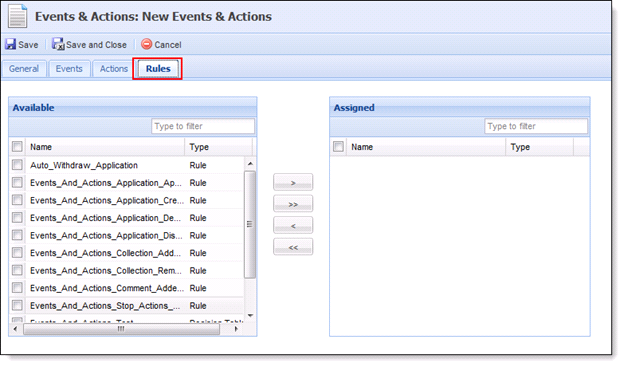
A list of available rules appears under the Available Rules box. Assign the desired Event Processing rule(s) to the event and action pairing.
|
Only rules in the Event Processing categories populate in this list. Additionally, the Event Processing rules may employ the “stop event processing” template. |
 |
Chaining multiple events and actions together may result in notifications such as “Calculations are stale.” |
Once the event and action pairing has been configured, click Save and Close to finalize the pairing. The pairing appears on the Event Processing administrator page.
Editing an Event and Action Pairing
Administrators are able to modify an existing event and action pairing.
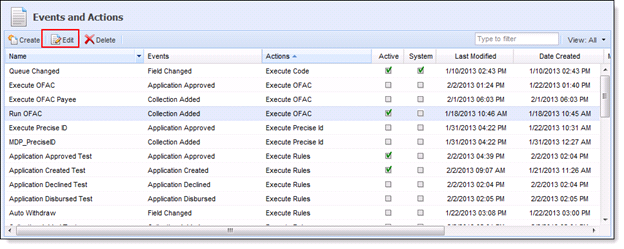
To edit an existing event and action, select the desired event and action pairing and click Edit. Once the logic has been updated, select Save and Close to finalize the Event Processing modifications.
Deleting an Event and Action Pairing
Administrators are able to remove an existing event and action pairing.
To delete an existing event and action, select the desired event and action pairing and click Delete. Clicking Delete prompts the user to verify that the event and action pairing is to be deleted. Click OK to confirm the deletion.
Practical Business Example
The following business example provides the step-by-step procedure to create an Event Processing, which uses both System-Defined and User-Defined Screens. It is to be used for example purposes only.
o Navigate to Event Processing (System Management>Lending>Event Processing)
o Select Create.
o Fill in the General tab with the below information:
- Name: Decision Cross-sells.
- Description: This is an event, application decision, which causes an action, calculating Cross-sells.
- Active Check box: Ensure this check box is selected in order for the Event Processing to be active.
o Fill in the Events tab with the below information:
- Select Add to add an Event.
- Scroll through the Event drop-down and then select Application Decision.
- Click Ok.
o Fill in the Actions tab with the below information:
- Select Add to add an Action.
- Scroll through the Actions drop-down and then select Calculate Cross-sells.
- Click Ok.
o Click Save and Close.