Within the Workspace of an Area, there are many screens that can be configured and assigned so that what is visible to the user is in a logical format. Screens exist at both the Account and the Case level and include Screens (which contain Detail and System information on the account) and Workflow screens. For those situations where stand-alone account records need to be created, Create screens are available to identify what information should or must be included during the setup of an account that exists only in the Akcelerant Framework.
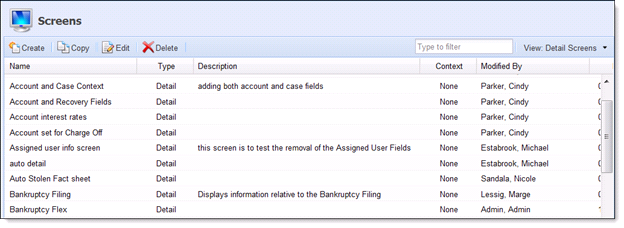
The easiest way to review Screens is to utilize the Views in the left navigation panel and then sort the contents of that view by Type.
Detail Screens provide supporting information for the account or case that is being viewed.
 |
System screens provide historical information on a number of topics such as Letters, Workflow, Promises, Payment, etc. |
Users are able to Create, Copy, Edit and Delete screens from the Screen Listing page.
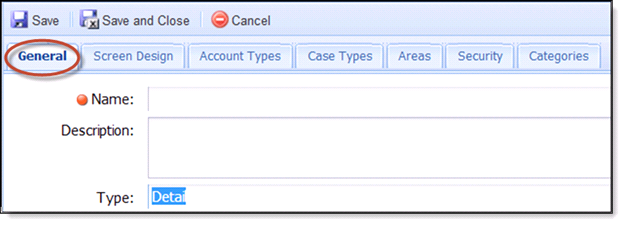
General Tab
- Enter a Name and a Description for the Screen.
- The Screen Type chosen from this dropdown determines where the Screen will be visible. Choose from Create Account, Detail or Workflow.
Screen Design Tab
The Screen Design step gives users a visual of what the screen looks like in terms of structure, fields and appearance.
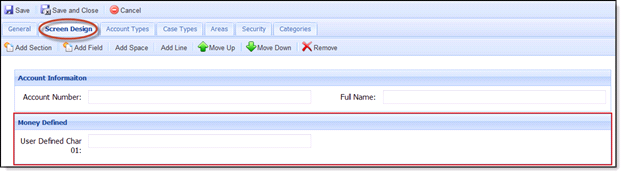
- To create a new section or field click Add Section or Add Field. Once the section or field appears, use the mouse to select either an entire section or single field. Selecting a section will enable all buttons at the top of the Design page. There is also the option to insert a blank space and a divider line. In addition there are arrows used to move up and down the fields. A field can only be displayed once on any particular screen.

- By selecting Add Section, a new section will appear and users will have the capability to add fields within that section.

- Once the Add Field button is selected a separate window a ‘Field Selector’ containing folders of fields will appear. Choose the fields that should be added to the screen. It will appear under that section.
Sections Properties
- To edit a certain section, double click the blue bar at the top of that section.
- A design page will appear which will let users add or modify the section label, determine the number of columns within that section (1 through 4) and set the column label width (which is the width of the column and fields that are displayed).

Field Properties
- To edit a certain field, double click the specific field and a design page will appear.
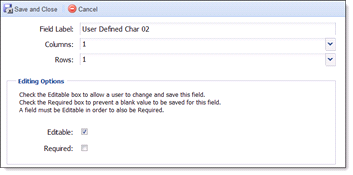
- Users can use this window to modify the field label (which is what appears on the screen), the number of columns (up to the number of columns designated for that section) and the number of rows for that field.
- Under the Editing Options field, users can determine whether the field is:
Required The user would need to input a value into that field in order to save the screen changes in the workspace. Editable User will be able to change and save the information.
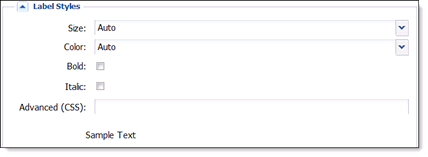
The following style tips can be used when working with screen configurations. These styles can be used to change the appearance of a field label on any screen and a field value on any screen.
|
Screen Options |
Description |
|
Font Size |
Font size lets users specify how large the text will appear to be. Generally, the easiest way to specify this is by using point for the reference unit. |
|
Color |
There are five key color keywords (auto [black], blue, green, red, and orange). |
|
Bold |
Select the Bold checkbox to set the text to appear in bold. |
|
Italicized |
Select the Italics checkbox to set the text to appear italicized. |
|
Advanced (CSS) |
This feature allows the user to set the text to appear a different size or color than those choices listed in the above dropdowns. For example, to set the color to purple, users would type the following into the Advanced CSS text box: color: purple. The results will display in the "Sample Text." If users want to change both the weight and the color of a particular label or value, separate the styles with a semi-colon and no spaces. |
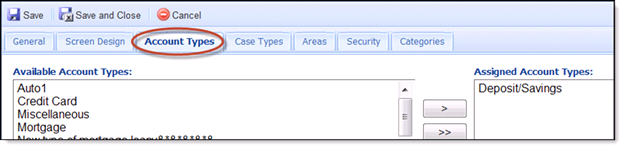
Account and Case Types Tab
- If the screen being worked is Account-based, then Account Types should be selected. Use the arrow buttons to move Account Types between the Available and Assigned windows. This configuration determines when the screen should be visible. If a screen has been associated with only the Auto Account Type, then the screen will not be available if being viewed on a Credit Card or any other Account Type besides Auto.
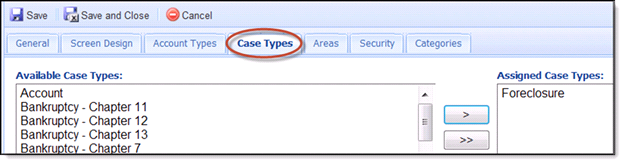
- If the screen being worked is Case-based, the Case Types should be selected. Use the arrow buttons to move Case Types between the Available and Selected windows. This configuration determines when the screen should be visible. If a screen has been associated with Fraud Case Types, the screen will not be available when viewing a Bankruptcy or other non-Fraud Case.
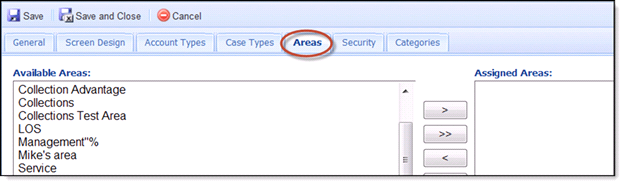
Areas Tab
- Identify which Area(s) the screen is visible in by moving the selection(s) from the appropriate Available window to the corresponding Assigned window.
- Highlight one or more Areas in the Available Areas window and clicking the > button will move the Areas to the next window.
- Clicking the >> will move all Areas from the Available Areas window to the Assigned Areas window.
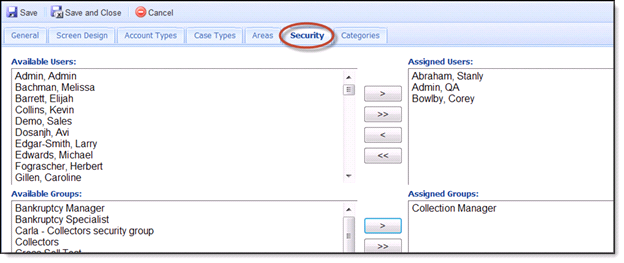
Security Tab
- Identify which Users and or/Groups are given access to view the screen by moving the selection(s) from the Available Users/Groups to the Assigned Users/Groups window.
- Highlight one or more Users in the Available Users/Groups window and clicking the > button will move the Users to the next window.
- Clicking the >> will move all Users/Groups from the Available Users/Groups window to the Assigned Users/Groups window.
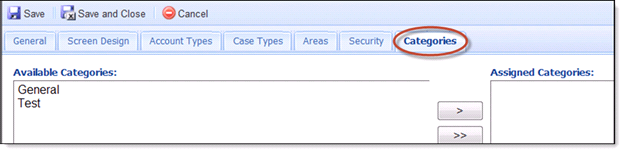
Categories Tab
- Identify which Categories the screen is visible in by moving the selection(s) from the Available Categories to the Assigned Categories window.
- Highlight one or more Categories in the Available Categories window and clicking the > button will move the Workflows to the next window.
- Clicking the >> will move all Categories from the Available Categories window to the Assigned Categories window.