


Workflow Models allow Framework administrators to assign Screens, Workflows and Validation Rules to the application process. Once created, a Workflow Model is assigned at the Sub-Product level.
To view a demonstration of this feature, click here.
To view a demonstration of how Validation Rules affect the application process, click here.
 |
A single Workflow Model is able to be used by multiple Sub-Products; however the Workflow Model must be individually assigned to each loan Sub-Product. |
Workflow Models can be accessed by navigating to: System Management>Lending>Workflow Models.
From the Workflow Models Admin screen, users are able to Create, Edit or Copy existing Workflow Models. A list of existing Workflow Models populates on the Workflow Model home screen.

Clicking Create opens the Workflow Model window. The Workflow Model window contains the following tabs:
| Tab | Description |
| General | Contains basic descriptive information about the Workflow Model. |
| Screens | Enables an Administrator to assign Screens to the Workflow Model. |
| Workflow | The Workflow tab allows the administrator to create a collection of screens that are set in a particular order in order to walk the Framework User through an application. Screens are organized according to Origination, Underwriting Approval or Decline categories. |
| Decision Validation | The Decision Validation tab allows the administrator to assign validation rules to an application’s Decision process. |
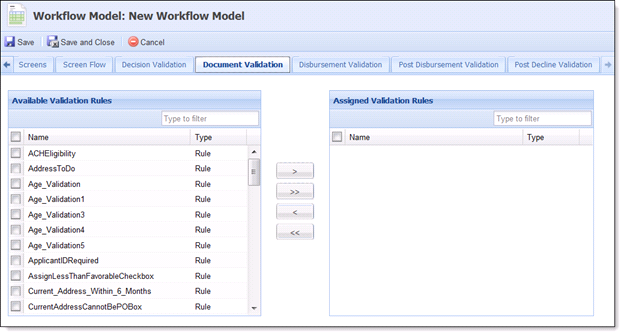
| Document Validation | The Document Validation tab allows the administrator to assign validation rules to an application’s Document process. |
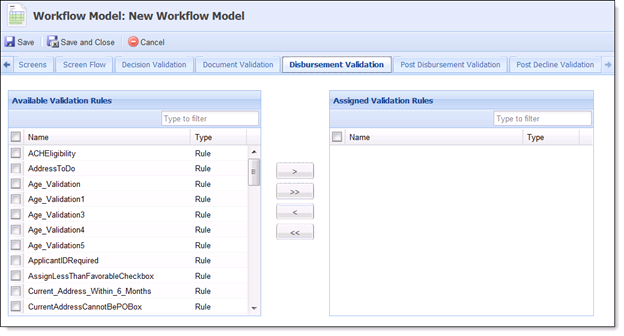
| Disbursement Validation | The Disbursement Validation tab allows the administrator to assign validation rules to an application’s Disbursement process. |
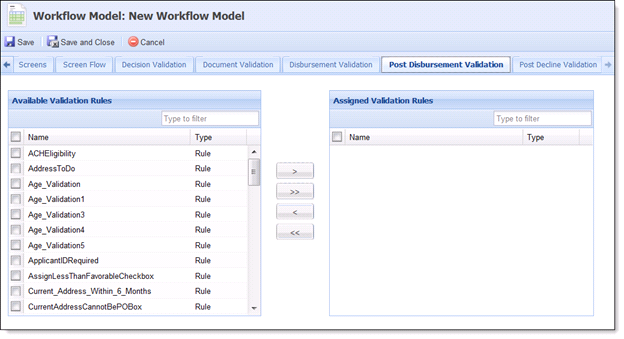
| Post Disbursement Validation | The Post Disbursement Validation tab allows the administrator to assign validation rules to an application’s Post Disbursement process. |
| Decline Validation | The Decline Validation tab allows the administrator to assign validation rules to an application’s Decline process. |
The General tab contains basic information pertaining to the Workflow Model. Refer to the table below to assist completing the General Tab.
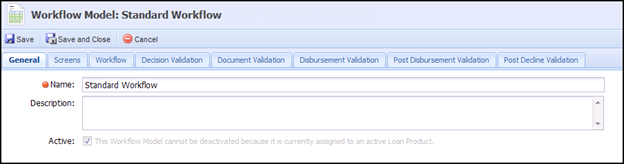
| Field | Description |
| Name | Enter a name unique to the new Workflow Model. |
| Description | Enter a description that identifies the purpose of the Workflow Model. |
| Active | Select the Active check box if the Workflow Model is available to be assigned. |
There are two panels within the Screens tab that allow institutions to customize the system user’s Framework experience.
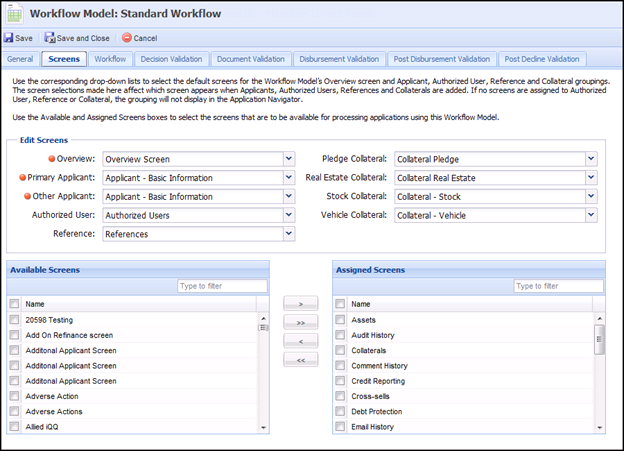
Edit Screens
The Edit Screens panel allows the administrator to assign screens to be used by the Workflow Model’s Applicants, Authorized Users, Collaterals and References sections in the Application Navigator. If any user-defined screens have been created, they populate within the drop-down lists. If no user-defined screens have been created, only the System and Custom screens are displayed. Use the drop-downs to assign screens to each screen type.
|
If screens are not mapped to the Applicants, Authorized Users, Collaterals or References fields, the sections will not appear in the Application Navigator. |
Use the following table to assist in making the appropriate screen selections:
| Screen | Description |
| Overview | Select the screen used for the application Overview. |
| Primary Applicant | Select the screen used to capture the Primary Applicant's information. |
| Other Applicant | Select the screen used to capture the Other Applicant's information. |
| Authorized User | Select the screen used to capture Authorized User information. |
| Reference | Select the screen used to capture credit Reference information. |
| Pledge Collateral | Select the screen used to capture Pledge Collateral information. |
| Real Estate Collateral | Select the screen used to capture Real Estate Collateral information. |
| Stock Collateral | Select the screen used to capture Stock Collateral information. |
| Vehicle Collateral | Select the screen used to capture Vehicle Collateral information. |
|
Each drop-down only contains screens that match the screen type. |
Available/Assigned Screens
Use the Available Screens box to allocate screens to the Assigned Screen box. All application-level screens appear within the Available Screens box. The screens within the Assigned Screen box are assigned to the Workflow Model and appear within the (Left-Hand) Application Navigator.
|
Screens in the Assigned Screens box are independent of Workflow. It is possible to have screens assigned to the Application Navigator that do not occur in Workflow. |
The Workflow is a suggested order in which the application is to be completed. Users are able to proceed through the Workflow by clicking Next and Back.
|
Following the defined Workflow is not the mandatory order to complete an application. Users can ignore the Workflow and complete the application by manually selecting Screens from the Application Navigator. |
Workflows are built according to the various stages of an application life cycle.

To create a Workflow, click Add Screens. The Select Screens window appears.
By default, the Category drop-down (in the top left) defaults to Origination, however, you can add Screens to Underwriting, Approval and Decline. Select the desired Category then select the check boxes that correspond with the desired screens. Click Add to add screens to the desired Workflow category. Once the screens have been added to the first category, select the next Category from the drop-down list, then select the corresponding check boxes and click Add. Repeat this process for the remaining two Categories.

|
For user convenience, a Filter appears in the top-right corner of the Select Screens window. Enter keywords to narrow down the available choices within the Screen list. Additionally, users are able to sort the list alphabetically by clicking the column header. |
Once desired screens have been added to the appropriate Workflow Categories, click Close. Closing the Select Screen window returns the user to the Workflow tab. Verify that all desired screens have been added to the appropriate Workflow category. If additional screens need to be added, reselect Add Screens and repeat the addition process.
If screens were added to a Workflow category incorrectly, select the check box that corresponds with the wrongly placed screen and click Remove Screens. Users are also able to clear an entire Category by selecting the check box that corresponds with the category to be cleared and clicking Remove Screens.
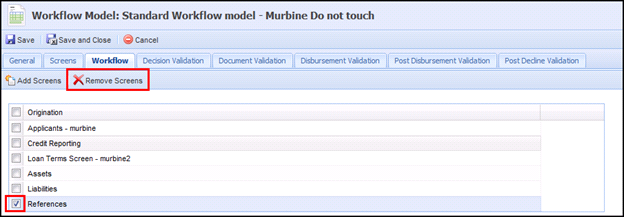
If screens were added to a Workflow category in the incorrect order, click the wrongly placed screen and drag it into the correct order.
 |
When a new application is created, the first screen of the Workflow displays as the default screen. This typically is the first screen assigned to the Origination stage of the Workflow, however, if there are no screens assigned to Origination, the first screen in the Underwriting stage displays as the default screen. Screens will only be displayed to the user if they have permissions to view or edit these screens. |
Decision Validation rules execute every time an application is saved prior to Decisioning. Any outstanding Errors or generated To-Dos prevent the Framework from completing the Decision Process. Users are not able to proceed until the Validation/Error/To-Do has been cleared.
|
Users can create To-Dos in rules and assign them here to give advance notice of missing/invalid data. |

Document Validation rules execute during the Generate Documents Process. Validation errors prevent the Document process from completing. Users are not able to proceed until the Validation/Error has been cleared.
Disbursement Validation rules execute every time the application is saved as long as it is not decisioned or approved. Errors or generated To-Dos prevent the Decision Process from completing. Users are not able to proceed until the Validation/Error/To-Do has been cleared.
|
Users can create To-Dos in Rules Manager and assign them here to give advance notice of missing/invalid data. |
 Post Disbursement Validation Tab
Post Disbursement Validation rules execute every time the application is saved after it is disbursed.
Post Decline Validation rules execute every time the application is saved after it is declined.

Once all tabs have been completed, review each tab for accuracy. After all updates have been made to the Workflow Model, click Save and Close.
The Copy function enables users to duplicate the logic and structure of an existing Workflow Model. The existing Workflow Model can be used as the base for creating a new workflow model. Copying a workflow model allows users the ability to add, modify or delete screens, as well as workflow and validation logic. Users are then able to save it with a different name in order to create a new workflow model.
To copy an existing workflow model, select the desired workflow model and click Copy. Once the workflow model’s name has been changed and logic updated, save all changes to finalize the creation of a new workflow model.
The Edit function enables users to revisit an existing workflow model and modify the existing logic to enhance usability.
To edit an existing workflow model, select the desired workflow model and click Edit. Once the logic has been updated, click Save and Close to finalize the workflow model’s modifications.