The Letters & Forms page allows administrators to manage letters and letter templates within the Framework.
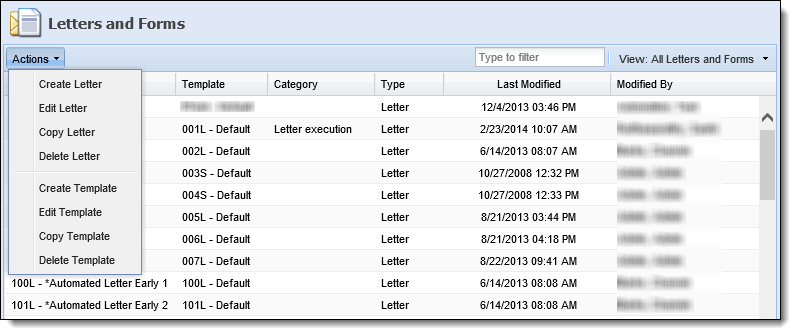
The following columns display in the grid:
| Column Name | Description |
| Letter | The name of the letter. Displays in the following format: Letter Code-Letter Name |
| Template | The name of the template to which the letter is associated. |
| Category | Displays the category of the letter. |
| Type | Designates whether it is a letter or a form. |
| Last Modified | Denotes when the last modification on the letter was made. |
| Modified By | Denotes who made the last modification on the letter. |
Clicking the Actions drop down displays all of the functions associated to the Letter & Forms page. Administrators can create letters, edit letters, copy letters, delete letters, create templates, edit templates, copy templates and delete templates. Administrators can filter results in the grid by either typing in the filter box or using the View drop down.
Creating a Letter
The first step to add a new letter to the system is to create a Letter. Creating a letter is consisted of defining a letter code and name. The next step is to build the template or Word document associated to it.
- Click the Actions drop down.
- Select Create Letter. The Create Letter screen appears.
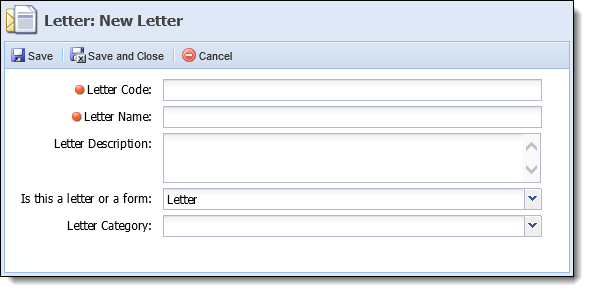
- Enter a Letter Code in the Letter Code field.
- Enter a Letter Name in the Letter Name field. This name appears in the Send Letter workflow step when selecting the letter that is to be sent.
- If necessary, enter a description for the new letter in the Letter Description field.
- Designate whether the new letter is a letter or a form in the "Is this a letter or a form" drop down.
- If necessary, assign the new letter to a Letter Category. This is for reporting purposes.
There is no functionality difference when selecting a letter versus selecting a form.
- Click Save or Save and Close to save and return to the Letters & Forms page. The new letter populates in the grid. Click Cancel to return without saving. The next step is to build the letter template.
Editing a Letter
Edit letters to change the Letter Code, Letter Name, description and whether or not it is a form or letter.
- Click to highlight the letter that is to be edited.
- Click the Actions drop down. Select Edit Letter.
- The Edit Letter screen appears. Make any necessary changes to the letter.
- Click Save or Save and Close to save the letter and return to the Letters & Forms page. Click Cancel to return without saving.
Copying a Letter
- Click to highlight the letter that is to be copied.
- Click the Actions drop down. Select Copy Letter.
- The Copy Letter screen appears. Make any necessary changes to the copied letter.
- When finished making changes, click Save or Save and Close to save the new letter and return to the Letters & Forms page. The new letter populates in the page.
Deleting a Letter
- Click to highlight the letter that is to be deleted.
- Click the Actions drop down and select Delete Letter.
- A confirmation message appears. Click Yes to delete the letter. Click No to return to the Letters & Forms page without deleting.
Letters associated within a workflow cannot be deleted. A message appears if attempting to delete a letter already associated within a workflow. To delete the letter, the workflow(s) it is associated to must be edited to remove the letter from it.
Creating/Editing a Letter or Form Template
- Click to highlight the Letter to edit or create a new template.
- Click the Actions drop down and select Edit Template.
When a Letter is created for the first time, a default template is automatically created. The default letter template should be edited rather than creating a new template.
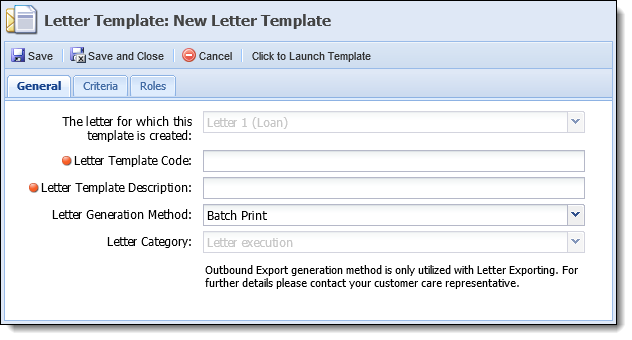
- The Letter Template screen displays. The General and Roles tabs are enabled.
General Tab
The following fields display in the General tab:
| Field Name | Description |
| The letter for which the template is created | Displays the letter for which the template is being created. |
| Letter Template Code | Enter the template code for the new template. The template code carries over from what was defined when the letter was created. Akcelerant recommends keeping the code the same as the letter for consistency purposes. This is a required field. |
| Letter Template Description | Enter a description for the new letter template. This is a required field. |
| Letter Generation Method |
Select the letter generation method:
|
| Letter Category | Select a letter category from the drop down menu. This is for reporting purposes. |
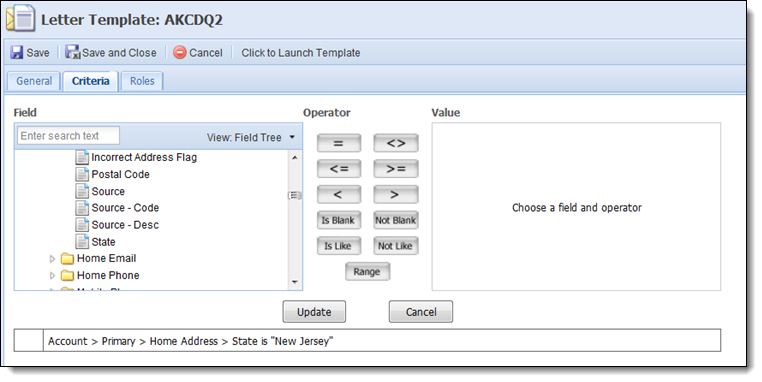
Criteria Tab
The criteria tab allows administrators to define criteria for a letter/form that may have multiple templates associated to it. Specify the conditions that determine which template should be used. For example, an institution may have customers in three different states; New Jersey, Delaware and New York. Because of statewide regulations, the templates for each state have to be designed differently to conform to the regulations for each state. When building a template for the state of New Jersey, the administrator can set the criteria to look for the Primary’s home state to be New Jersey so when the letter is sent, it is only sent to appropriate customers in New Jersey.
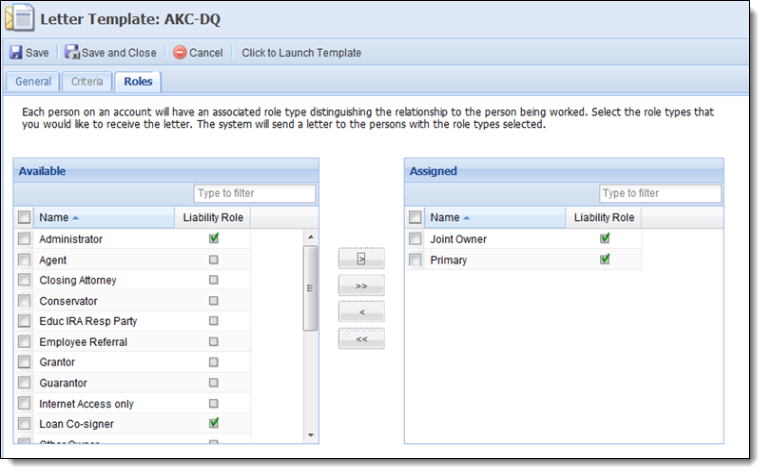
Roles Tab
The Roles tab displays a list of all roles defined by the System Administrator in System Management > Role Types. An Available and Assigned Column displays. Select the Role types that should receive the letter. The system automatically generates a letter to the person(s) with the role types selected.
 |
The primary role code within the database is imported into the Framework and automatically mapped to all letters upon completion of the first batch import. For more information, please see the connector guide for the applicable core interface. |
Example: The institution needs to send a letter on all of Audrey’s delinquent accounts and any joint owners on her accounts. The system administrator of the Framework selects Primary and Joint Owner in the Roles tab for this letter.
|
At least one Role type must be selected. If no role types are selected, a message appears directing the user to assign at least one role. |
 |
Prior to designing the letter, determine if the letter is to include just the information of the person the letter is sent to or information of multiple people on the letter. An example would be having both the Primary and Joint Owners name on the same letter. |
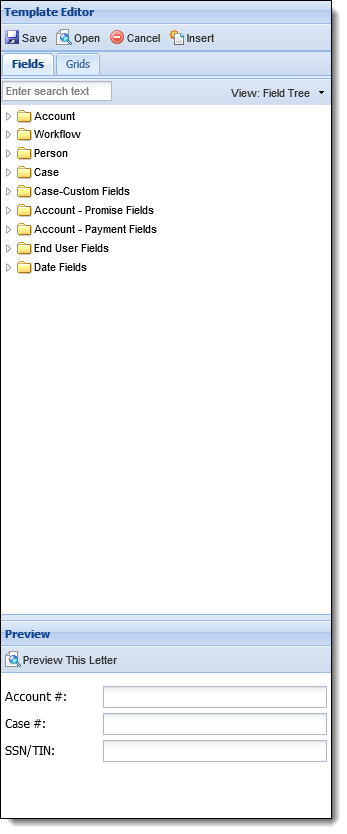
Fields Tab
The Template Editor allows the user to add fields or grids to the Word document by selecting a field and double clicking on the field or selecting insert at the top of the editor. From the Template Editor toolbar, the system administrator can also open an existing Word document and edit it using the template editor.
|
If the Word document contains pre-existing fields, the fields must be deleted and re-mapped using the Framework fields. |
The Fields tab displays a list of all available fields in the Framework to be used on a letter.
| Folder Name | Description | ||
| Account |
Contains all fields associated to the account. The Account folder contains the Primary and Secondary folders. Use these folders if more than one person is being added to the account.
|
||
| Workflow | Used to capture fields customized in the configure fields tab when building a workflow. | ||
| Person |
Contains all fields associated to the person.
|
||
| Case | Contains fields that are associated to a case. | ||
| Case-Custom Fields | Contains custom case fields. | ||
| Account - Promise Fields |
Contains fields relative to promise amounts, such as First Promise amount, last promise amount, etc.
|
||
| Account - Payment Fields | Contains fields associated to payments such as payment amount, payment date, transfer source account and transfer destination account. | ||
| End User Fields | Contains all fields that can be used in relation to the End User. These fields may want to be used to sign a letter if the letter should contain the institutions employees contact information. | ||
| Date Fields | Contains Current Date Fields. These are used when the current date or a current day plus a designated amount of days date range needs to be added. |
Grid Tab
The Grids tab displays grids available to be used in the Letter.
|
Letter export functionality does not support the export of grid data. If a letter contains a grid, the letter exports with all content excluding the grid. |
|
Only one grid can be on a letter at a time. Some fields displayed in these grids are not available in the Field Tree. |
| Grid Name | Description |
| DQ Fields for Letter |
This grid contains account related delinquency information such as Balance, DQ Amount, Due Date, etc. The following fields are available in this grid:
|
| Vehicle Fields for Letter |
This grid contains vehicle collateral information such as Make, Model, Vin, etc.
The Framework supports multiple pieces of Collateral. This allows the institution to place multiple collateral in a letter within a grid. These fields are not available in the field tree. The following fields are available in this grid:
|
| Real Estate Fields for Letter |
This grid contains real estate fields such as address, description, Parcel Number and Property type description. These fields are not available in the field tree. The following fields are available in this grid:
|
| Promise to Pay Fields for Letter |
This grid provides pertinent information regarding a customer's promise to pay information. This grid contains the following fields:
|
| Most Recent Credit Risk Factors |
This grid displays any credit report risk factors associated to a person when a credit report is ran. This grid contains the following field:
|
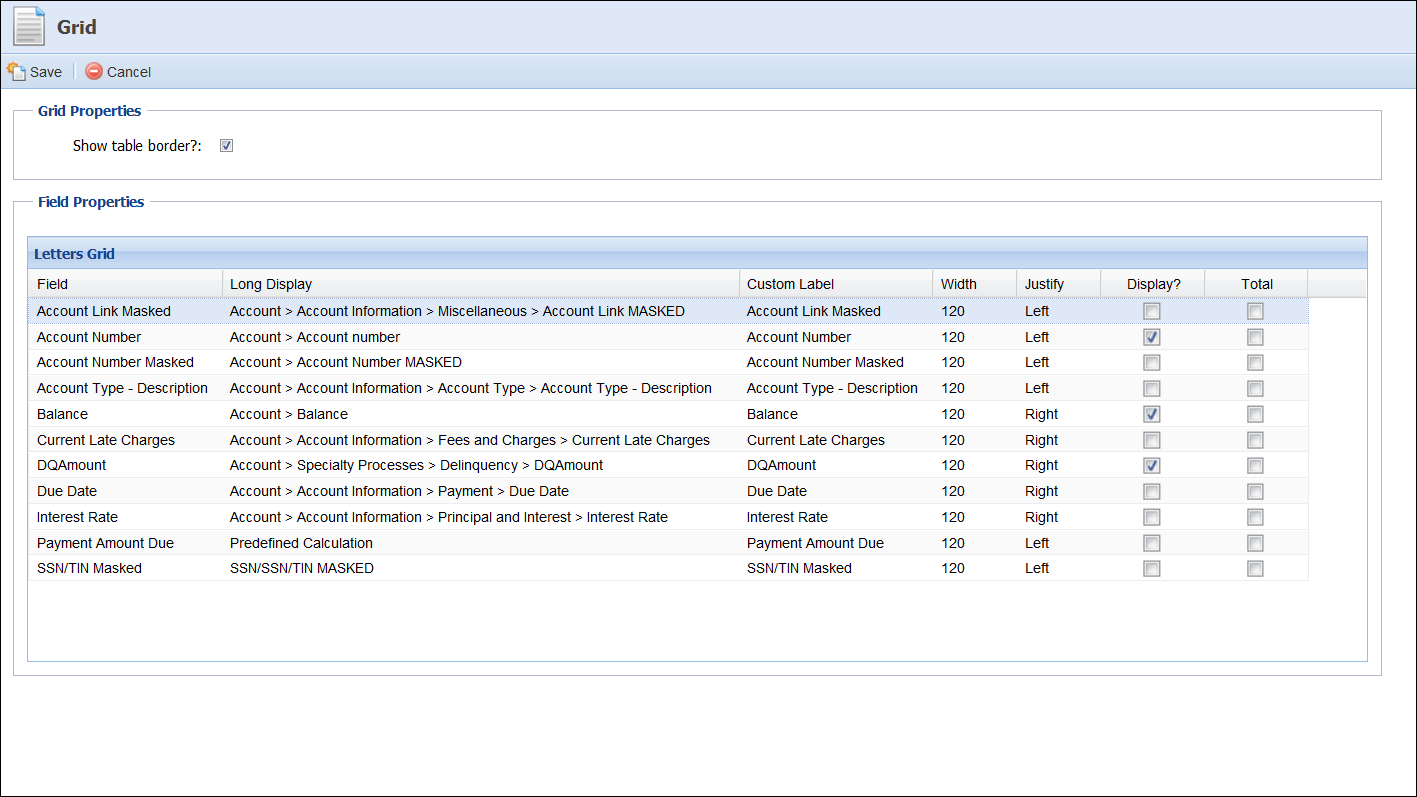
Select a Grid to add and click Insert to add it to the document. By double-clicking the grid, or highlighting a grid and clicking Edit, it allows the institution:
- Within the Grid Properties section, determine if a table border should display.
- Within the Field Properties section, define custom labels to display within the letter for the field.
- Determine the width for each individual column. By default, each column is set to 120 pixels.
- Determine if columns should have left, center or right justification.
- Define what fields to display on the grid.
- Determine if a total amount should display.
- When finished customizing the grid click Save to save and return to the template editor. Click Cancel to close the grid without saving.
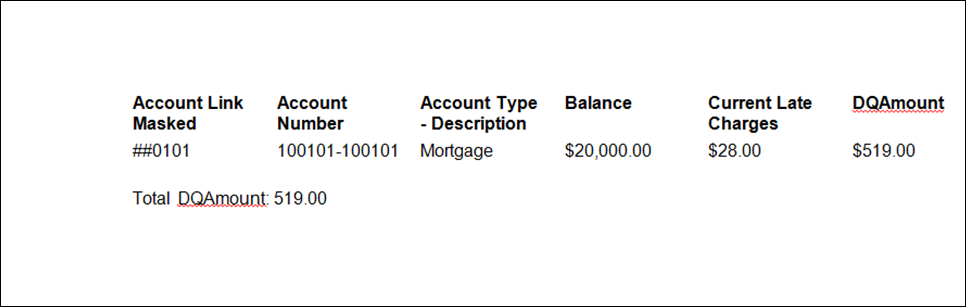
Example: An institution may want to add the DQ Fields for Letter grid but not have the following fields displayed on the grid: Account Number Masked, Interest Rate. They would then uncheck the check mark in the display column. An institution may want the total DQ Amount at the bottom of the grid and would select the Total check box.
|
Once a grid has been added to a letter template, no changes can be made to it. If changes need to be made the grid must be deleted from the template, re-configured and then added back into the template. |
- To Preview the letter enter in an Account, Case or SSN/TIN number and select Preview this Letter.
- Select Save to save the Letter Template. The Template Editor and Word document closes automatically.
- Select Save and Close on the Letter Template window. The letter is now available to be added to a Send Letter workflow step.
Editing a letter template requires the user to save in both places defined above. If the user does not save on both the Letter Editor screen and Letter Template window the Letter does not save correctly.
Copying a Letter Template
Copying letter templates makes an exact copy of the template in the system, which includes the fields in the template editor.
- Click to highlight the letter template that is to be copied.
- Click the Actions drop down. Select Copy Template.
- The Copy Template screen appears. Make any necessary changes to the template information and the fields in the template editor.
- When finished, click Save or Save and Close to save the new template and return to the Letters & Forms page. Click Cancel to return without saving.
Deleting a Letter Template
- Click to highlight the letter template that is to be deleted.
- Click the Actions drop down and select Delete Template.
- A confirmation message appears. Click Yes to delete the template. Click No to return to the Letters & Forms page without deleting.
When a new letter is created it is assigned a “default” template. Default templates cannot be deleted.
