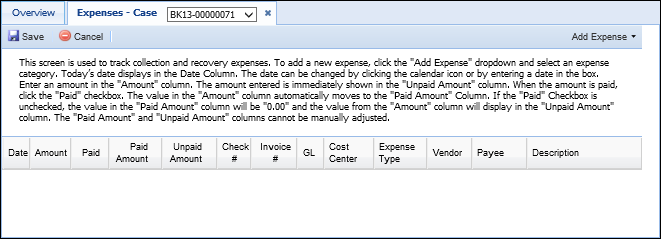
The Expenses screen displays all collection and recovery expenses recorded for the account in context. From this screen users can add, delete and update expenses.
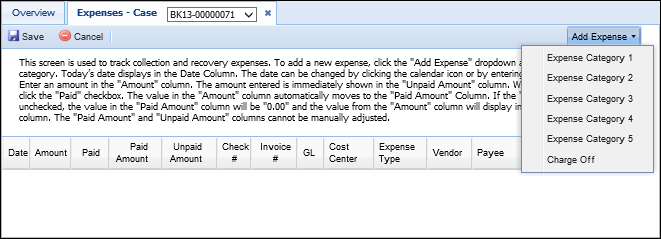
Adding Expenses
Click Add Expense and select the expense category to track a new expense within the Framework.
Once an expense is added, it is itemized within the grid where the following data is displayed within columns:
| Column Name | Description | ||
| Date | Enter the date in which the expense is assessed. This value defaults to the current date, but is editable. Click the Date value and manually enter the date or select it from the calendar tool. | ||
| Amount | Enter the total expense amount. | ||
| Paid |
Select the check box to indicate the expense is paid. Leave blank to indicate the expense remains unpaid.
|
||
| Paid Amount |
Displays the total amount of the expense that was paid.
|
||
| Unpaid Amount |
Displays the remaining unpaid expense balance.
|
||
| Check # | Enter the number of the check used to pay the expense. | ||
| Invoice # | Enter the number of the invoice used to assess the expense. | ||
| GL | Enter the general ledger account number where the expense is to be credited. | ||
| Cost Center | Enter the assessing cost center. | ||
| Expense Type |
Using the associated drop-down, select the type which classifies the expense.
|
||
| Vendor |
Using the associated drop-down, select the name of the associated expense vendor.
|
||
| Payee | Enter the name of the expense payee. | ||
| Description | Using the associated text field, enter a description for the expense. |

When finished adding expenses click Save. Click Cancel to delete all expenses without saving.