The Administrative Settings screen allows for customization of general Framework features such as password settings, account settings and institution settings.
General
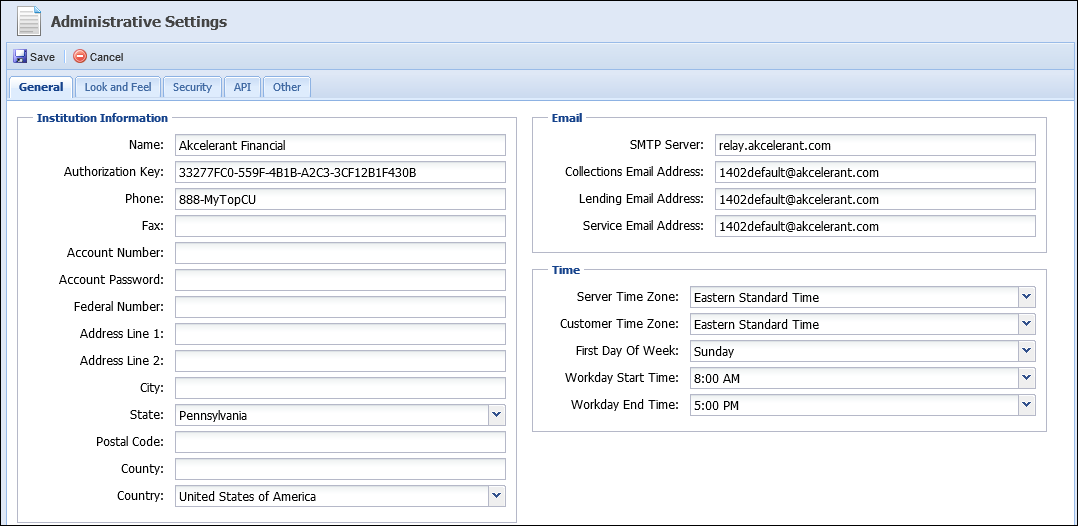
The General tab includes the following fields:
| Fields | Description |
| Institution Name | Name of the financial institution. |
| Authorization Key | The Authorization Key of the financial institution. |
| Phone and Fax Number | Phone and fax number of the financial institution. |
| Account Number | Only used if specific third party connectors are used. |
| Account Password | Only used if specific third party connectors are used. |
| Federal Number | Specify the Federal Number of th financial institution. |
| Address Information | Address information of the financial institution. |
| SMTP Server | Specify the name of the email server used to route emails from the application. |
| Email Address fields | Specify the email address that serves as the 'from' address for all system emails. This field must be completed in order to email account holders from the Framework or have scheduled reports emailed to individuals. |
| Server Time Zone | Select the time zone in which the server resides. |
| Customer Time Zone | Select the time zone of the financial institution. |
| First Day of Week | Select the first day of the week. These time settings ensure appropriate times are used throughout the Framework. |
| Workday Start Time | Select the default workday start time for the financial institution. |
| Workday End Time | Select the default workday end time for the financial institution. |
Look and Feel
The Look and Feel tab allows administrators to configure the background and text color within the Workflow History screen. This feature allows users and administrators to distinguish what users ran the respective workflows.
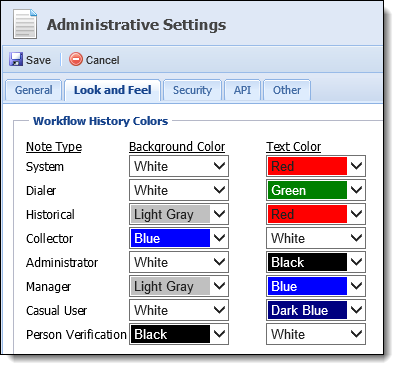
Workflow History Colors can be assigned for the following note types:
| Note Type | Description |
| System | Comment was added to an account holder by the system. |
| Dialer | Comment was added to an account holder by a dialer. |
| Historical | Comment was added to an account holder through a historical notes import. |
| Collector | Comment was added to an account holder by a collector. |
| Administrator | Comment was added to an account holder by an administrator. |
| Manager | Comment was added to an account holder by a manager. |
| Casual User | Comment was added to an account holder by a user that only has access to view workspaces and place comments. |
| Person Verification | Comment was added to an account holder via the person verification feature. |
 |
Users are assigned to user types in System Management > Users. |
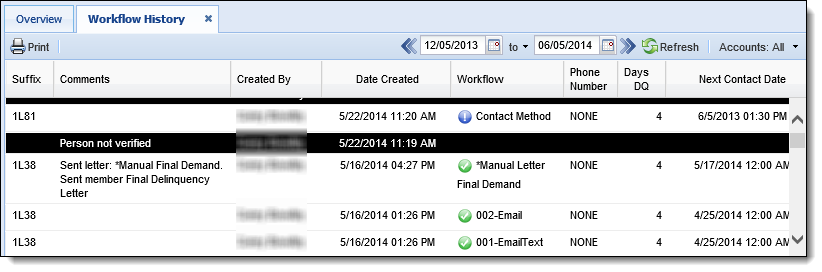
For example, if an administrator runs a workflow and his background color is set to white and text color to black and the person verification background is set to black and the text white, an account's Workflow History screen looks like this:
Security
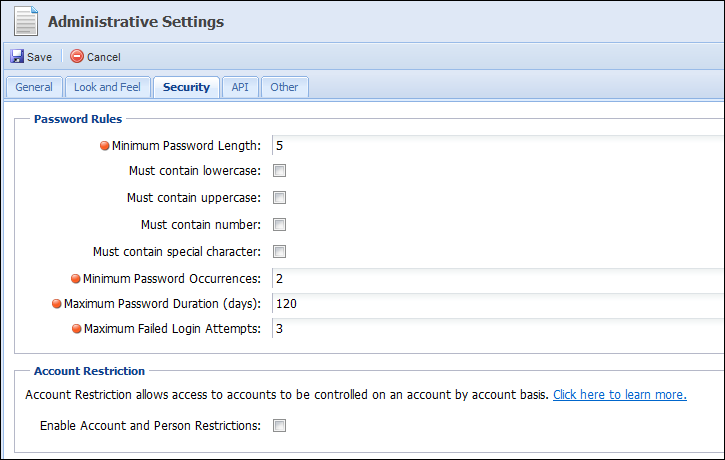
The Security tab allows administrators to set password rules and account restrictions. From this screen users can determine password rules such as minimum password length, minimum password occurrences, maximum password duration in days and maximum failed login attempts.
Account and Person Restrictions can also be enabled. If account restriction is enabled in the Framework, a user must be given the appropriate permissions in order to view restricted accounts. If restricted persons is enabled, it prevents a user from gaining access to a person's workspace. For more information on this setting, select the click here to learn more link within the Administrative Setting's Security tab in the Framework.
|
If the administrator changes Password rules, existing users are not prompted to adhere to these changes until the next time they change their password. The changes immediately apply to new users. |
API
The web service allows customers to integrate their own internal applications to perform general tasks in the Akcelerant Framework.
- Customer applications have read/write access to Persons, Accounts and Cases within the Framework through any external API. Actions such as posting a comment to an account, retrieving comments on an account, initiating a workflow on an account, creating a promise on an account or changing the next contact date on an account may be performed.
- All requests must include the Authorization Key, which is generated and stored under API on the Administrative Settings page in the Productivity Framework.
- Set the Authorization Key or Generate New Key.

|
|
Other
The Other Tab allows administrators to configure additional settings for the Framework. These settings include Dialer Account Search Option, Hide return setting options on the Next Contact Date Step, and Use Akcelerant Report Viewer.
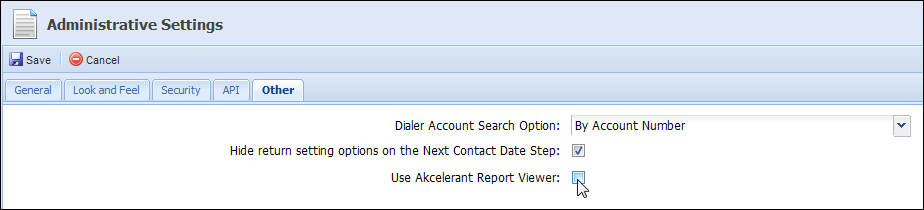
Specify the Dialer Account Search Option to be by account identifier, by account ID or by account number. This controls how accounts sent to a dialer can be searched for in the Framework.
Check the Hide return setting options on the Next Contact Date Step check box to prevent an administrator from configuring a workflow to allow a user to set a return to status after running the Next Contact Date workflow step. If this option is enabled, users have the ability to select one of the following options from a drop-down when running the Next Contact Date workflow step.
- Return to me in the queue
- Return to me in any queue
-
Return to anyone in the queue
-
Return to anyone in any queue
|
Akcelerant recommends having this option hidden. Accounts are then presented to anyone in the queue and are not available to all end users. |
Check the Use Akcelerant Report Viewer check box to activate the Akcelerant Report Viewer. If enabled, reports ran in the Framework are displayed using the Akcelerant Report Viewer and have a slightly different format than reports not rendered with the Akcelerant Report Viewer. If this option is not selected, reports still generate in the Framework. This setting is optional.
Once finished configuring Administrative Settings, click Save. Click Cancel to disregard any changes made.