A Case Type denotes the specific purpose of a case. When a new case is created in the Framework, a Base Type is chosen which defines the general purpose of the case (repossession, bankruptcy, etc.). A Case Type is also chosen when creating a new case to define the more specific purpose of the case. For example, a case is created for a chapter 13 bankruptcy. Bankruptcy is the Base Type and Chapter 13 is the Case Type.
By navigate to the System Management > Collections > Case Types page administrators can manage existing Case Types and create new Case Types that are available to end users when creating a Case in the workspace.

The following columns display on the Case Types page:
| Column Name | Description |
| Name | Displays the name of the case type. |
| Description | Displays a description of the case type. |
| Base Type | Displays the case base type in which the case type is connected to. |
| Prefix | Displays the prefix associated to the case type. |
| Last Modified | Denotes when the last modification was made on a case type. |
| Modified By | Denotes who made the last modification on a case type. |
Case Type Attributes
All case types share common attributes that are defined while creating, copying, or editing a case type.
General
All general attributes provide basic information about the case type and are required.
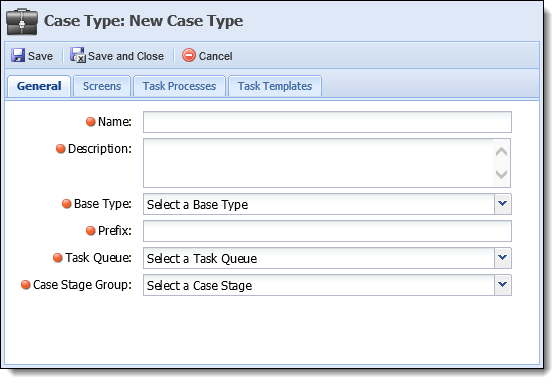
The following attributes are defined on the General tab:
| Field | Description | ||
| Name | Enter a name for the new case type. | ||
| Description | Enter a description for the new case type to provide administrators more information about the case type on the page in System Management. | ||
| Base Type | Select a Base Type, the type of case (bankruptcy, repossession, etc.), to which the new case type is associated too. When creating a new case, the base type chosen drives the drop-down list of case types that are available. | ||
| Prefix | Enter a prefix for the new case type. The prefix is used when created the Framework case number ([Prefix] - [Incremental Number]). | ||
| Task Queue |
Select a Task Queue. All tasks assigned within this case type are assigned to the selected Case Queue by default.
|
||
| Case Stage Group | Select a Case Stage in which the new case type is applied. Case Stage Groups are defined in System Management > Field Configurations. |

Screens
Screen attributes allow administrators to determine which additional screens are displayed in the Screens menu in the workspace of this case type.
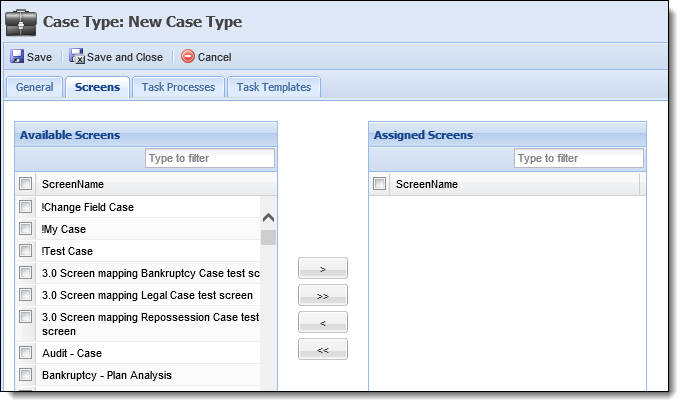
The Screen attributes defined on the Screens tab:
| Attribute | Description | ||
| Available | Displays a list of all screens configured in System Management > Screens. Assign a screen to a case type by selecting the desired screen(s) from the list and moving the screen(s) to the Assigned Screens box using the arrows that display. | ||
| Assigned |
Displays a list of the screens assigned to the case type. Once the case type is saved, the screens are available in the screen menu while the case type is in context in the workspace.
|
Case Processes
The case process attributes allow administrators to assign a level of access to all case processes available in the Framework.
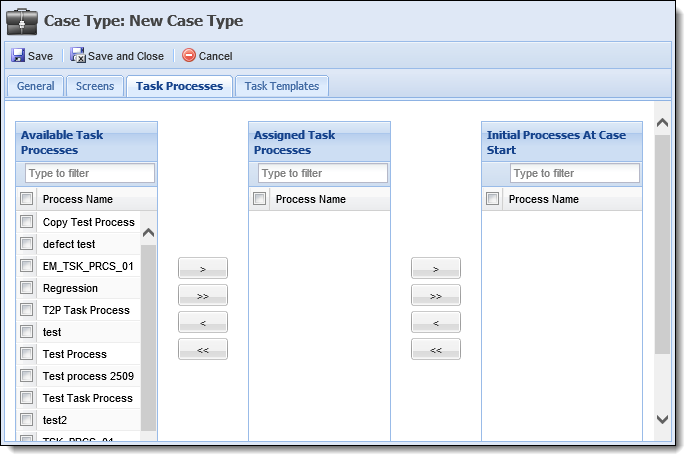
The Case Process attributes are defined on the Case Process tab:
| Attribute | Description | ||
| Available Case Processes | Contains a list of all available case processes in the Framework. | ||
| Assigned Case Processes |
Contains a list of available case processes that a user can add to the task tree while working a case.
|
||
| Initial Processes At Case Start | Contains a list of case processes that are automatically included in the case type when a new case is created. |
Case processes can be assigned to different lists by using the arrows that are displayed.
Case Tasks
The Case Task attribute allows individual tasks to be assigned to a Case Type separate from a case process.
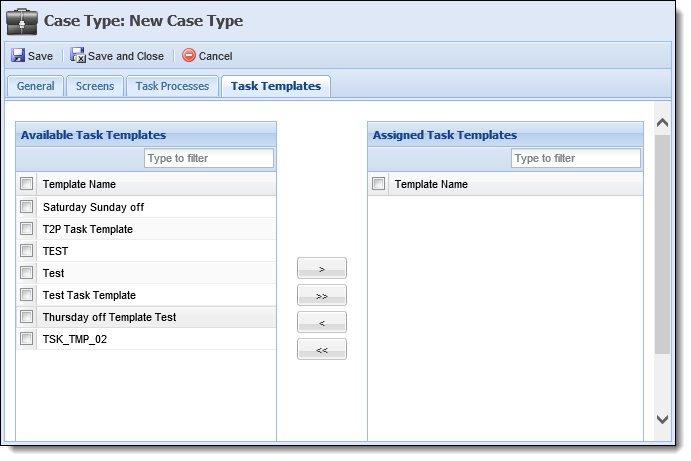
Case Type attributes are defined on the Case Task tab:
| Attribute | Description |
| Available Case Tasks | Displays a list of all case tasks configured in System Management > Collections > Case Tasks. Assign case task(s) to a case type by selecting the desired case task(s) from the list and moving it to the Assigned Case Tasks box using the arrows that display. |
| Assigned Case Tasks |
When finished entering all information on the tabs, click  to save the new case type and return to the case types page. The new case type populates in the case type list and is available for users to use when creating a case in the Framework. Click
  to return to the case types page without saving.
 Creating a Case Type
The create function allows administrators to create new Case Types that can be used in the workspace.
-
Navigate to the Case Types page in System Management and click
 .
. -
The Case Type edit screen appears. Navigate through the tabs and define the necessary attributes.
-
When finished, click
to save the new case type and return to the Case Types page. Click Cancel to return without saving.
The Copy function enables administrators to duplicate an existing Case Type. The existing Case Type can be used as a base for creating a new Case Type.
-
Highlight the case type that is to be copied and click
 .
. -
The Copy Case Type screen appears. Navigate through the tabs and make any necessary changes to the case type attributes.
-
When finished, click
to save the new case type and return to the Case Types page. Click to return without saving.
The Edit function enables administrators to revisit existing case types and edit the attributes assigned to them.
-
Highlight the case type that is to be edited and click
 .
. -
The Edit Case Type screen appears. Navigate through the tabs and make any necessary updates to the attributes.
-
When finished, click
to save the case type and return to the Case Types page. Click to return without saving.
-
Highlight the case type that is to be deleted and click
 .
. -
A confirmation message appears.
-
Click Yes to delete the Case Type. Click No to return to the Case Types page without deleting.