The Workflows page allows administrators to manage all workflows found within the Framework. Workflows are used to document what occurs within an account or case, and can be configured to be as basic or as complex as the creator desires.
To manage workflows navigate to System Management > Workflow > Workflows.

Workflow view is filtered by context and displays those workflows that are Account related, Case related, both Account and Case related and those that not require an account or case (“None”).
The following columns display within the Workflows page:
| Column Name | Description | |||||||||||||||
| Name | Name of the workflow. | |||||||||||||||
| Description | Description of the workflow. | |||||||||||||||
| Context |
The level that the workflow is applied to, which is defined by the workflow steps added to the workflow. Reference the table below for an overview of each workflow context:
|
|||||||||||||||
| Last Modified | Denotes when the last modification was made. | |||||||||||||||
| Modified By | Denotes who made the last modification. |
Workflow Attributes
All workflows share common attributes that are defined while creating, copying, or editing a workflow.
General
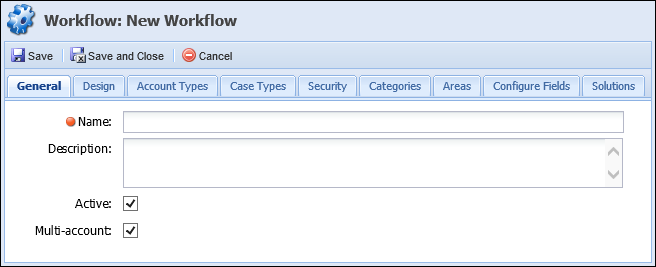
General attributes are located on the general tab:
| Attribute | Description |
| Name |
Name of the new workflow. This is a required field.
|
| Description | Provide a description of the new workflow. |
| Active | Select whether the workflow is active in the Framework. |
| Multi-Account | Select whether the new workflow is multi-account |
 |
When Multi-account is selected, only workflow steps that are multi-account capable appear within the Design tab when adding a new step to the workflow. |
Design
The design attribute provides administrators with the capability to create custom workflows. Follow the procedure below for a high-level overview of how to build a workflow using workflow steps.
- Right-click Start Workflow and select New Step After.
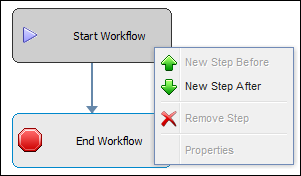
- The Select a Workflow Step screen opens.
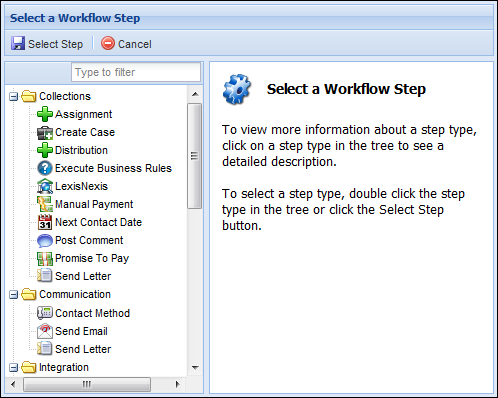
- Select the desired step to highlight it and click Select Step.
- The Step Properties window opens.
- Use the Step Properties window to configure the workflow step.
Only workflows with a Context of "None" are available in the Run Non-Person Workflow window. After an upgrade from version 10, non-person workflows including account/case screens must be manually recreated with Person screens or the workflow has a context of account/case and does not appear in the non-person workflow window.
-
This section explains the General, Queuing and Instructions attributes of a workflow step when the step is being addd to a workflow. When a workflow step is inserted into a workflow, administrators are prompted to configure the workflow step.
General
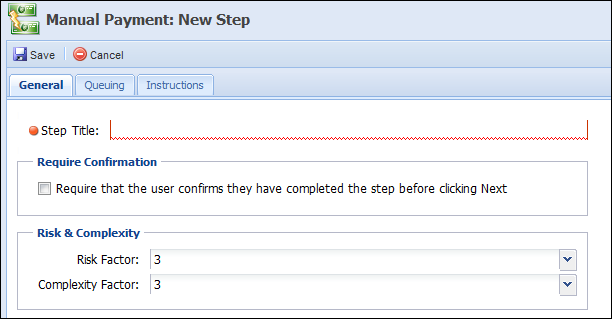
Attribute Description Step Title Provide a title for the workflow step. The title displays when the workflow step populates in the Framework. Require Confirmation If selected, the user must check the "I have complete this step" check box prior to clicking "Go To Next Step" when running the workflow. Risk Factor Determine the degree of risk if this step is not completed in a workflow. The higher the number, the higher the risk. This is used for reporting purposes Complexity Factor Determine the degree of complexity of the workflow step. Complexity is based on the degree of manual labor involved in executing the workflow. This is used for reporting purposes. Queuing
If the workflow step is always automated, this tab is not available.
If the workflow does not need to route into a different workflow queue, this tab can be skipped.

Attribute Description Workflow Queue This drop-down contains all workflow queues in the Framework. If a user working the Workflow, does not have access to a chosen Workflow Queue, they receive a message stating that they are not permitted to work that step. Days to complete this step The administrator has the option to set the amount of days in which the task has to be completed.
If a Workflow Queue has been chosen, this is a required field. User Permissions There are two User Permissions that can be set by the administrator. User Permission Description Allows users to change the workflow queue to which this step is assigned Select this box to display a drop-down of all the service queues available in the workspace and allow the user to assign the task to another Workflow Queue. Allow users to change the due date of this step Select this box to allow users to change the due date for the workflow step. Instructions
If the workflow step is always automated, this tab is not available. Type in the instructions that display while running the workflow in the workspace. The instructions appear to the right of the workflow step that is open in the workspace. If there are more instructions than what fits in the box, click Edit Detailed Instructions to add more instructions.
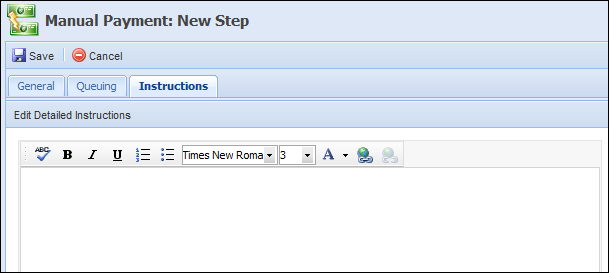
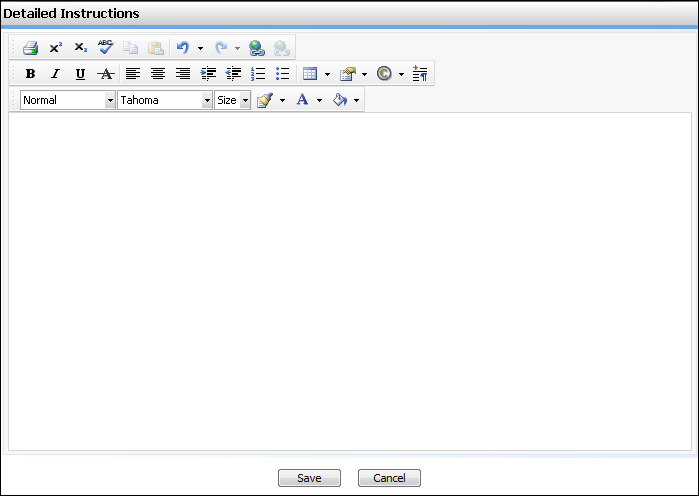
When Edit Detailed Instructions is selected, a detailed instructions page is displayed. This allows the creator to print, change font styles, colors, and insert images, bullets and numbers. Once entered, click Save. The detailed instructions display on the workflow with a link.
 Configuring Workflow Steps
Account Types
Administrators can assign account types to have access to the new workflow on the account types tab.

| Attribute | Description |
| Assign Account Types | Select Account Types from the Available Account Types list and move them to the Assigned Account Types list to provide access to the workflow. |
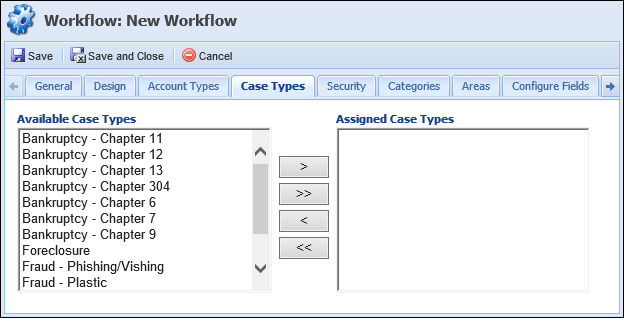
Case Types
Administrators can assign case types to have access to the new workflow on the case types tab.
| Attribute | Description |
| Assign Case Types | Select Case Types from the Available Case Types list and move them to the Assigned Case Types list to provide access to the workflow. |
Security
Administrators can assign the level of access a user has to a workflow on the security tab.
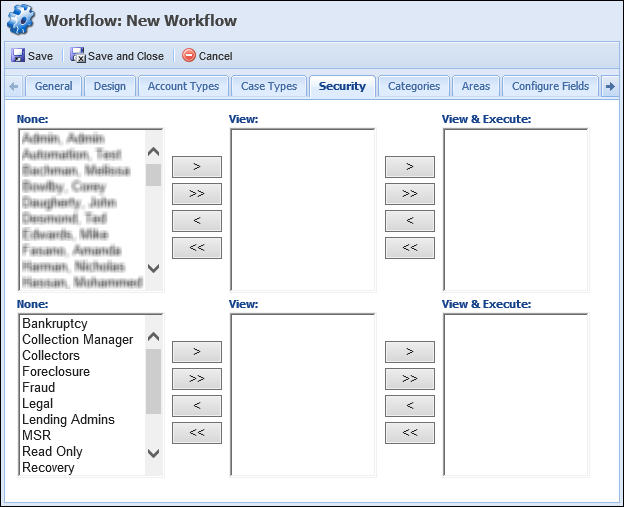
| Attribute | Description | ||||||||
| Assign Users |
Assign a level of access to indvidual users by selecting users and moving them between columns:
|
||||||||
| Assign Groups |
Assign a level of access to a group of users by selecting the group and moving it between columns:
|
|
Users are able to right-click on an active workflow to complete it if they have View or View & Execute permissions. |
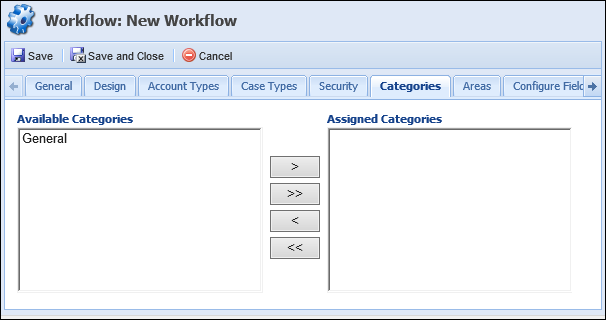
Categories
Assign specific categories to have access to the new workflow.
Areas
For each area, determine the level of access for the workflow in the Areas tab.
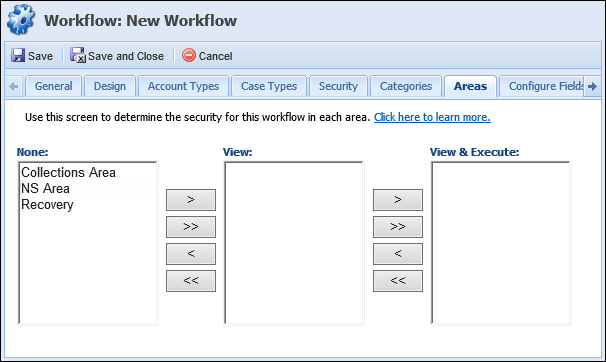
| Attribute | Description | ||||||||
| Assign Areas |
Assign a level of access to each area by selecting the areas and moving them between columns:
|
|
For a user to have access to the workflow on an Area, the workflow must be assigned to the area and the user must have access to the workflow individually or through a security group. |
Configure Fields
Administrator are able to rename up to 120 workflow-based fields and define drop-down values for the look-up type fields on the configure fields tab. These fields are stored within the workflow when it is executed and cannot be viewed on the account.

To rename a configured field administrators must:
- Click the field’s corresponding Label slot. Type in the desired Label name.

Save the Configure Field step before adding it to a screen. This re-labels the fields in the fields list. - Add the “View Screen” workflow step as a part of the workflow. Within the screen tab, create a new screen.
- Within the “Screen Design” tab select the field under the workflow folder that was re-named in the configure fields tab and click Add Field. The field appears in the screen and is included as a part of the workflow.
Solutions
Solutions allow the administrator to select if running this workflow should count as a user worked the account and whether the account should be deactivated in the queue.
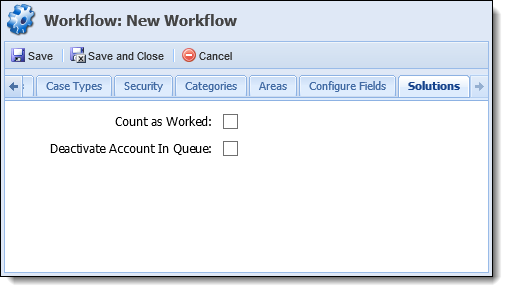
| Attribute | Description | ||
| Count as Worked | If selected, indicates that the completion of this workflow should count as a worked account in performance reporting. | ||
| Deactivate Account in Queue |
If selected:
|
- To create a workflow, click Create.
- The New Workflow screen appears. Navigate through the tabs and define the necessary attributes.
- Click Save or Save and Close to save the new workflow and return to the Workflows page. The new workflow populates in the grid and is now available to users and/or groups, who have permission to run the workflow on a person, account or case depending on the context to which the workflow is assigned. Click Cancel to return without saving.
- Select a workflow to highlight it and click Copy.
- The Copy of Workflow screen appears. Navigate through the tabs and make any necessary changes.
- Click Save or Save and Close to save the new workflow and return to the Workflows page. The new workflow populates in the grid and is now available to users and/or groups, who have permission to run the workflow on a person, account or case depending on the context to which the workflow is assigned. Click Cancel to return without saving.
- Select a workflow to highlight it and click Edit.
- The Edit Workflow screen appears. Navigate through the tabs and make any necessary changes.
- When finished making edits click Save or Save and Close to save the changes and return to the Workflows page. Click Cancel to return without saving.
- Select a workflow to highlight it and click Delete.
- A confirmation message appears. Click Yes to delete the workflow. Click No to return to the Workflows page without deleting.
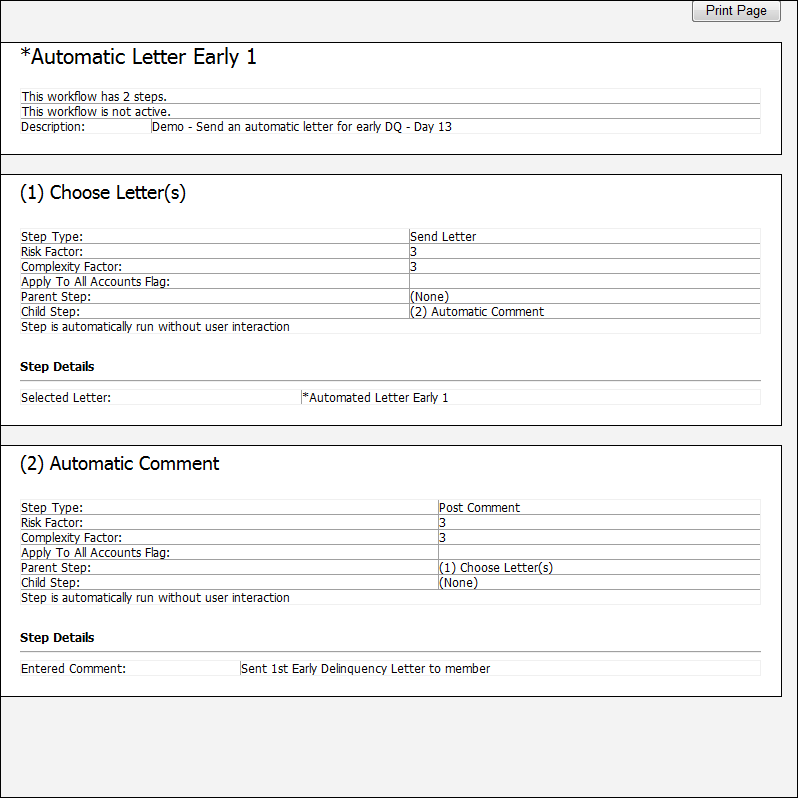
- Select a workflow to highlight it and click Print Workflow.

- A preview screen appears. Click Print Page in the top right to print the workflow summary.