To begin writing rules click the Launch Rules Management button.
The Rules Manager Toolbar contains four buttons:
- Save – Saves all changes made to the Rule App and validates rules for any errors.
Save must be selected at the Rules Manager level once all changes to rule logic or lookups syncs are completed. Clicking Save within the individual rule does not save rule logic to the Rule App without this final save.

- Validate – Checks rule logic for errors without saving to Rule App.
- Sync. Lookups – Imports all of the most current System Lookups into the Rule App. Prior to writing new rule logic, it is advised to select Sync. Lookups. -
- Force Checkout – Rules Manager only allows Write capabilities to one user at a time. Subsequent users may view Rules Manager with Read-Only capabilities. Subsequent users in need of write access may select Force Checkout to gain write access.
Selecting Force Checkout causes all unsaved updates made by the current user to be lost. Prior to selecting Force Checkout, contact the current user.
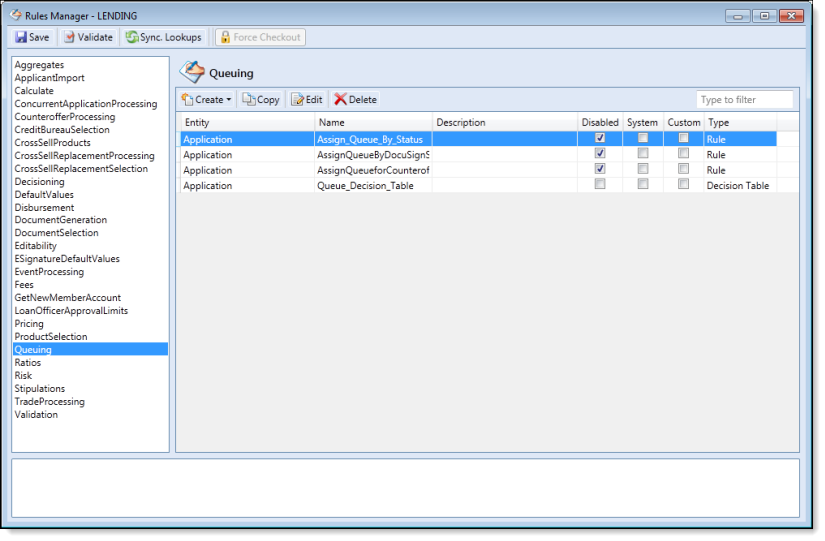
The Lending Rules Management screen displays a left hand navigation panel that contains Rule Categories. A list of rules is displayed in the main window. This list is determined by the category that is selected.
In order for the rule to be executed across all records in the collection, the rules should be built at the collection level underneath the Applicant or Application entity.
- When writing a rule that calculates a payment amount on a liability, if the payment is null or zero the rule needs to be written under Applicant.Libailities collection.
- When writing a rule to validate that applicant addresses cannot contain a PO Box, the rule would need to be written under the Applicant.Addresses collection.
If you are calculating an aggregate or ratio that provides totals or counts within a specific collection, the rule should be written at the entity above the collection in which you need to count or sum. Aggregate and Ratios are always written at the Applicant and Application entities.
- When calculating the number of assets for each applicant, the rule would need to be written at the Applicant entity. This ensures that a count is calculated for each applicant.
- When calculating the overall number of liabilities across all applicants on the application, the rule would need to be written at the Application entity. This ensures that a count of unique liabilities is calculated for the application.
 Create a New Rule
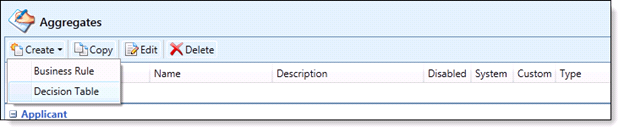
- Select the appropriate rule category from the left navigation pane.
- Click the Create button and select one of the following rules:
Rule Description Business Rule Create a rule based upon condition(s) and associated action(s) expressed in business language. Rule logic is typically expressed in the form of, "If...Then..." statements. Decision Rule Create a rule or set of related rules in the form of a multi-dimensional matrix. Users can enter a multi-axis grid combining multiple conditions and actions. The resulting decision matrix evaluates the conditions and assigned actions from the top down until it finds a path where all conditions resolve to True.
-
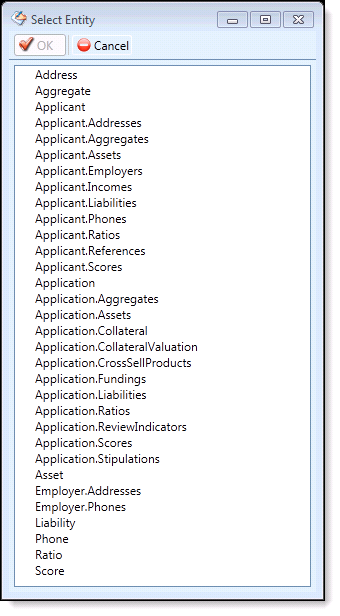
Select the appropriate entity where the rule is applied. Click OK.
- The new rule window appears.
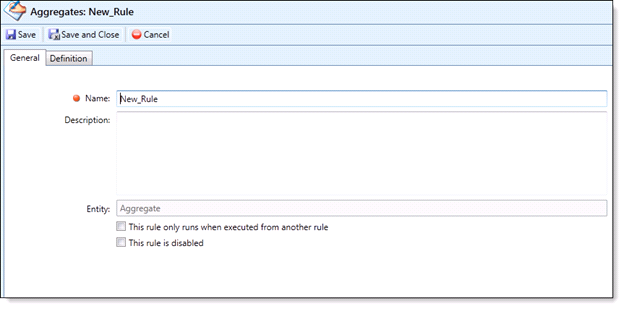
- Use the following the table to complete the General tab.
Field Description Rule Name The Rule Name cannot contain space or special characters. Description Enter a Description (if needed). This rule only runs when executed from another rule If specifically checked, the rule is not executed as part of a rule category and is only executed if explicitly called from another rule. This can be used to control the order of execution for rules in a group. This rule is disabled When checked for a specific rule, that rule is disabled and does not run. This can be used for creating rules at one time and activating them at another.
When “This rule only runs...” is unchecked, “This rule is disabled” is automatically unchecked and enabled. After a rule is saved, the “This rule only runs...” is disabled and can no longer be changed.

The General tab is the same for both Business Rules and Decision tables. The format of the Definition tab differs according to Business Rule and Decision Table selection.
-
Condition - Logical circumstances (such as Fields, Field Values or Functions) which are met in order for an Action to be assigned.
- Actions - Activities that are performed if Conditions are met.
Business Rules use business language (such as If... Then... statements) to link Conditions to Actions.
- Select Create Rule and a drop down menu appears.
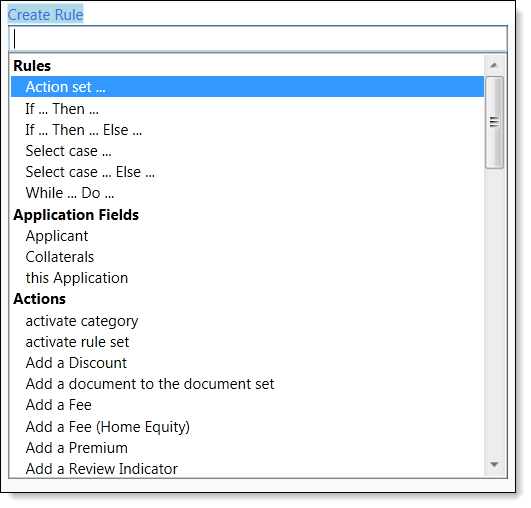
- Select the Rule, Field, Action, etc.
There multiple ways to author a rule. The following demonstration utilizes an If... Then... rule to build a Queuing Rule and should be used for EXAMPLE ONLY.
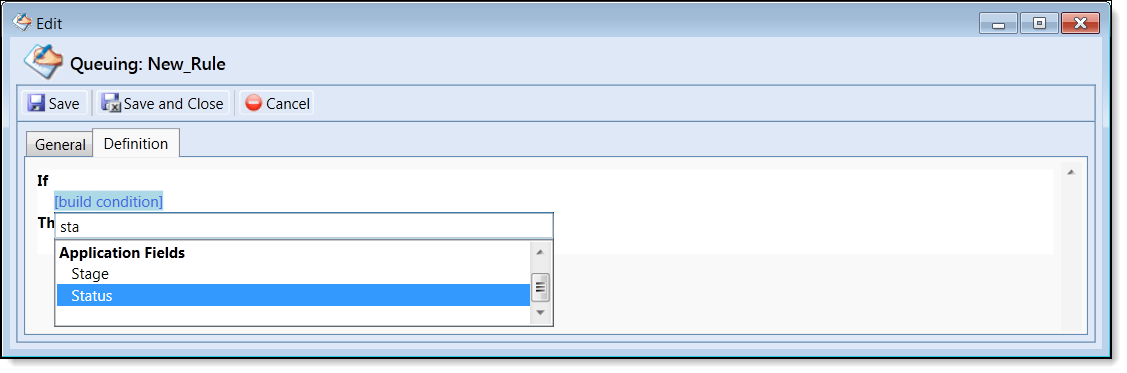
- Click {build condition}. Search for the Application Field titled “Status” or type "Status" into the search box to refine options. Select Status.
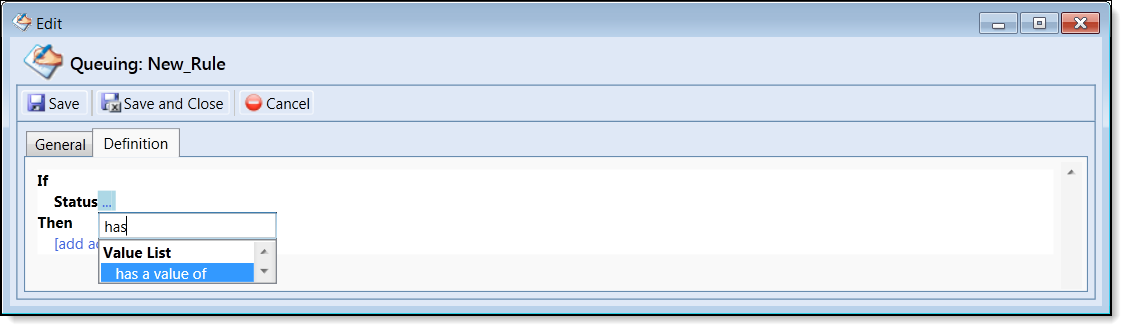
- Click on the … (three dots after Status) and select has a value of from the drop down.
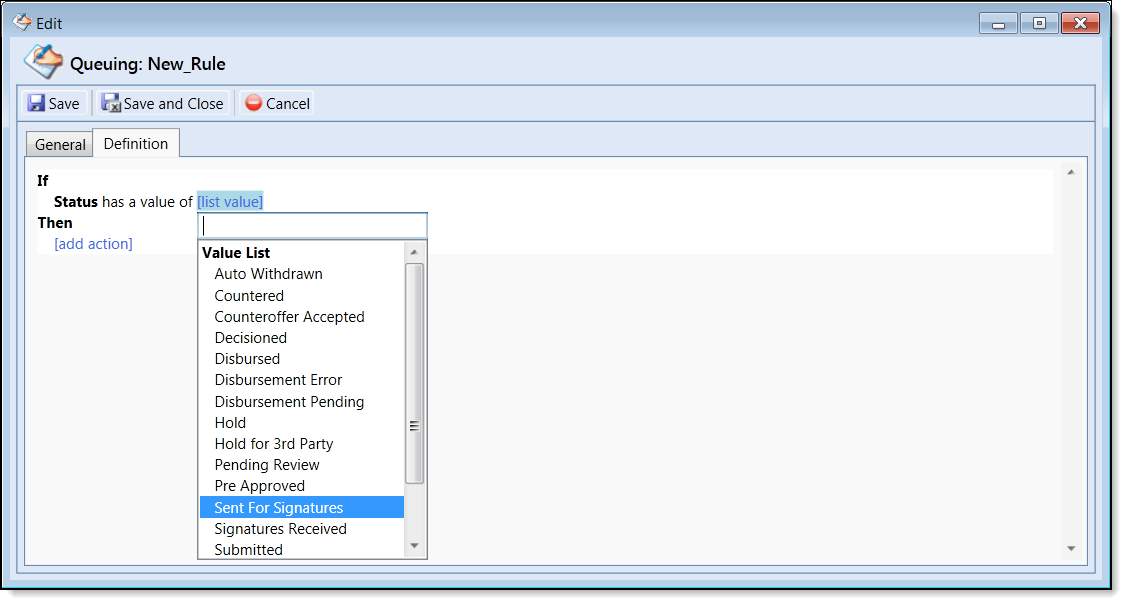
- Click {list value} and select the application Status which must be met in order for the document to be assigned to the queue (example: Sent for Signatures).
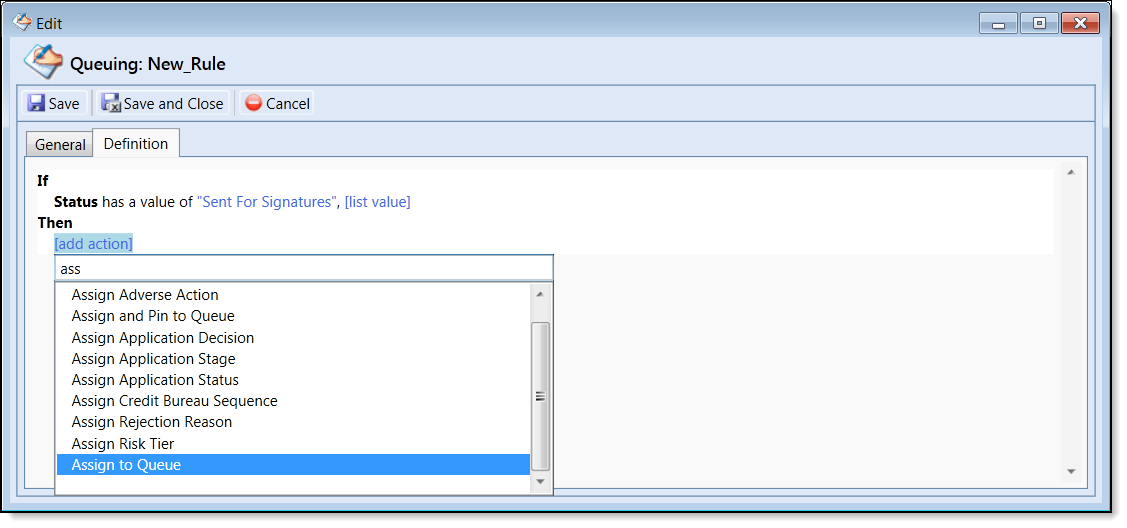
- Under Then, select {add action} and select Assign to Queue from the drop down.
- Click {Select a Queue} and pick the Queue which the applications pending a signature are assigned.
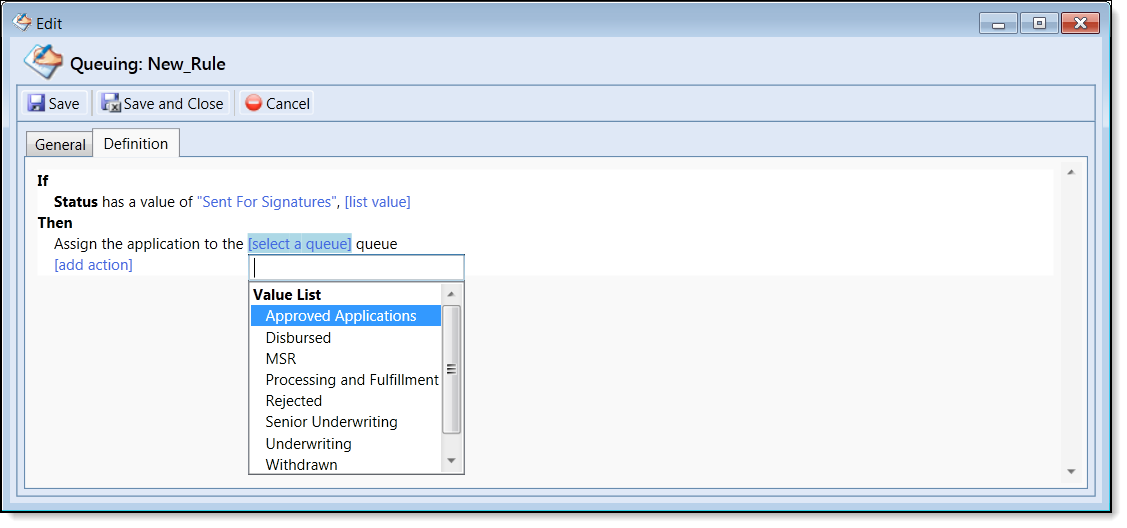
Upon the completion of this rule, the user has the following logical statement: If the status of an application has the status of Sent for Signatures, assign the application to the Approved Applications queue.
- Click Save and Close.
Decision Tables utilize the Conditions and Actions boxes to create a Decision Matrix, which links Conditions to Actions.
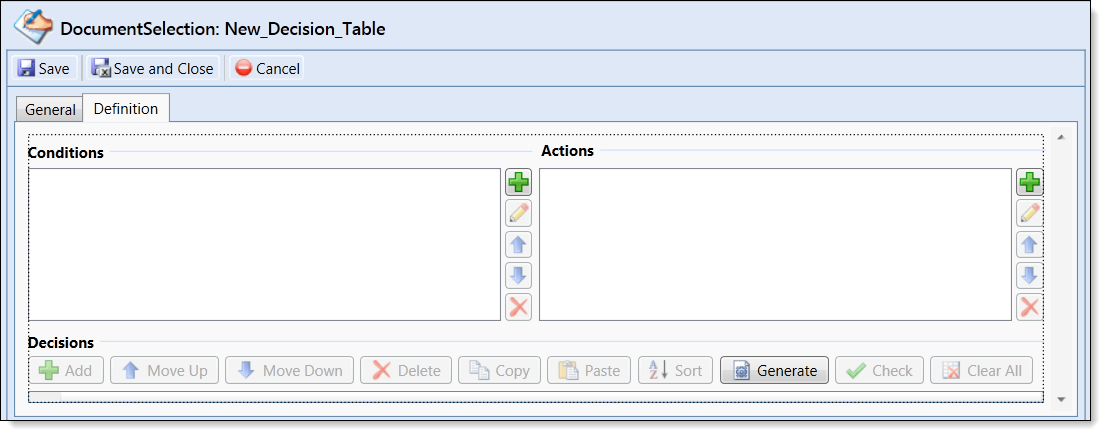
The Conditions and Action table contains the following icons:
| Icon | Details |
 |
Add a condition or action. |
 |
Edit an existing condition or action. |
  |
Move the order that conditions and actions appear in the columns of the Decision Table. |
 |
Delete an existing condition or action. |
The Decision Table Box contains the following icons:
| Icon | Details |
|
Add new row to the Decision Table. |
 |
Move selected row up. |
 |
Move selected row down. |
|
Delete selected row. |
 |
Copy selected row. |
 |
Paste the copy of a row. |
 |
Select the sort order of the Decision Table. |
 |
Generate an exhaustive list of all possible options for the table. |
 |
Check Decision Table for any duplicated or missing options. |
 |
Delete all rows of the Decision Table. |
Conditions
- Select the Add Condition icon to build rule criteria. The Add Decision Table Condition window appears.
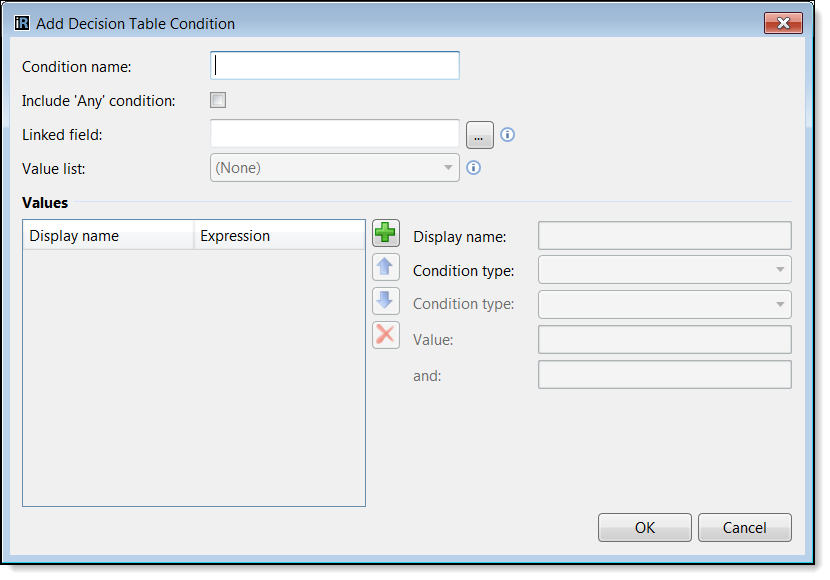
- Using the table below, complete the applicable Add Decision Table Condition fields.
Conditions Description Condition Name Specifies the name of the condition that appears in the Decision Table column header. Include 'Any' checkbox Adds the ‘Any’ option to the list of conditions. Selecting ‘Any,’ in the table triggers that condition to be True under any circumstances. Linked Field Specifies the condition relates to a specific field in the loan application. Use Value List If linked to a field, you can select a value list to automatically populate the condition set. Pre-Defined Value List Gives you the option to select from the lookup lists available from System Management>Lending>Field Configuration. Use Field Condition Becomes available to use only when linking to a specific field. Use Business Language Can be used whether or not the condition is linked to a specific field. Input a Display Name This is what shows as a selection in the drop down for that condition column of the Decision Table.
- Repeat steps until all options for the condition are created. Click OK button to save.
Actions
- Click on Create Action Rule to select the desired action template.
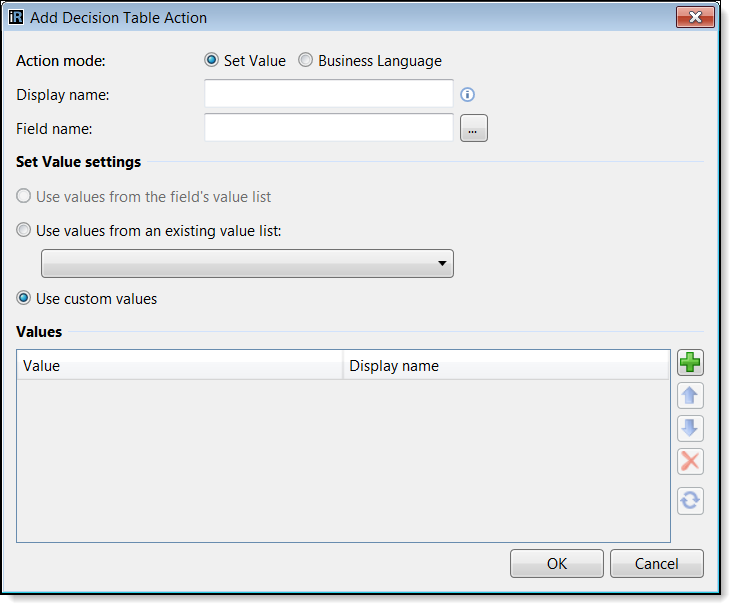
- Using the table below, complete the applicable Add Decison Table Action fields.
Actions Description Action Mode Select "Use Business Language." Action Name Specifies the name of the action that appears in the Decision Table column header. Display Name This is what shows as a selection in the drop down for that action column of the Decision Table.
- Click the OK button to save.
Decisions
- Manually add rows or select the Generate button to create an exhaustive list of all possible combinations for the table.
- Using the associated drop downs, assign Conditions to Actions until all desired outcomes have been accounted for within the Decision Table.
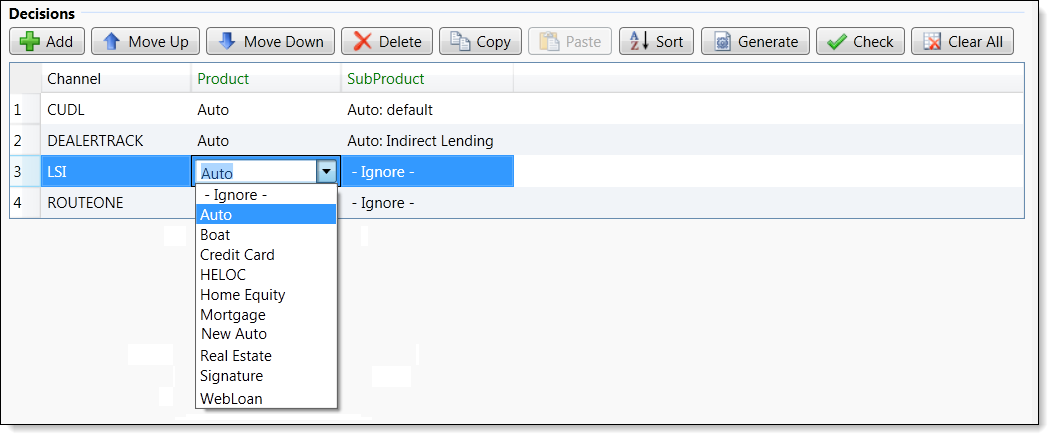
- Click Save and Close.