Temenos Lifecycle Management Suite - Loan Origination Product Guide
References
| End-User Guide > Application Processing > Origination > References |
Depending on the configuration of the workflow model, the Workflow may contain the option to add References. Upon navigating to the References screen, users are able to add references to an application.
 |
A references panel may be added to any user-defined screen in the workflow. |
Users may also be able to add a reference within the References screen configured to appear in the Screens List.
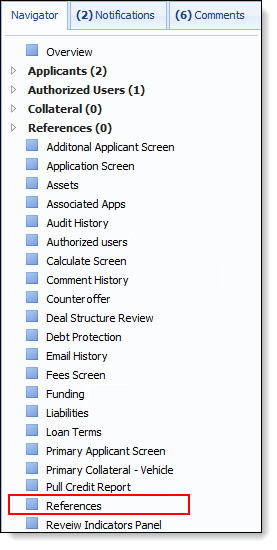
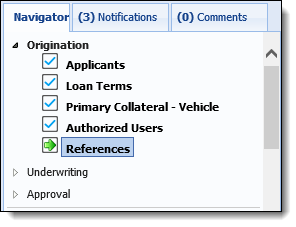
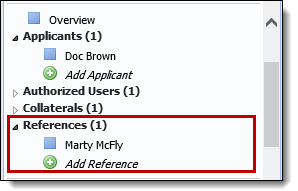
When references are added to an application, their records appear in the Application Navigator for easy access. Each reference record is added to the references grouping located beneath the Workflow. If multiple references are assigned to the application, a number corresponding to the amount of references displays next to the References heading.
|
For the References section to be available, a References screen must be mapped to the Workflow Model. |
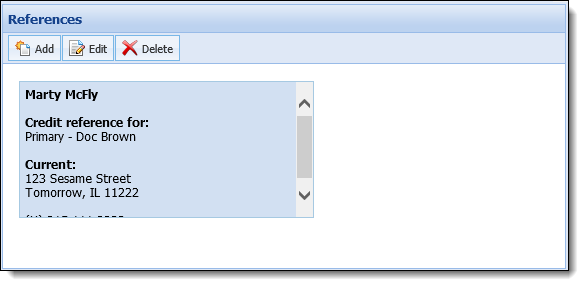
In addition to displaying the list of references, the References section allows users to Add, Edit, and Delete reference addresses and phone numbers.
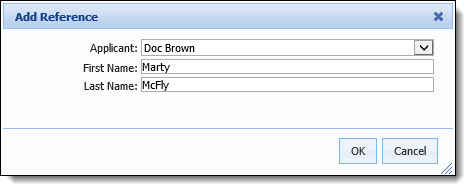
When adding references to an application, users are able to assign a reference to a specific applicant. If an applicant has prior applications in the Loan Origination module, the references copy over from the prior application. Multiple references can be added to an application for each applicant.
Icon Description Allows a user to add a reference to the current application. Allows a user to edit a reference that is assigned to the current application. Allows a user to remove a reference from the current application.
When adding references to an application, users are able to collect Reference Information and add it to the corresponding Panels and Screens.
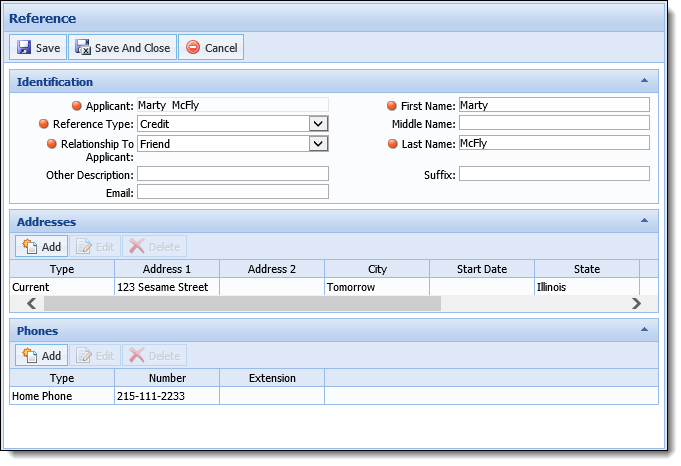
In the Identification panel, users are able to input the information used to identify the reference. This information may include Name, Relationship to Applicant, Email, and Reference Type.
The Reference Addresses panel is used to capture a reference’s address information. The Reference Addresses panel contains a grid that populates with the addresses that are provided.

A toolbar is located above the References Addresses grid that allows users perform the following actions:
| Icon | Description |
 |
Allows a user to add a reference address to the current application. |
 |
Allows a user to edit a reference address that is assigned to the current application. |
 |
Allows a user to remove a reference address from the current application. |
The Add function allows users to manually input a reference’s address. Clicking Add from the Address toolbar opens the Reference Address screen in a new window.
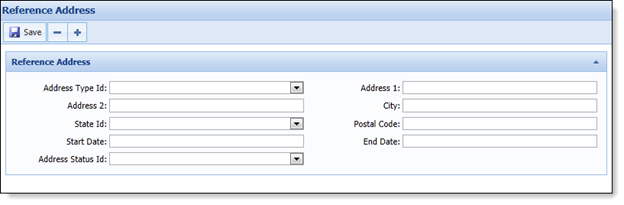
Saving an address does not clear the form. A user must manually clear the screen to enter another address.
If a user is adding multiple addresses, they must close out the Reference Address screen after each save. If the screen is not closed, the new address overwrite the previously entered address.
The Edit function allows users to update an address that has been provided by the user. Clicking Edit from the Address toolbar opens the Reference Address screen in a new window. The current information is populated in the corresponding fields.
Reference addresses may be edited by double-clicking the desired address from the Reference Addresses grid.
The Delete function allows users to remove an address that has been provided by the user.
The Reference Phones panel is used to capture a reference’s phone number information. The Reference Phones panel displays a grid that populates with the provided phone numbers.

A toolbar is located above the Reference Phones grid that allows users perform the following actions:
| Icon | Description |
|
Allows a user to add a reference phone to the current application. |
|
Allows a user to edit a reference phone that is assigned to the current application. |
|
Allows a user to remove a reference phone from the current application. |
The Add function allows users to input a reference’s phone number. Clicking Add from the Reference Phones toolbar opens the Reference Phone screen in a new window.
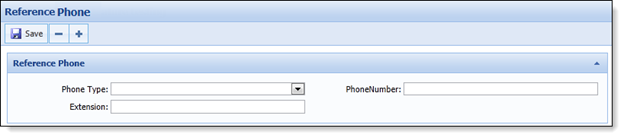
Saving a phone number does not clear the form. A user must manually clear the screen to enter another phone number.
If a user is adding multiple phone numbers, the user must close the Reference Phone screen after each save. If the screen is not closed, the new phone number overwrites the previously entered phone number.
The Edit function allows users to update a phone number. Clicking Edit from the Reference Phones toolbar opens the Reference Phone screen in a new window. The current information is populated in the corresponding fields.
Phone numbers can be edited by double-clicking the desired phone number from the Reference Phone grid.
The Delete function allows users to remove a phone number that has been provided by a user.
When processing an application, users are able to edit reference information. There are three methods that enable users to update reference information:
|
The editability of references can be restricted according to the application’s status. For more information on Field and Action Editability, see the Administrator Guide. |
In order for the Previous button to navigate users to the Reference screen, the Workflow Stage that contains the references must be the active stage.
While processing an application, users are able to remove a reference from the application. Users are able to remove a reference from an application by selecting the References workflow, screen, or section.
In order for the Previous button to navigate users to references screen, the Workflow Stage that contains the References screen must be the active stage.
 Adding References