
Temenos Lifecycle Management Suite - Collection Product Guide
Expenses Screen - Case
| End-User Guide > Screens > Case System Screens > Expenses Screen - Case |
Within the Expenses screen, collection expenses can be manually entered for the account in context. By default, expenses are grouped by category, with the newest expense within each category appearing last. Once entered, each expense is listed as a row within the grid, with columns designating various fields of information.
From this screen, users can perform the following actions:
 |
Once an expense has been added, it cannot be deleted. |
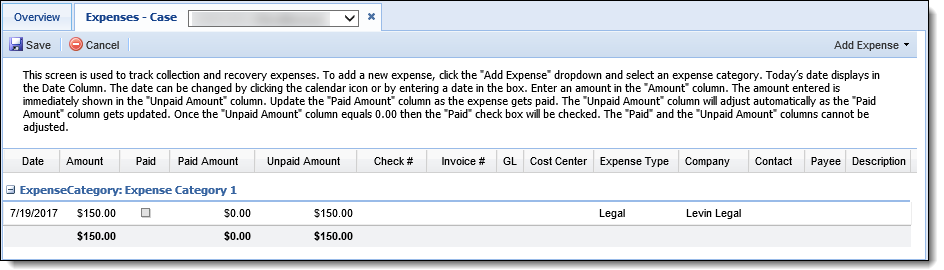
To track a new expense within the Lifecycle Management Suite, click the Add Expense drop-down to select an expense category.
 |
Expense categories are defined in the database by a Temenos Customer Care Representative or Project Manager. |
Once an expense category is selected, a new row is added to the grid and information can be entered within the following columns:
| Column Name | Description | ||||
| Date | Enter the date in which the expense is assessed. This value defaults to the current date, but is editable. Click the Date value and manually enter the date, or select it from the calendar tool. | ||||
| Amount | Enter the total expense amount. | ||||
| Paid |
If selected, this check box indicates that the expense is paid in full. This check box is read-only.
|
||||
| Paid Amount |
Enter the total amount of the expense that was paid.
|
||||
| Unpaid Amount |
Displays the remaining unpaid expense balance.
|
||||
| Check # | Enter the number of the check used to pay the expense. | ||||
| Invoice # | Enter the number of the invoice used to assess the expense. | ||||
| GL | Enter the general ledger account number where the expense is to be credited. The GL Account may be associated with Collections-specific GL Accounts. | ||||
| Cost Center | Enter the assessing cost center. | ||||
| Expense Type |
Using the drop-down, select the type which classifies the expense.
|
||||
| Company |
Using the drop-down, select the name of the company associated with the expense.
|
||||
| Contact |
Using the drop-down, select the name of the contact for the company associated with the expense.
|
||||
| Payee | Enter the name of the expense payee. | ||||
| Description | Enter a description for the expense. |
|
Applicable Recovery GL Account Number and Transaction Code Number fields are available for use in queues, views, and reports, but are not available within screens. |
When finished adding expenses, click  . Click
  to disregard any changes.
Expenses can be updated by clicking within any of the following columns:
|
Once an expense has been transferred, it cannot be edited. |
