
Temenos Lifecycle Management Suite - Origination Product Guide
Account Product Screen and Panel Configuration
| Administrator Guide > Virtual Capture Overview > Virtual Capture Screens > Field and Panel Configuration Examples > Account Product Screen and Panel Configuration |
System administrators are provided with the following functionality in System Management > Origination > Virtual Capture > Virtual Capture Screens to capture and display information for each account product added to application in Virtual Capture:
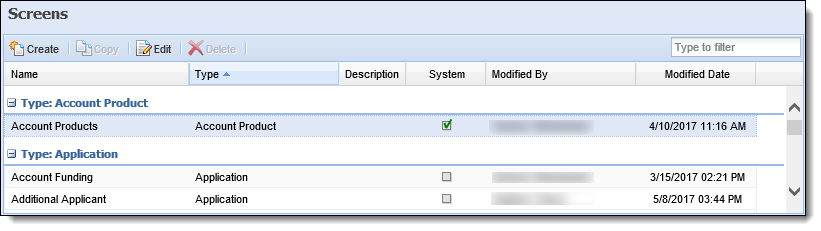
The Account Products screen is a system-defined screen that can be configured to display an Account Product panel for each account product added to an application in Virtual Capture. This screen is automatically available within the Virtual Capture Screens page for each institution that uses the Account Origination module.
 |
While the attributes of the Account Products screen can be modified by the system administrator, institutions are not able to create an Account Products screen type for Virtual Capture. The Account Products screen can also not be copied or deleted; therefore, the  and and  buttons are disabled when the screen is selected within the Screens grid. buttons are disabled when the screen is selected within the Screens grid. |
System administrators can add an Account Product panel to the Account Products system screen for each type of account product available for selection in Virtual Capture. For example, since checking accounts and savings accounts may require different information to be captured during the application process, system administrators can configure a separate panel for a Checking account product and Savings account product to appear within one screen, and use the panel properties to determine when the panel is presented in Virtual Capture.
When rendered in Virtual Capture, the Account Product panel provides the applicant with the ability to enter the necessary information for the account product, as well as perform the following actions:
 |
Please see the Using the Account Product Screen and Panel in Virtual Capture section of this topic for more information on the behavior of the Account Product panel. |
This topic provides the following information to assist administrators with configuring the Account Products screen and understanding the behavior of the screen in Virtual Capture:
To define the attributes for the Account Products screen, navigate to System Management > Origination > Virtual Capture > Virtual Capture Screens. Double-click the Account Products screen within the Screens grid or highlight the screen and click  .
.
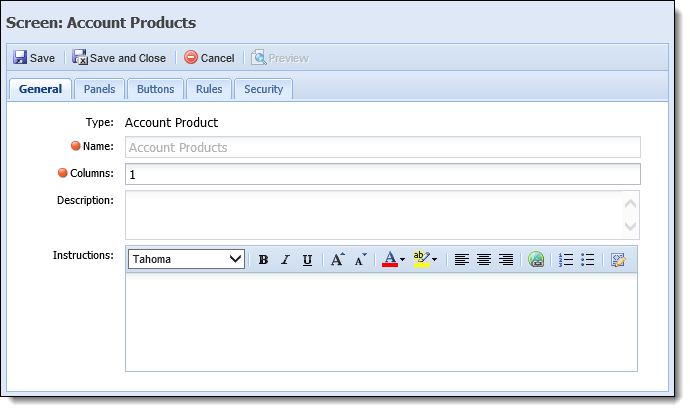
Within the screen configuration window that appears, define the General attributes.
|
The name of the Account Products system screen cannot be modified; therefore, the Name field defaults to a value of Account Products, and appears disabled within the Edit Screen window.
|
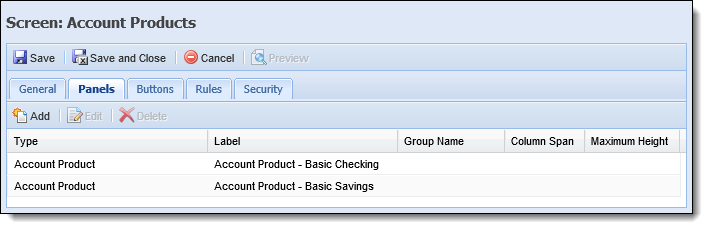
Once the General attributes are defined, navigate to the Panels tab to configure the attributes for each Account Product panel configured to appear in the Account Product screen.
The Panels tab provides administrators with the ability to add an Account Product panel to the screen for each type of account product available for selection in Virtual Capture.
Once  is clicked, a window appears to select the Account Product panel type.
|
The Account Product panel is the only panel type able to be added to the Account Products screen. |
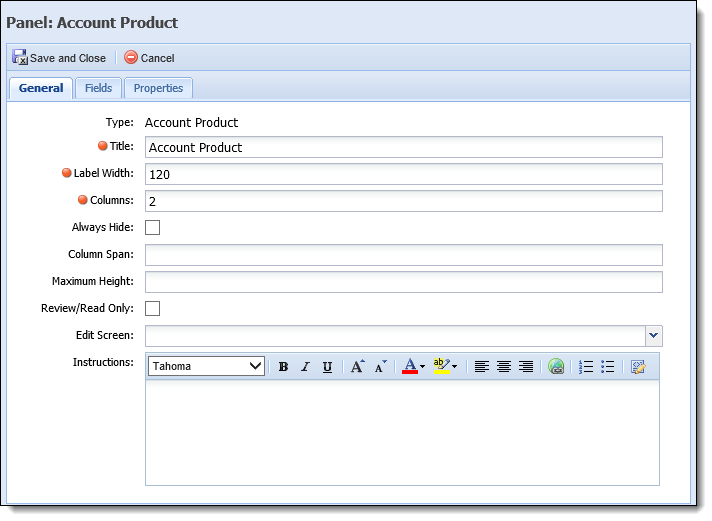
Upon selecting the Account Product panel, the panel configuration window displays to provide administrators with the ability to define the fields to appear within the panel, as well as determine which account product(s) the panel appears for in a virtual application.
|
System administrators can add more than one Account Product panel to the Account Product screen, and use the panel properties to determine which account product(s) the panel populates for in Virtual Capture. Within the Fields tab, administrators should define the fields that are necessary to capture for an account product type, and assign the account product to the panel within the Properties tab. This should be repeated for each type of account product that is available for selection in Virtual Capture. |
To configure the Account Product panel:
|
For a complete overview of the General and Field panel attributes, please see the Panels section of the Virtual Capture Screen Designer topic in this guide. |
 administrators are presented with a Field List that includes the Application > Account Product level fields available to add to the panel, as well as any Application Account Product custom fields configured by the institution.
|
The Applicant Roles field can be added within the Fields tab to enable the ability to assign the additional applicant(s) a role for each account product.
When adding the Applicant Roles field to an Account Product panel, it is recommended that the following configurations are made to ensure that the drop-down fields display properly in Virtual Capture, and applicants have a clear understanding of how to complete the field(s) in the screen:
|
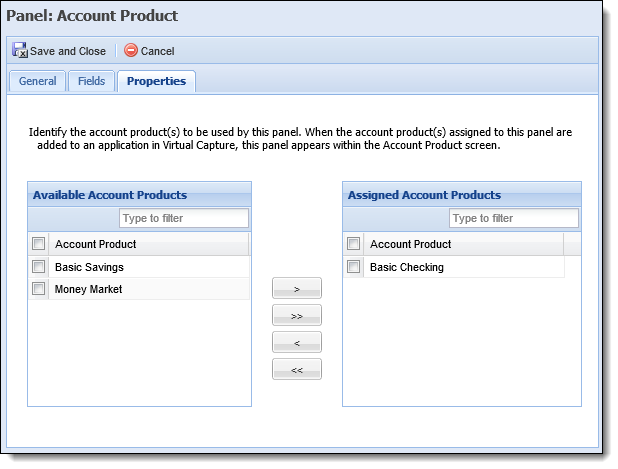
The following attributes are assigned for the Account Product panel within the Properties tab:
|
When the Check Image field is added to the Account Product panel, the Properties tab displays an additional section to configure the properties for the Check Image displayed in Virtual Capture.
|
| Attribute | Description | ||
| Available |
Displays a list of all active account products configured in System Management > Origination > Account > Account Products. To assign one or more account products to the panel, select the desired product(s) from the list, and move them to the Assigned box using the arrows that display in the tab, or by dragging and dropping.
|
||
| Assigned |
Displays a list of the account products assigned to the panel. When the account products assigned to the panel are added to an application in Virtual Capture, the panel appears within the screen. For example, in the above image, the Basic Checking account product has been assigned to the Account Product panel. When the Basic Checking account product is added to an application, the panel populates within the screen to allow the applicant to capture the necessary information for a Basic Checking account. |
 to add the panel to the Account Product screen.
|
If desired, more than one account product can be assigned to a single Account Product panel; however, each account product can only be assigned to one Account Product panel that appears on the Account Product screen. If an account product is already assigned to an Account Product panel on the screen, a Validation error is received upon trying to save the panel. |
The Buttons tab provides administrators with the ability to assign the Add Products button to the Account Products screen.

Once is clicked, a window appears to select the Add Product button.
|
By default, the Add Product button is assigned to the Add Products screen. |
If the Add Products button is assigned, the Add button displays when the Account Products screen is renders in a Virtual Capture application. If the Add Products button is not assigned, the Add button does not display when the Account Products screen is renders in a Virtual Capture application.
|
If the Add Products button is not assigned to the Account Product screen, the Cross-Sell panel must exist prior to the account products screen in the Virtual Capture workflow. If the Cross-Sell panel is does not appear before the Account Product screen, applicants are unable to see any account products that were accepted from cross-sells on the account product screen. |
After each account product has been assigned to an Account Product panel, select the Rules and Security tabs to configure the final attributes for the Account Product screen. Upon completion of all screen attributes, click to retain the configurations.
|
In order for the Account Product screen to display in Virtual Capture, the screen must be assigned to a Virtual Capture Workflow Model in System Management > Origination > Virtual Capture > Virtual Capture Workflow Models. If the Account Product screen is not assigned to a workflow model, and account products have been configured within the Product Selection tab in Virtual Capture Settings, a warning message is received upon clicking
|
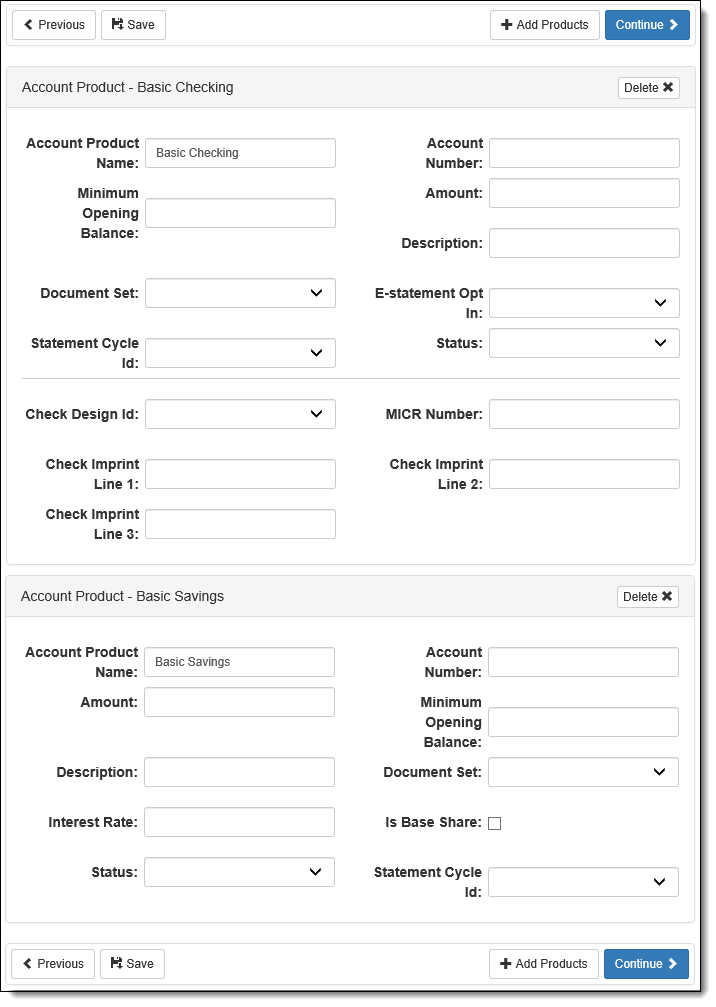
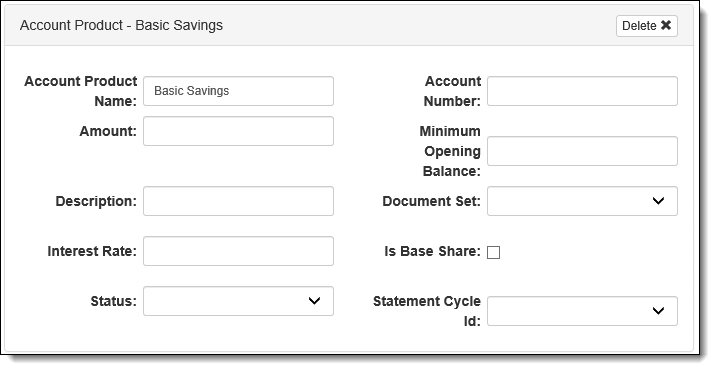
When the Account Product screen renders in Virtual Capture, a panel appears on the screen for each account product that is assigned when the application is created. In the below example, the Basic Checking and Basic Savings account products have been added to an application; therefore, the panels to which the Basic Checking and Basic Savings account products are assigned appear within the screen:
|
The panel that appears for each account product is determined by the panel properties. For more information, please see the Account Product Panel Attributes section in this topic. |
Within the account product screen, applicants can enter the necessary information for each account product in the applicable panel, as well as perform the following actions:
|
The title of the Add Products and Update Products buttons reviewed in this section may differ each Virtual Capture instance if custom values are set for the corresponding global parameters. For more information on configuring custom text for these buttons, please see the Customizing Global Settings for Virtual Capture topic in this guide. |
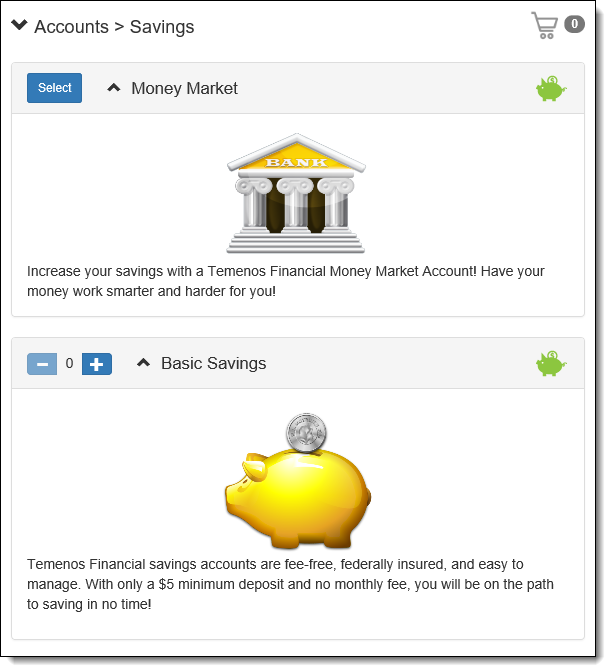
An  button appears within the toolbar at the top and bottom of the Account Product screen to provide applicants with the ability to easily add an account product during the virtual application process. Clicking
  opens the Account Product Selection window to allow the applicant to select the desired account product(s) to add to the application.
|
The Account Product Selection window is displayed in the same format as the Product Selection page; therefore, all large and small device settings configured for the instance in the Device Parameters tab of Virtual Capture Settings are also applied to the parameters in this window. Similarly, if an institution has customized any of the global parameters for the product selection process, the custom values are displayed within the Account Product Selection window. For an overview of the details displayed within the Product Selection page, please see the Product Selection Page section of the Virtual Capture Overview topic in this guide. |
Clicking  or
or  within the product card adds the account product to the cart.
|
Similar to the title of the Add Products and Update Products buttons, the text of the Select button for a product card can also be customized, and may appear differently for each instance. |
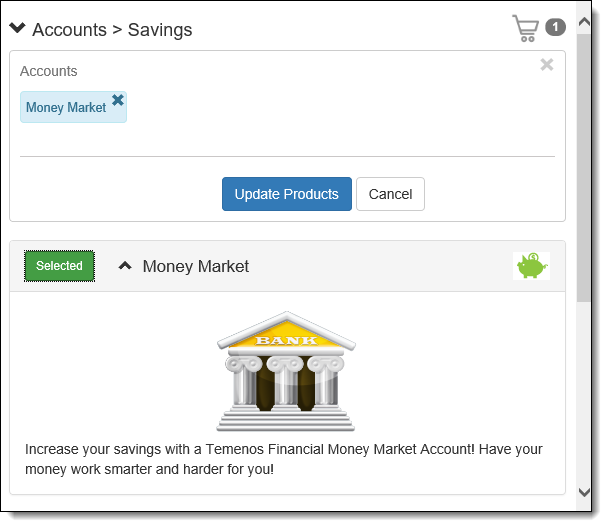
Once the desired account product is added to the cart, clicking  adds the selected account product to the application, and populates a panel for the product within the Account Product screen.
|
The Update Products button is not enabled until at least one product is added to the cart. Clicking Cancel returns the applicant to the Account Products screen without updating the products on the application. |
|
When the Account Product panel is configured as Review/Read Only, |
Each Account Product panel includes a  button in the header to provide applicants with the ability to easily remove an account product from an application.
Once  is clicked, the applicant is presented with a confirmation message to ensure that the product should be deleted. If the applicant clicks Yes, the panel and all information for the account product is removed from the Account Product screen. If the applicant clicks No, the product remains on the application and the applicant is returned to the Account Product screen.
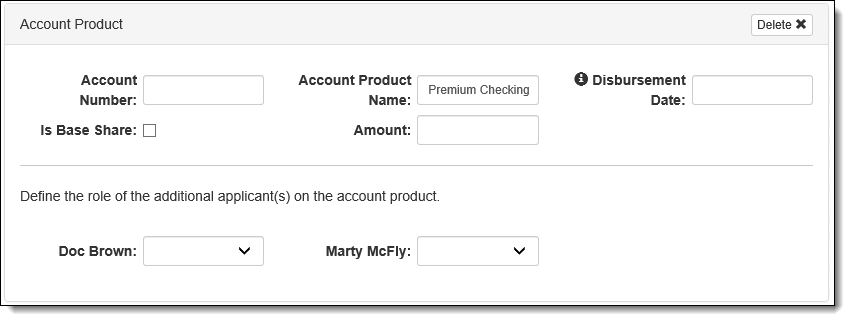
The Applicant Roles field allows applicants to assign each additional applicant a role on the account product(s) for their application within the Account Product screen.
|
Additional applicant roles can also be assigned for each account product using the Account Product Roles field on an Applicant screen. For more information, please see the Additional Applicants Panel example in this guide. |
When a Virtual Capture application includes one or more additional applicants, the Applicant Roles field populates a drop-down in the screen for each additional applicant to enable the ability to assign him or her a role on the account product.
|
The drop-down to assign an additional applicant role does not appear in the Account Products screen until an additional applicant is added to the application in Virtual Capture. A separate drop-down field populates for each additional applicant on the application. |
This field populates as the name of the additional applicant, and includes a list of all applicant types assigned to the account product. Applicants can easily assign the additional applicant a role on each product by selecting a value from the drop-down list.
|
Each drop-down in the panel defaults to a blank value, and includes a list of the applicant types assigned to the account product in the Table Entries tab of the Account Product configuration window in System Management > Origination > Account > Account Products. For more information on assigning applicant types to an account product, please see the Table Entries section of the Account Products topic in this guide. |
 Account Products Screen
 button, which allows applicants to make modifications to the select fields configured to appear in the edit screen assigned to the panel.