Temenos Lifecycle Management Suite - Origination Product Guide
How to Create Screen Interactions
| How To Guides > How to Create Screen Interactions |
Temenos Infinity's Screen Designer allows institutions to create Interactions, which allows institutions to configure the conditions in which a screen's fields and panels are hidden in an application.
This How To Guide contains the following topics to help administrators configure the conditions in which a screen's fields and panels are hidden from an application:
To create field and panel hide conditions, navigate to System Management > Origination > Screens.
 |
To configure field and panel interactions for Virtual Capture, navigate to System Management > Origination > Virtual Capture > Virtual Capture Screens.
|
While creating or editing a screen, select the Interactions tab.
Screen interactions are created and maintained using the following action buttons:
| Button | Description | ||||||||||||||||||||||||||||||||||||
 |
Allows the administrator to create a new Interaction. Clicking
|
||||||||||||||||||||||||||||||||||||
 |
Allows the administrator to copy an existing interaction. | ||||||||||||||||||||||||||||||||||||
 |
Allows the administrator to edit an existing interaction. | ||||||||||||||||||||||||||||||||||||
 |
Allows the administrator to delete an existing interaction. |
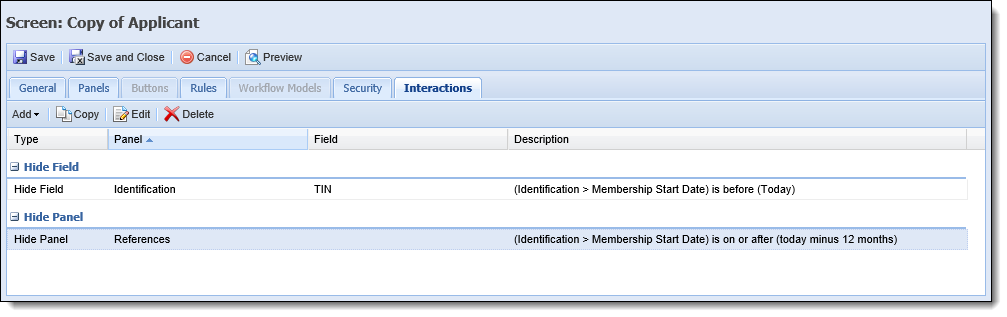
The following attributes are defined within the grid that displays in the Interactions tab:
|
All interactions for a screen are grouped together by type. Users are able to expand a grouping by clicking |
| Attribute | Description |
| Type | Identifies whether the interaction Type is Calculate Field, Hide Field, Hide Panel, Hide Row, or Field Validation. |
| Panel |
The value within the Panel attribute is determined by the interaction type:
|
| Field |
The value within the Field attribute is determined by the interaction type:
|
| Description | For Calculate Field Interactions, this column indicates the formula used to calculate the value of the field. For all other Interaction Types, this column, indicates the interaction condition(s). |
To access the condition and expression builder, click , , or . Within the condition and expression builder, administrators are able to identify the item to be hidden, as well as the condition(s) that must be met for the interaction to occur.
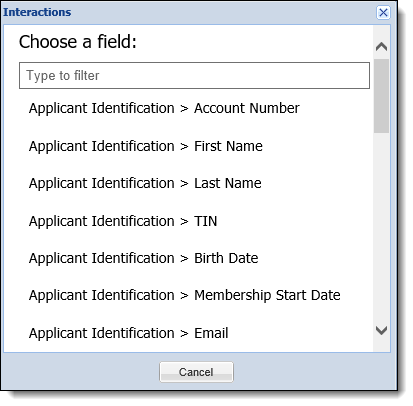
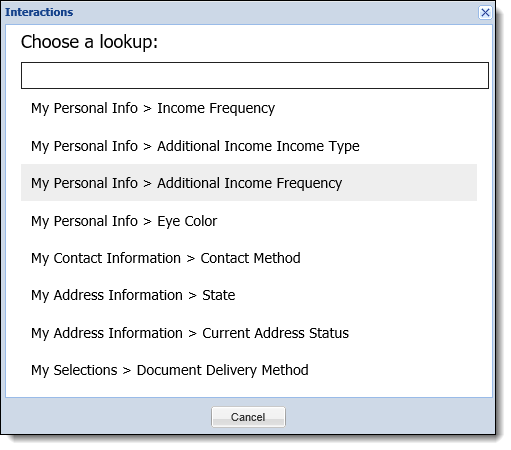
Upon clicking , administrators are presented with a selection window.
 |
If editing an existing interaction, administrators bypass the selection window, and are taken directly to the condition and expression builder. |
This window allows the administrator to:
|
A separate selection window is presented for each interaction type. Reference the table below for an overview of the values that appear in the selection window for each interaction type:
|
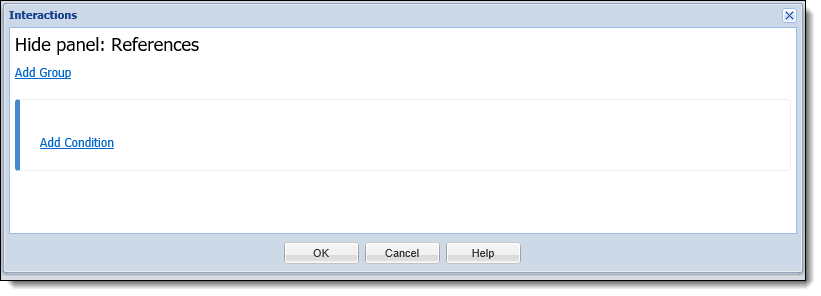
For example, if Hide Field is selected, the following window appears to determine which field should be hidden when conditions are met in the application:
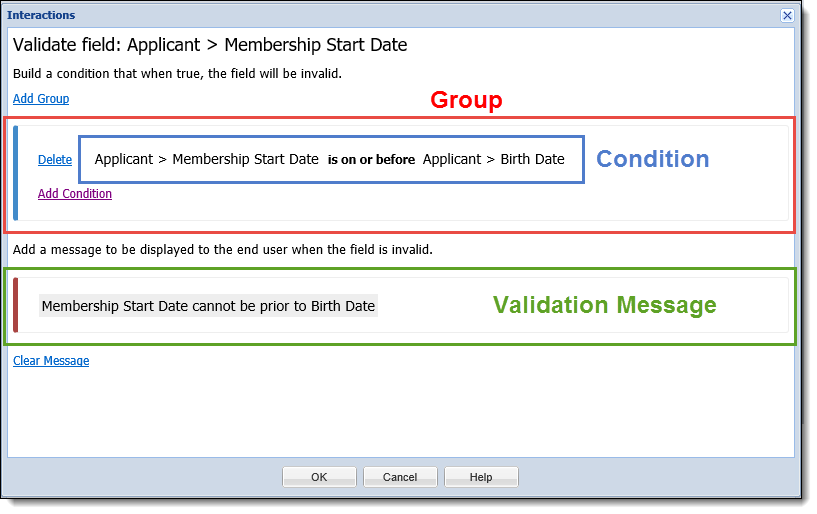
The criteria defined within the condition and expression builder is comprised of the Calculations, Groups, Conditions, and Validation Messages.
|
The condition and expression builder also contains instructions, which provide users helpful information for creating screen interactions. |
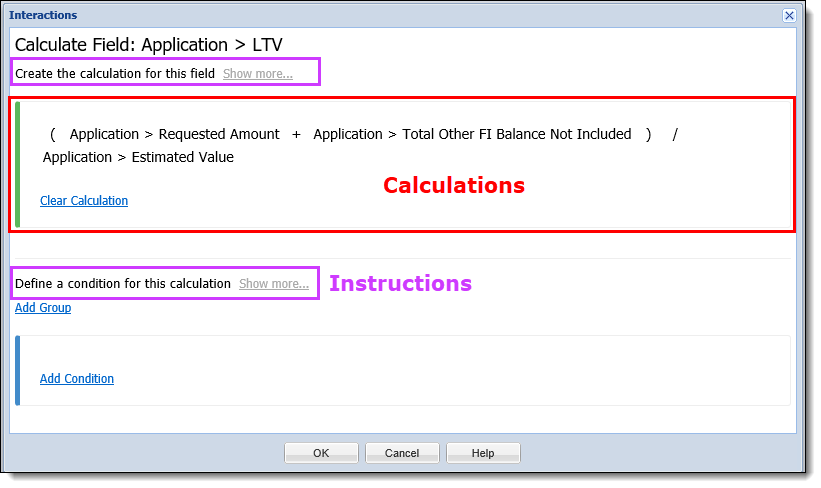
A calculation is an expression that calculates the value which populates within any field assigned to the screen. The calculation executes, when the screen loads in the workspace. If any data included in the calculation changes, the calculation executes. For example, if Application > Requested Amount is included in the expression, and the applicant increases the Requested Amount,the calculated field updates accordingly.
 |
Calculated fields are read-only, and only the interaction is able to update their values. |
|
The field being calculated does not appear in the field and function menu. |
|
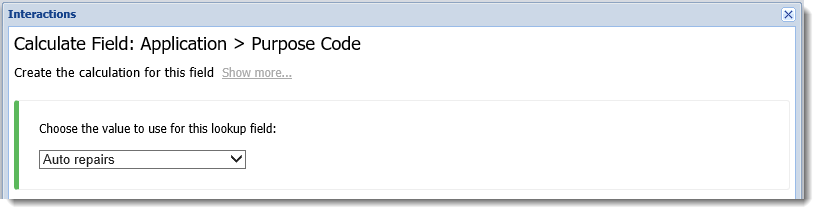
If a lookup field is selected to be the calculated field, a calculation expression builder does not appear. The interaction only allows users to set the value of the field, and a drop-down field is presented that includes the lookup values for the field.
|
Click ![]() to remove any calculation logic that currently exists for the interaction.
to remove any calculation logic that currently exists for the interaction.
A group is a group of conditions. At least one Group must be defined. Each Group contains one or more Condition that is administrators can define one or more groups that may contain multiple conditions. If an interaction contains multiple groups, each group may be linked with an AND/OR relationship.
|
A screen interaction mat contain an unlimited number of groups, and each group may contain an unlimited number of conditions. |
Click  to begin authoring the hide condition(s). Once clicked, a new group is added to the Interactions pop-up window.
|
When creating a new interaction, one group is automatically added. |
Within each group, administrators are able to perform the following actions:
| Action | Description |
 |
Allows administrators to add an interaction condition to the group. Upon clicking this button, a new condition is added to the group. When a new condition is added, the first field available in the screen populates in the left expression. Click on the left expression to open the field and function menu.
If a group contains multiple conditions, each condition may be linked with an AND/OR relationship. By default, the relationship is set to an AND relationship. Click on the AND to change it to OR. |
 |
Allows administrators to delete a condition from the group. Upon clicking this button, the condition is removed from the group. |
A condition is comprised of two expressions (a left and a right) that are linked by a relationship operator.
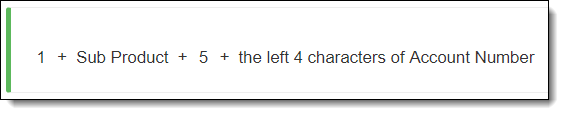
An expression is a calculation that returns a single value. Each expression can be comprised of one or more tokens, which may include a mixture of manually entered data, operators, fields, and functions. The following example contains seven tokens:
When building an expression, the following navigation capabilities are available:
|
The arrow keys cannot be used to navigate through the field/function menu. |
Additionally, the following keys are supported for data entry:
| Keys | Description |
| Letters | All upper and lowercase letters from A to Z |
| Numbers | All numbers 0-9 |
| Space | The space bar |
| ( | Begin grouping |
| ) | End grouping |
| + | Add |
| - | Subtract |
| * | Multiply |
| / | Divide |
| \ | Forward slash |
| . | Period or decimal |
| = | Equal sign |
| ! | Exclamation |
| @ | At symbol |
| # | Number sign, pound sign, hashtag |
| $ | Dollar sign |
| % | Percent |
| ^ | Caret |
| & | And symbol, ampersand |
| , | Comma |
| < | Less than |
| > | Greater than |
| ? | Question mark |
|
Expressions are validated as they are authored. Invalid tokens are highlighted in red and the errors are indicated in a tooltip when the cursor hovers over the exception.
|
When authoring an expression, administrators may select a field from the left side of the field and function menu. The fields available within this list are limited to those that are assigned to the screen.
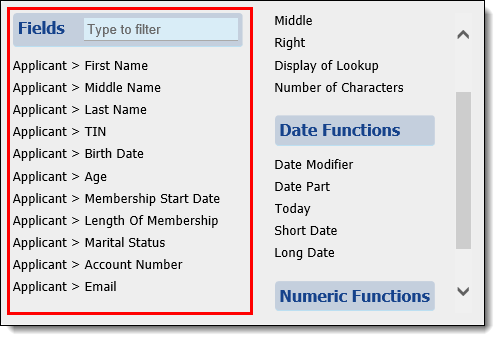
|
The fields displayed within the fields list include the fields assigned to panels that are always hidden. |
A Function is a token that uses one or more inputs to produce a single value. The following functions appear on the right side of the field and function menu:
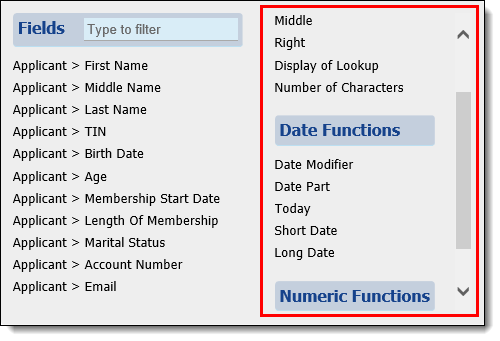
If a function, such as Today, does not require an input, a dialogue box opens in which the function can be configured. Review the following table for an overview of the functions available within the condition and expression builder:
|
Lookup fields are not compatible with the String functions for a Hide Row interaction. |
| Function Name | Description | Function Logic and Inputs | Function | ||
| String | |||||
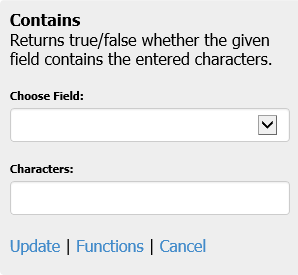
| Contains |
Returns true or false, given whether the field contains the entered characters.
|
Contains (b) within (a)
|
 |
||
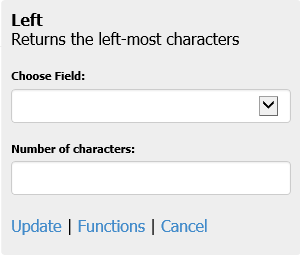
| Left | Returns the left-most characters. |
The left (b) characters of (a)
|
 |
||
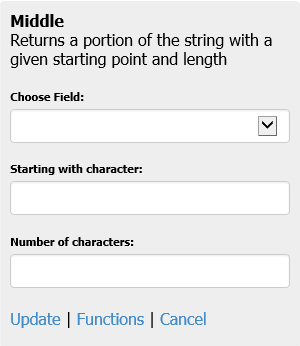
| Middle | Returns a portion of the string with a given starting point and length. |
The middle (c) characters of (a), starting with.
|
 |
||
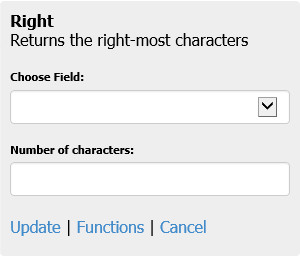
| Right | Returns the right-most characters. |
The right (b) characters of (a)
|
 |
||
| Display of Lookup | Returns the display of the lookup field. | Choose the lookup field. | 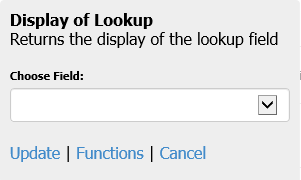 |
||
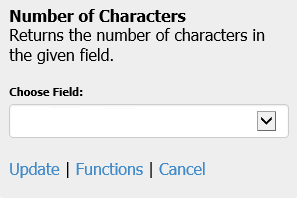
| Number of Characters | Returns the number of characters in the given field. |
The number of characters in (a).
|
 |
||
| Date | |||||
| Today | Returns today’s date. |
Today
|
|
||
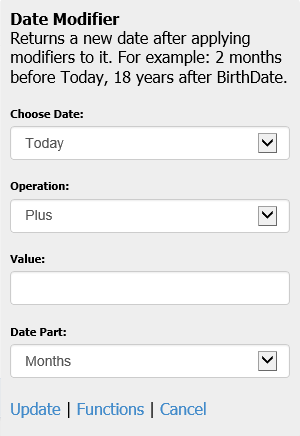
| Date Modifier | Returns a new date after applying modifiers to the original date. For example: Today minus 2 months, or BirthDate plus 18 years. |
(a)(b)(c)(d)
|
 |
||
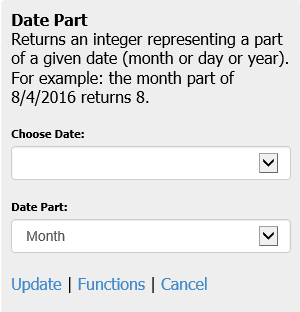
| Date Part | Returns an integer representing a part of a given date (month, day, or year). For example: The month of 4/1/77 is 4. |
The (b) of (a)
|
 |
||
| Short Date | Returns the selected short date format of the date field. |
Choose the date field. Choose the format:
|
 |
||
| Long Date | Returns the long date format of the selected date field. | Choose the date field. | 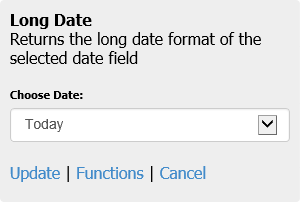 |
||
| Numeric | |||||
| Money | Returns the money format of the selected field. | Choose the field. | 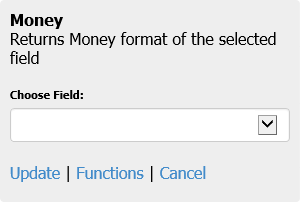 |
||
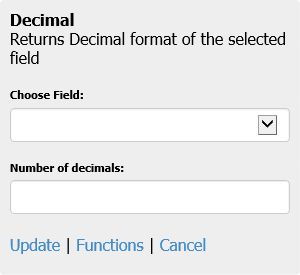
| Decimal | Returns the decimal format of the selected field. |
Choose the field.
Enter the number of decimal places. |
 |
||
|
When a calculated field requires formatting, an empty field must be created to hold the calculated value, and the formatting needs to be applied to the empty field. |
Upon selecting a function, the corresponding pop-up window opens. Within the function pop-up window, administrators are able to set the inputs to the desired values. In addition to setting the inputs, administrators are able to perform the following actions:
| Action | Description |
| Update | Saves the selections made in the function's pop-up window and returns the administrator to the condition and expression builder. |
| Functions | Closes the function's pop-up window, discards all selections, and returns the administrator to the field and function menu |
| Cancel | Closes the function's pop-up window, discards all selections, and returns the administrator to the condition and expression builder. |
The relationship operators available in a condition are based on the left expression's data type. For example, in the following image, the left expression is a date field and operators available are limited accordingly.
Refer to the following matrix for an overview of the relationship operators available with each data type:
| Operator |
Data Type |
||||
| Booleans | Dates | Strings | Lookups | Numerics | |
| Is equal to |
|
|
|
|
|
| Is not equal to |
|
|
|
|
|
| Is greater than |
|
|
|||
| Is greater than or equal to |
|
|
|||
| Is after |
|
||||
| Is on or after |
|
||||
| Is less than |
|
|
|||
| Is less than or equal to |
|
|
|||
| Is before |
|
||||
| Is on or before |
|
||||
| Is blank |
|
|
|
|
|
| Is not blank |
|
|
|
|
|
| Is between |
|
|
|||
|
Reference the following list for an overview of information to consider for specific interactions and/or functions:
|
|
The following examples are valid for applications processed within Temenos Infinity, as well as Virtual Capture. |
The following example demonstrates how to create an interaction that calculates the total income for an applicant with multiple sources.
|
The following example assumes that Custom Fields exist to capture Monthly Regular Income, Monthly Retirement Income, Monthly Social Security Income, as well as an Empty Field titled Total Monthly Income. |
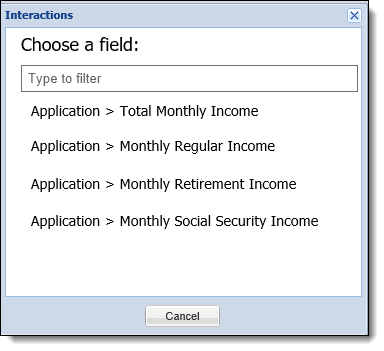
Navigate to the Interactions tab, click , and select Calculate Field. Within the Interactions pop-up window, select Total Monthly Income.
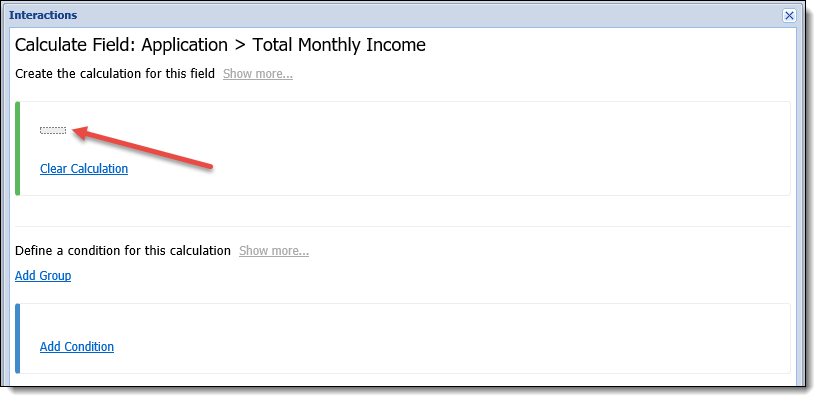
Once the Total Monthly Income field is selected, the Interactions pop-up window closes, and the Condition and Expression Builder appears. Click on the empty token in the Calculation section, and click the Equal sign (=) on the keyboard.
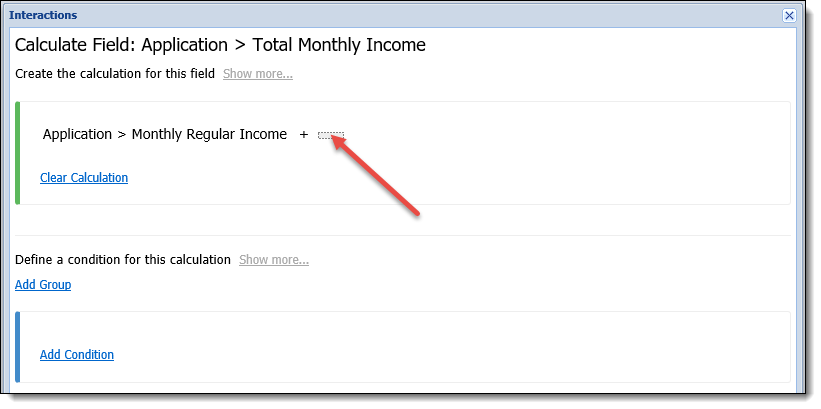
Upon clicking the Equal button, the field and function menu opens. Within this menu, select the Monthly Regular Income field. Once selected, the menu closes, and the Monthly Regular Income field appears in the calculation section.
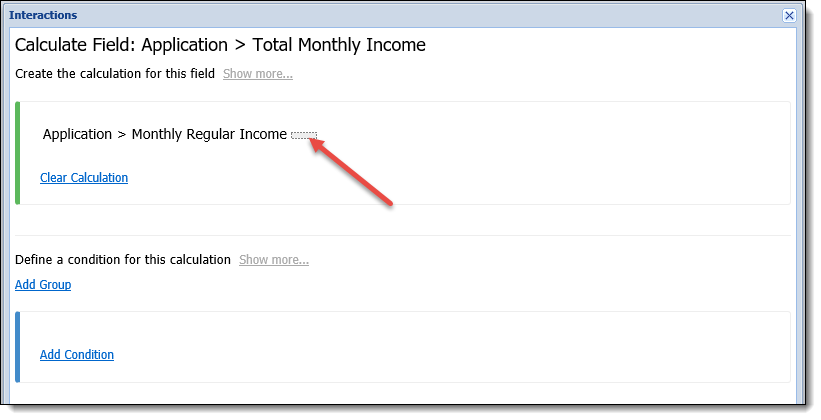
A new blank token appears to the right of the Monthly Regular Income field. Click the plus (+) symbol on the keyboard. The plus symbol populates in the calculation section. A new blank token appears to the right of the plus symbol.
Click on the empty token in the Calculation section, and click the Equal sign (=) on the keyboard. Upon clicking the Equal button, the field and function menu opens. Within this menu, select the Monthly Retirement Income field. Once selected, the menu closes, and the Monthly Retirement Income field appears in the calculation section. A new blank token appears to the right of the Monthly Retirement Income field. Click the plus (+) symbol on the keyboard. The plus symbol populates in the calculation section. A new blank token appears to the right of the plus symbol.
Repeat this process for the Monthly Social Security Income field.

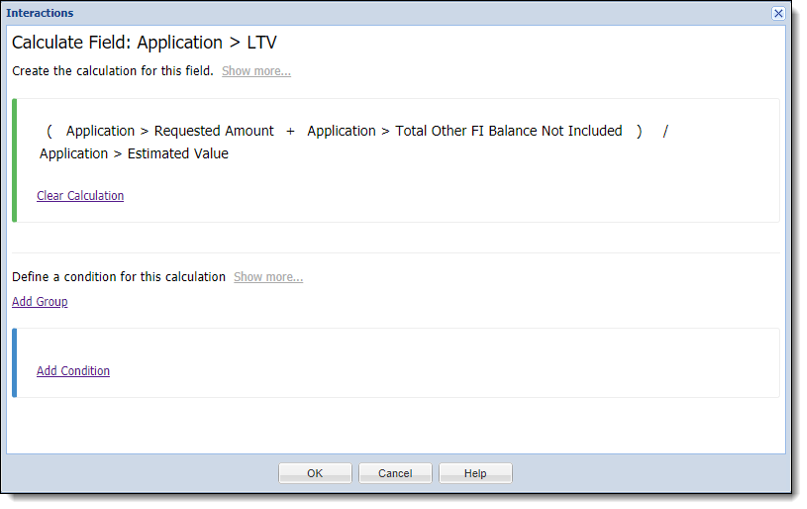
The following example demonstrates how to create a series interaction that interact with one another, and contain multiple calculations, custom/empty fields, and validations.
|
The following example assumes that Custom Fields exist to capture Other FI Balance 1 Payoff, Other FI Balance 1 Amount, Other FI Balance 2 Payoff, Other FI Balance 2 Amount, Total Other FI Balance Not Included, and Estimated Value; as well as an empty field that captures LTV. |
Navigate to the Interactions tab, click , and select Calculate Field. Within the Interactions pop-up window, select Total Other FI Balance Not Included.
.....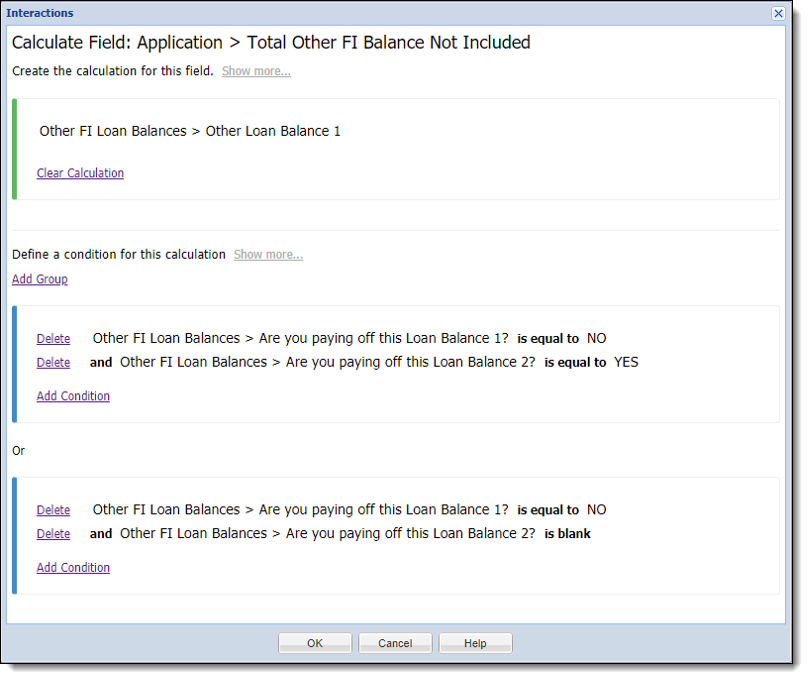
Once the final condition is entered, click OK to commit the interaction. The window closes, and the interaction displays in the Interactions grid.
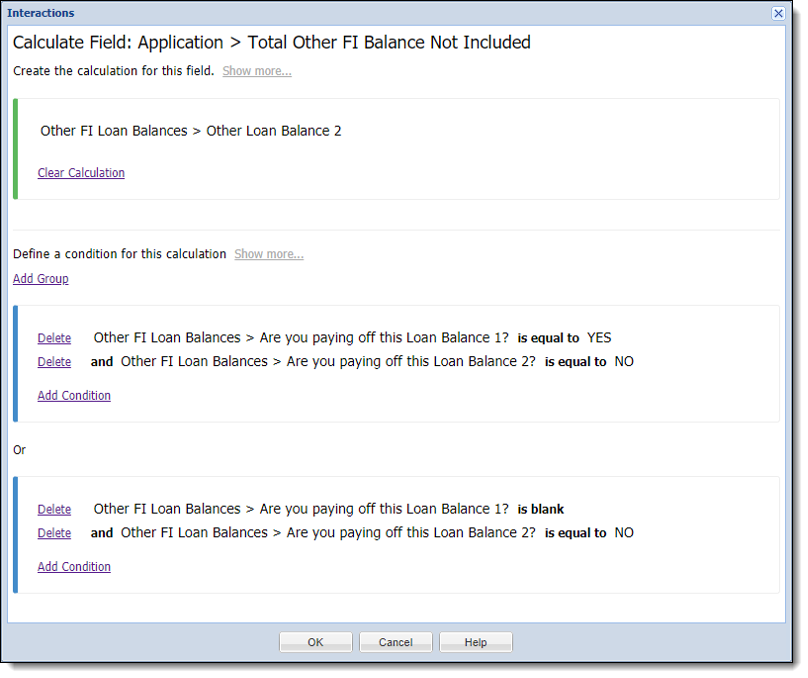
Click , and select Calculate Field. Within the Interactions pop-up window, select Total Other FI Balance Not Included.
 ..
.. ...
...
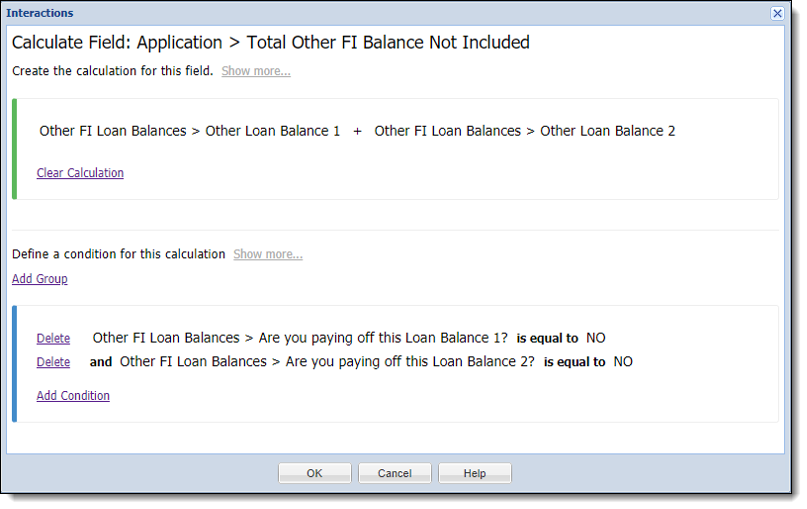
Click , and select Calculate Field. Within the Interactions pop-up window, select Total Other FI Balance Not Included.
..
Click , and select Calculate Field. Within the Interactions pop-up window, select LTV.
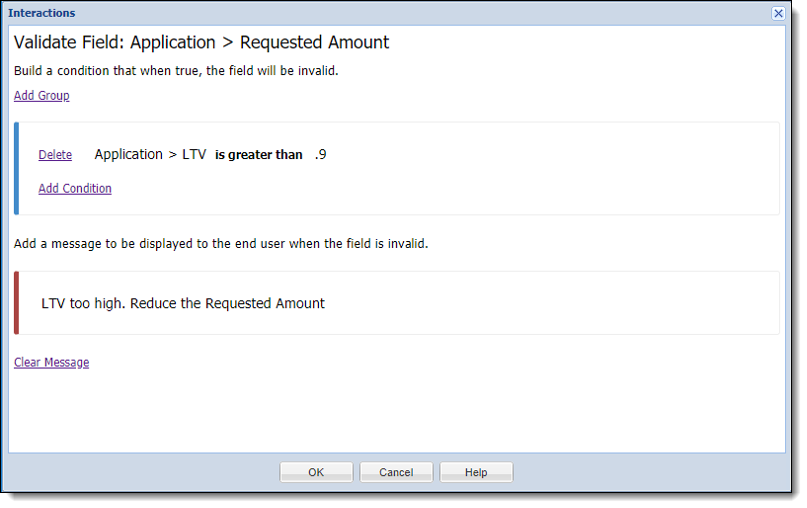
Click , and select Validate Field. Within the Interactions pop-up window, select Application Amount.
The following example demonstrates how to create an interaction that hides the References panel from the application, if the applicant has not had an account at the institution for at least a year.
|
The following example assumes that an Applicant screen has been created containing a References panel, as well as an Applicant panel with a TIN field. |
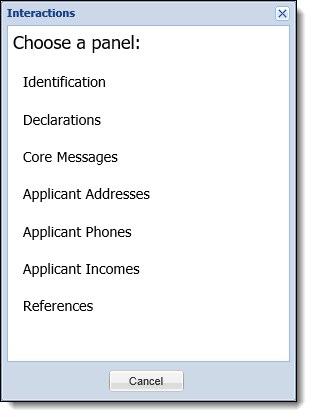
Navigate to the Interactions tab, click , and select Hide Panel. Within the Interactions pop-up window, select References.
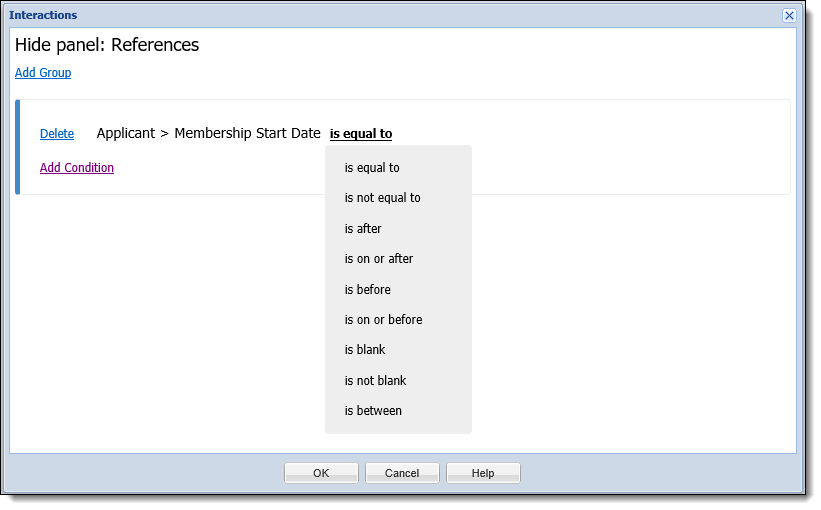
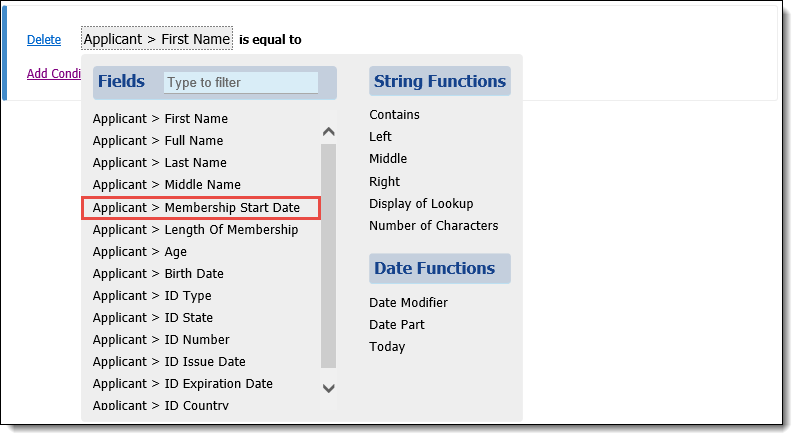
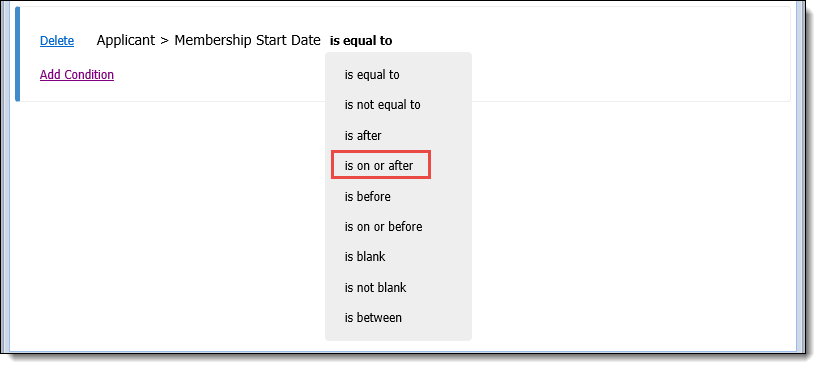
Once the References panel is selected, the Interactions pop-up window closes, and the Condition and Expression Builder appears. Click to begin authoring the hide conditions for the References panel. Click on the first token (Applicant > First Name) to open the field and function menu. Within the field menu, select Applicant > Membership Start Date.
The field and function menu closes and the first token displays as Applicant > Membership Start Date. Click on the relationship operator (is equal to) to open the relationship operator menu. For this example, click is on or after within the relationship operator menu.
The menu closes and the relationship operator displays is on or after. Click on the empty token to the right of is on or after, and click the Equal sign (=) on the keyboard.

Upon clicking the Equal button, the field and function menu opens. Select Date Modifier from the functions menu to identify the Membership Start Date being tested by the condition. Once clicked, the Date Modifier Input window opens. Update the Choose Date, Operation, Value, and Date Part attributes as displayed in the image below:

Once all function attributes have been set, click Update. The Date Modifier Input window closes, and the function populates to the right of the relationship operator in the condition.
Based on the logic in this condition, the References panel only appears in the Applicant screen if the applicant has been an account holder at the institution for at least a year.
The following example demonstrates how to create an interaction that hides the TIN field from the application, if the applicant is a current account holder.
|
The following example assumes that an Applicant screen has been created containing an Applicant panel that includes the TIN field. |
Navigate to the Interactions tab, click , and select Hide Field. Within the Interactions pop-up window, select Applicant > TIN.

Once the Applicant > TIN field has been selected, the Interactions pop-up window closes, and the Condition and Expression Builder appears. Click to begin authoring the conditions that hide the Applicant > TIN field. Click on the first token (Applicant > First Name) to open the field and function menu. Within the field menu, select Applicant > Membership Start Date.

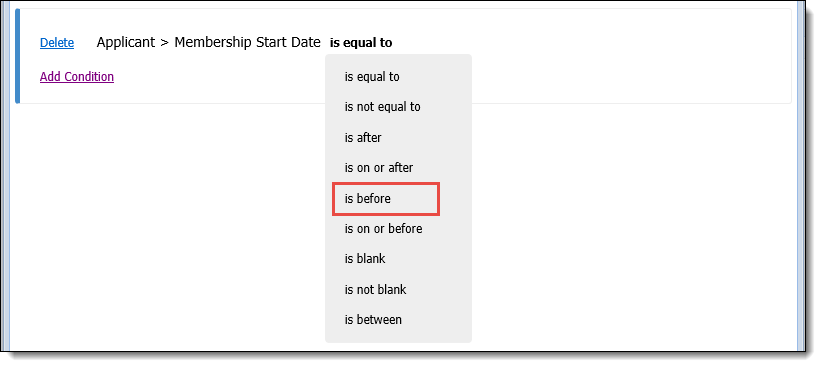
The field and function menu closes, and the first token displays Applicant > Membership Start Date. Click on the relationship operator (is equal to) to open the relationship operator menu. Click is before within the menu.
The menu closes, and the relationship operator displays as is before. Click on the empty token to the right of is before and click the Equal sign (=) on the keyboard.

Upon clicking the Equal sign, the field and function menu opens. Select Today from the function menu. The field and function menu closes, and Today populates to the right of the relationship operator in the condition.
Based on the logic in this condition, the TIN field does not appear in the Applicants panel, if the applicant is an existing account holder at the institution.
|
This example only applies to Virtual Capture applications, as the Hide Lookup Value interaction type is only available for Virtual Capture screens. |
The following example demonstrates how to create an interaction that limits the options available for an applicant to select for his or her Additional Income Frequency in Virtual Capture based on the Income Type.
|
The following example assumes that a Primary Applicant panel titled My Personal Info has been assigned to a Virtual Capture screen, and configured to include the Additional Income Frequency and Additional Income Type lookup fields. |
While creating a Virtual Capture screen, navigate to the Interactions tab, click , and select Hide Lookup Value. Within the Interactions pop-up window, select the Additional Income Frequency field.
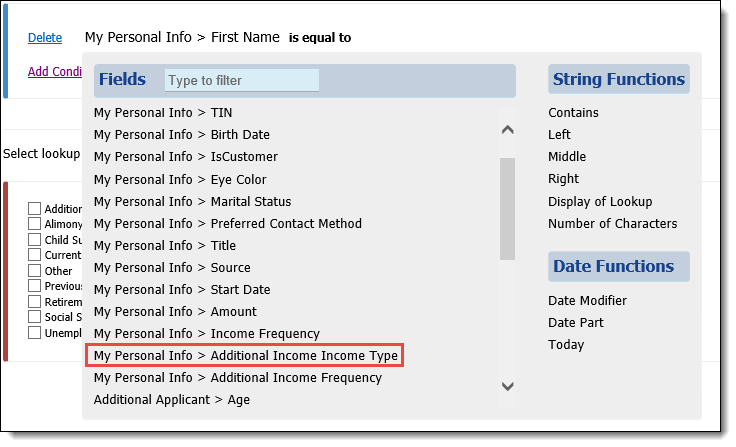
Once the Additional Income Frequency field has been selected, the Interactions pop-up window closes, and the Condition and Expression Builder appears. Click to begin authoring the condition(s) that hide the values for the applicant's Additional Income Frequency. Click on the first token (My Personal Info > First Name) to open the field and function menu. Within the field menu, select the Additional Income Income Type field.
The field and function menu closes, and the first token displays My Personal Info > Additional Income Income Type. The relationship operator automatically updates to display is equal to, and the right expression displays the lookup options for the Additional Income Income Type. From this list, identify the income types that determine when values for the Additional Income Frequency field are hidden in a virtual application.
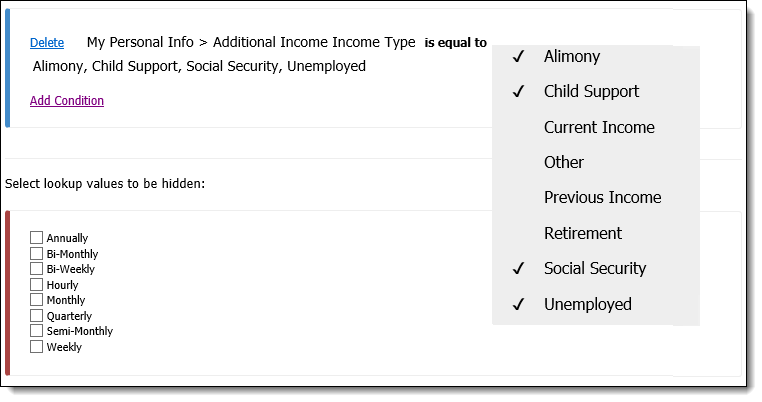
Once the condition is complete, select the lookup values to be hidden for the Income Frequency if an applicant selects one of the identified income types in Virtual Capture:
|
Within this section, a check box is displayed for each lookup value configured for the lookup in System Management > Origination > Field Configurations. |
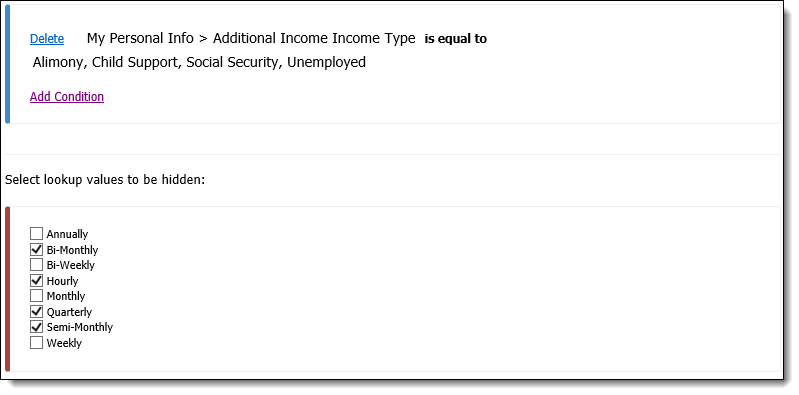
Based on the logic in this condition, values for Bi-monthly, Hourly, Quarterly, and Semi-monthly are not available to select for the Additional Income Frequency field in a virtual application, if the applicant selects Alimony, Child Support, Social Security, or Unemployed as the Additional Income Income Type.
|
Watch the following video to see this interaction type in action!
|
The following example demonstrates how to create an interaction that hides all addresses that are not current within the Applicant Addresses panel.
|
The following example assumes that an Applicant screen has been created containing an Applicant Addresses panel that includes the Address Type column. |
Navigate to the Interactions tab, click , and select Hide Row. Within the Interactions pop-up window, select Applicant Addresses.

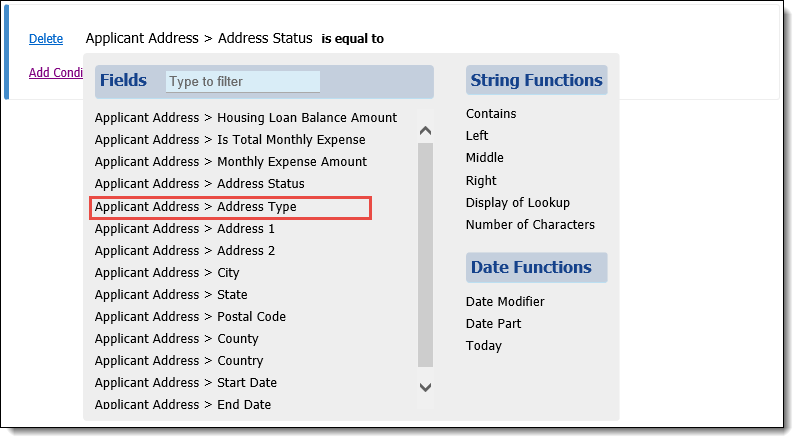
Once the Applicant Addresses panel is selected, the Interactions pop-up window closes, and the Condition and Expression Builder appears. Click to begin authoring the hide conditions for the Applicant Addresses panel. Click on the first token (Applicant Addresses > Address Status) to open the field and function menu. Within the field menu, select Applicant Addresses > Address Type.
The field and function menu closes, and the first token displays Applicant Addresses > Address Type. The relationship operator automatically updates to display is equal to, and the right expression displays the lookup options for Address Type.
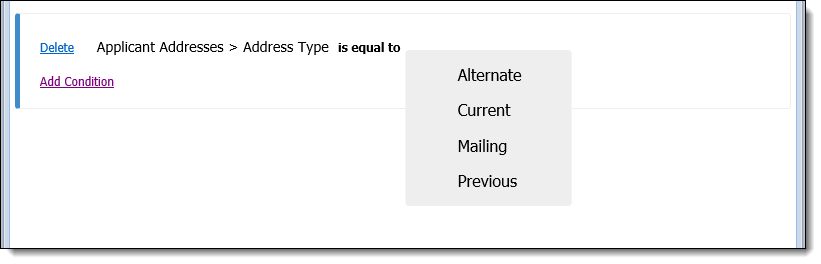
Select Alternate, Mailing, and Previous from the lookup options.
Based on the logic in this condition, the Applicant Addresses panel only displays current addresses.
The following example demonstrates how to create an interaction that validates the values entered within the Applicant > Birth Date field.
|
The following example assumes that an Applicant screen has been created containing an Applicant panel that includes the Birth Date field. |
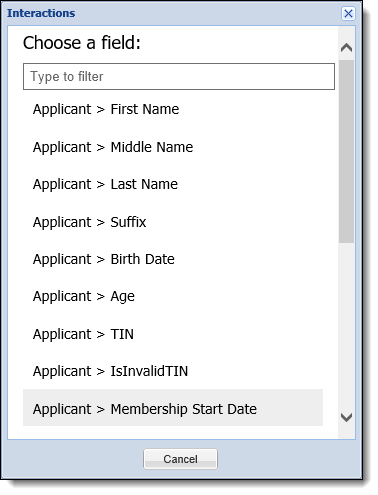
Navigate to the Interactions tab, click , and select Hide Field. Within the Interactions pop-up window, select Applicant > Birth Date.
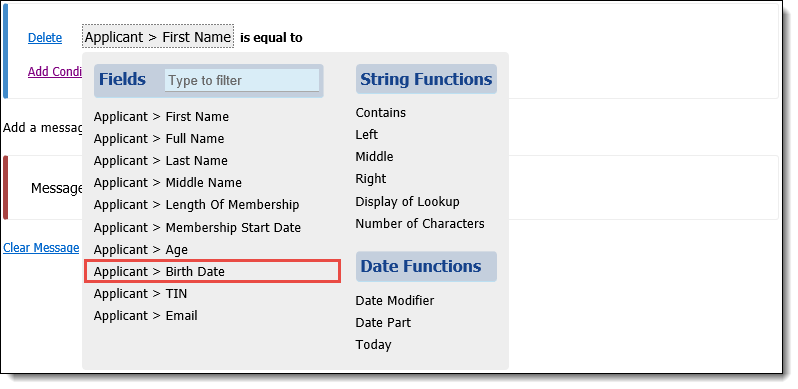
Once the Applicant > Birth Date field has been selected, the Interactions pop-up window closes, and the Condition and Expression Builder appears. Click to begin authoring the conditions in which a value entered in the Birth Date field is invalid. Click on the first token (Applicant > First Name) to open the field and function menu. Within the field menu, select Applicant > Birth Date.
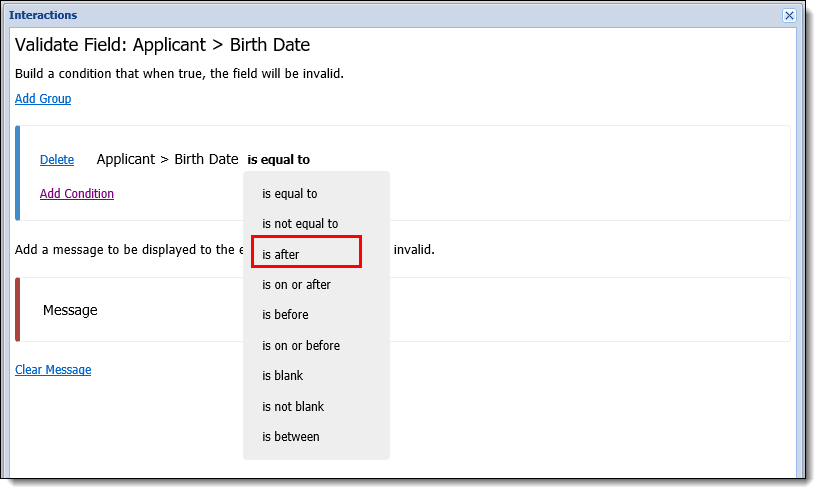
The field and function menu closes, and the first token displays Applicant > Birth Date. Click on the relationship operator (is equal to) to open the relationship operator menu. Click is after within the menu.
The menu closes, and the relationship operator displays as is after. Click on the empty token to the right of is after and press the Equal sign (=) on the keyboard.

Upon pressing the Equal sign, the field and function menu opens. Select Today from the function menu. The field and function menu closes, and Today populates to the right of the relationship operator in the condition. Click within the Validation Message token, and enter the message that displays to an end user, if an invalid entry has been made.
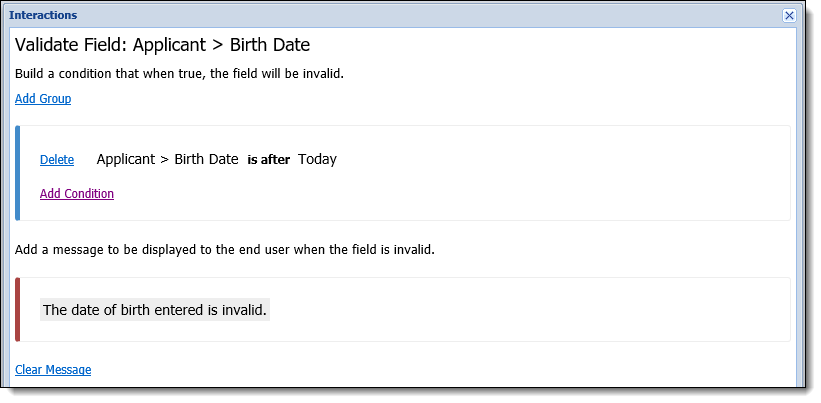
Based on the logic in this condition, if the end user enters a future date in the Birth Date field, a validation message instructs the user that an invalid value has been entered.
 Condition Logic
 or
or  to be clicked.
 and collapse a grouping by clicking
  .
.