
Temenos Lifecycle Management Suite - Origination Product Guide
Loan Workflow Models
| Administrator Guide > Loan Origination Overview > Defining Models > Loan Workflow Models |
Workflow Models allow system administrators to customize the application experience by assigning Screens and Workflows to the application process. Once created, a Workflow Model is assigned at the sub-product level within System Management > Origination > Loan > Loan Application Types.
 |
A single workflow model is able to be used by multiple sub-products; however, a loan sub-product may only have one workflow model assigned. |
The Loan Workflow Models page can be accessed from System Management > Origination > Loan > Loan Workflow Models and provides a complete list of all workflow models used within Temenos Infinity’s Loan Origination module. From this page, administrators are provided with the functionality to configure workflow models that efficiently organize and customize an institution's application process.
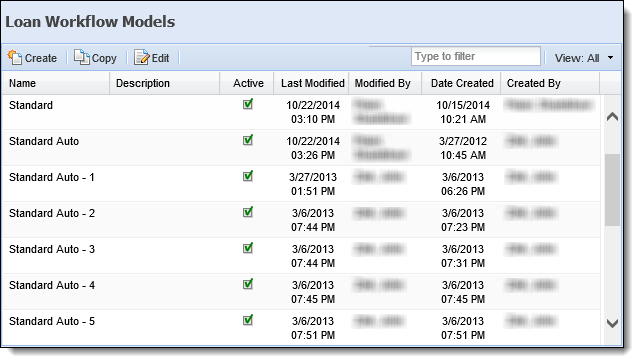
The Loan Workflow Models page displays information about each workflow model within the following columns:
| Column Name | Description |
| Name | Displays the name of the workflow model. |
| Description | If provided, displays a description of the workflow model. |
| Active | Displays a  if the workflow model is active. if the workflow model is active. |
| Last Modified | Denotes when the last modification was made. |
| Modified By | Denotes who made the last modification. |
| Date Created | Denotes when the workflow model was created. |
| Created By | Denotes who created the workflow model. |
The Loan Workflow Models topic includes the following attributes and instructions to assist administrators with creating, copying, and editing workflow models:
All Loan Workflow Models share common attributes that are defined when creating, copying, or editing a Workflow Model.
General attributes include basic information pertaining to the Workflow Model.
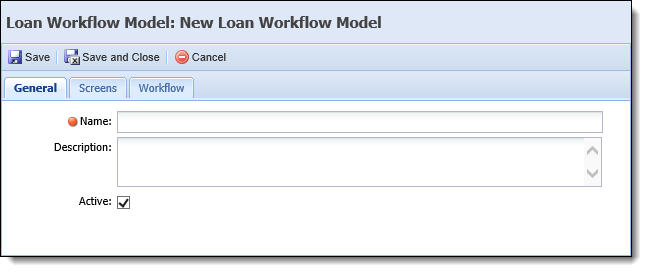
The following General attributes are defined on the General tab:
| Field | Description | ||
| Name | Enter a unique name for the Loan Workflow Model. | ||
| Description | Enter a description that identifies the purpose of the Loan Workflow Model. | ||
| Active |
Select the Active check box to make the Loan Workflow Model available to be assigned.
|
Screen attributes enable administrators to assign default screens to populate within the Application Navigator as well as select the screens to be available for processing applications using the workflow model.
|
For more information on the Application Navigator, please see the Application Workspace Overview topic within this guide. |
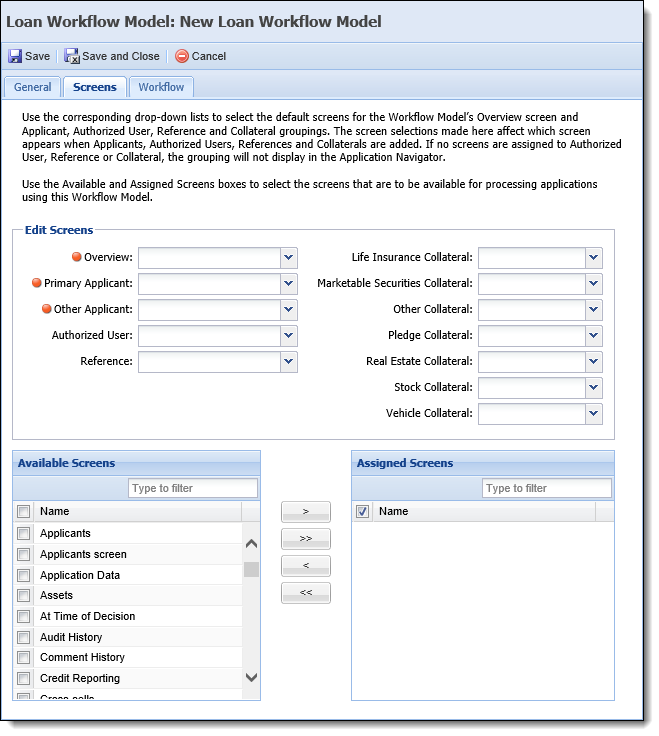
The following Screen attributes are assigned within the Screens tab:
Edit Screen attributes allow the administrator to assign screens to be used by the workflow model’s Overview, Applicants, Authorized Users, Collaterals, and References sections in the Application Navigator. If any user-defined screens have been created in System Management > Origination > Screens, they populate within the drop-down lists. If no user-defined screens have been created, only System and Custom screens are displayed.
Use the drop-downs to assign the following screens:
|
Each drop-down contains the screens that match the screen type. |
| Screen | Description |
| Overview | Select the screen used for the application Overview. This is the first screen that appears when opening an application that is in process. It is recommended to configure this screen to include fields and panels that provide a general summary of the application. |
| Primary Applicant | Select the screen used to capture the Primary Applicant's information. |
| Other Applicant | Select the screen used to capture the Other Applicant's information. |
| Authorized User | Select the screen used to capture Authorized User information. |
| Reference | Select the screen used to capture Reference information. |
| Life Insurance Collateral | Select the screen used to capture information for Life Insurance collateral. |
| Marketable Securities Collateral | Select the screen used to capture information for Marketable Securities collateral. |
| Other Collateral | Select the screen used to capture information for Other collateral. |
| Pledge Collateral | Select the screen used to capture information for Pledge collateral. |
| Real Estate Collateral | Select the screen used to capture information for Real Estate collateral. |
| Stock Collateral | Select the screen used to capture information for Stock collateral. |
| Vehicle Collateral | Select the screen used to capture information for Vehicle collateral. |
|
If screens are not mapped to the Applicants, Authorized Users, Collaterals, or References fields, the sections do not appear in the Application Navigator. |
Available/Assigned Screen attributes allow the administrator to assign screens to appear within the Screens List in the Application Navigator.
The following attributes are assigned within this section:
| Attribute | Description |
| Available | Displays a list of all Application and Account Product screens configured in System Management > Origination > Screens. Assign screens to the workflow model by selecting a screen from the list and moving it to the Assigned Screens box using the arrows that display. |
| Assigned | Displays a list of the screens assigned to the workflow model. Once the workflow model is saved and assigned to a sub-product, the screens within this box appear within the Screens List in the Application Navigator. |
|
Screens in the Assigned Screens box are independent of the Workflow. It is possible to have screens assigned to the Application Navigator that are not used in the defined Workflow. |
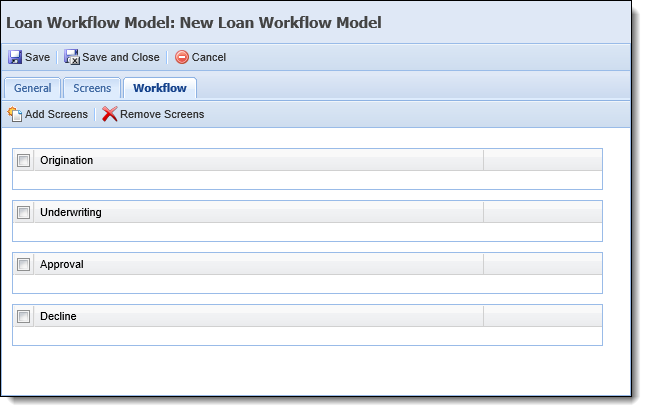
The Workflow provides a suggested order in which the application is to be completed and is built according to the various stages of the application life cycle.
|
For more information on the life cycle of a loan application, please see the Application Processing Overview topic within the End-User guide. |
Workflow attributes are assigned within the Workflow tab. This tab displays a list of the screens assigned to the Origination, Underwriting, Approval, and/or Decline categories of an application and provides administrators with the ability to add and remove the screens that are presented within each stage of the workflow.
The Create function enables administrators to define the logic and structure of a Loan Workflow Model. This function provides the ability to configure and customize the application process to meet an institution’s business needs.
To create a workflow model, navigate to System Management > Origination > Loan > Loan Workflow Models and click  .
.

Within the Workflow Model configuration window, define the General workflow model attributes.
Once all General attributes are defined, select the Screens tab to assign Screen attributes.
After assigning screen attributes, navigate to the Workflow tab to configure Workflow attributes and perform one of the following actions:
 |
1. If screens are added or removed from a workflow model that is already assigned to a sub-product, the changes are not reflected within “In Progress” applications unless a Change Product action is performed. |
 .
.
The Select Screens window lists all Application and Account Product screens configured in System Management > Origination > Screens.
For user convenience, a Filter appears in the top-right corner of the Select Screens window. Enter keywords to narrow down the available choices within the Screen list. Additionally, users are able to sort the list alphabetically by clicking the column header.
Assigning screens to each stage of the workflow is not mandatory. If no screens are mapped to a workflow category, that stage does not appear in the Application Navigator, nor does it occur during the application process.
When a new application is created, the first screen of the Workflow displays as the default screen. This typically is the first screen assigned to the Origination stage of the Workflow; however, if there are no screens assigned to Origination, the first screen in the Underwriting stage displays as the default screen. Screens only display for a user if they have permissions to view or edit these screens.
 and repeat the addition process.
 .
. .
.
Selecting the check box within a category heading automatically selects all screens under the category.
Once all tabs are complete, review each tab for accuracy. After all updates have been made to the workflow model, click  .
.
The newly created workflow model now appears within the grid on the Loan Workflow Models page and is available to be assigned to screens and loan sub-products.
The Copy function enables administrators to duplicate the logic and structure of an existing workflow model. The existing workflow model can be used as the base for creating a new workflow model. Copying a workflow model provides administrators with the ability to add, modify, or delete screens, as well as workflow and validation logic. Users are then able to save it with a different name in order to create a new workflow model.
 . to retain all changes and finalize the creation of a new workflow model.
The Edit function enables administrators to revisit an existing workflow model and modify the existing logic to enhance usability.
 . to finalize the workflow model’s modifications.