
Temenos Lifecycle Management Suite - Recovery Product Guide
Collection
| Administrator Guide > Modules > Collection |
The Collection page (System Management > Modules > Collection) allows administrators to manage several features in Temenos Infinity. This page serves as a centralized hub for important Collection settings.
This tab contains general collections settings.
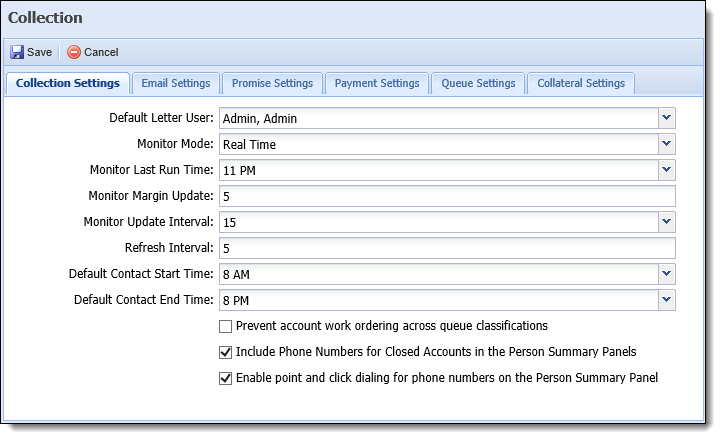
The following fields are displayed:
| Field | Description | ||||
| Default Letter User |
This drop-down contains a listing of all users in Temenos Infinity, both active and inactive. The user defined in this field is added to those letters where the collector name is a merge field in the template when the letter is generated via an automated queue.
|
||||
| Monitor Mode |
This drop-down determines how dashboards are to be updated. By default, Monitor Mode is set to Batch.
This number is in minutes. Temenos does not recommend anything less than 60 minutes (1 hour). If the process is constantly running it could potentially slow down the server, as the process is constantly hitting the database to obtain the necessary data to update the information on the dashboards. |
||||
| Monitor Last Run Time | This determines what time the Monitor process runs at the end of the day. | ||||
| Monitor Margin Update | Specify a percentage to be used throughout the Monitor process to determine how trend arrows are defined in the Monitor Margin Update field. If the Monitor Margin Percentage is set at 2%, then 98%-102% performance calculations are represented by a yellow dash, indicating “Even.” Performance calculations under 98% are represented by a red “Down” arrow. Performance calculations over 102% are represented by a green “Up” arrow. If the Monitor Margin Percentage is set at 5%, 95%-100% would be “Even,” fewer than 95% would be “Down” and over 105% would be “Up.” | ||||
| Monitor Update Interval | Determine how often the monitor and queue home page are updated. | ||||
| Default Contact Start Time | Determine the default start time an account created within Temenos Infinity can begin to be worked. | ||||
| Default Contact End Time | Determine the default end time an account created within Temenos Infinity can be worked. | ||||
| Prevent account work ordering across queue classifications checkbox | Select the check box to separate Delinquency and Recovery queues into two tabs within the Collection Queue Work Order page in System Management. This prevents accounts that may fall into both queue classifications from being worked across both. | ||||
| Include Phone Numbers for Closed Accounts in the Person Summary Panels | This check box determines if phone numbers related to closed accounts for the PersonMasterID are displayed in the Other Phones window, which is accessed from the Person Summary panel in the workspace. By default, this parameter is set to true to display phone numbers for closed accounts in the Other Phones window. If desired, clear the check box to exclude phone numbers related to closed accounts from the Other Phones window. | ||||
| Enable point and click dialing for phone numbers on the Person Summary Panel |
This check box determines if users are able to call an account holder by clicking on the phone numbers in the Person Summary Panel. When this check box is selected, the phone numbers displayed in the Person Summary Panel display as hyperlinks.
|
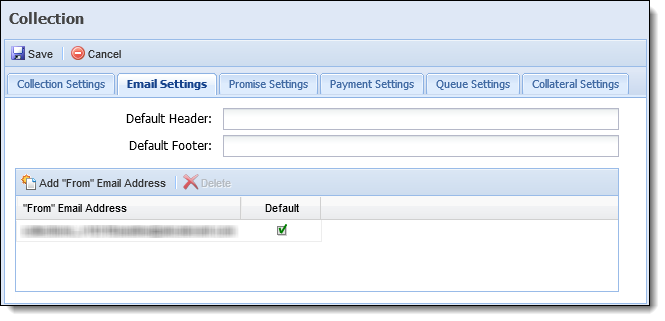
This tab allows administrators to configure settings for when emails are sent using the Send Email workflow step. If necessary, define a header and footer to display by default when an email is sent. These settings can be changed manually from within the workflow step.
Also, administrators can manage the list of “From” email addresses that a user can choose from when sending an email using the Send Email workflow step. Clicking Add “From” Email Address populates a new line item in the grid. Click within the line item and enter in an email address. When finished click Save or click Cancel to erase the text entered. Click the checkbox to make it a default selection. To delete an email address from the list, highlight an item in the grid and click Delete.
Within the Promise Settings tab, define the company settings for Promise to Pay. In the top section, determine the minimum/maximum payments, days, and amounts for promises. If a user exceeds any of these settings set forth by an administrator, a message appears indicating that the promise to pay needs management approval. Management approval occurs in System Management > Collections > Promise Approval.
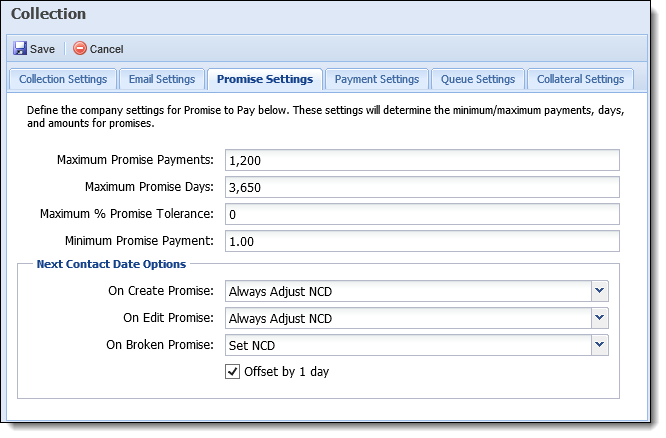
The following fields display within this tab:
| Field | Description |
| Maximum Promise Payments | Determines the maximum number of promise payments a user can take as part of a promise to pay. |
| Maximum Promise Days | Determines the maximum number of days in which the user can set the due date of the first payment. |
| Maximum % Promise Tolerance | Determines the maximum discount percentage that can be applied to a promise. |
| Minimum Promise Payment | Determines the minimum promise amount a user can take when obtaining a promise to pay. |
Within the Next Contact Date Options section, determine how an account’s next contact date is adjusted when a promise is created, edited, or broken. The following options are available to select within the drop-downs:
 |
Set NCD is only available for the "On Broken Promise" Next Contact Date Option. |
If desired, the Offset by 1 day parameter can be selected to automatically advance the Next Contact Date by one day for a promise, in order to ensure that account holders are not contacted until a promise is actually considered broken, one day after the due date.
|
The Offset by 1 day parameter only applies to the On Create Promise and On Edit Promise options. This parameter cannot be set for broken promises. |
These Next Contact Date Options are used in conjunction with the Promise Delay setting configured for the payment type being used for the promise in order to adjust the Next Contact Date appropriately.
|
The Promise Delay Setting for a payment type is configured in System Management > Payment Types. For more information on the Promise Delay setting, please see the Payment Types topic in this guide. |
For example, if the On Create Promise Next Contact Date Option is set to "Always Adjust NCD," and the Offset by 1 day parameter is set to true, when a promise is created on an account, and payments are to be made by a payment type with a Promise Delay of two days, then the Next Contact Date on the account is automatically set to a date that is three days after the date the last payment is due. If the Promise Due Date is June 15th, the Next Contact Date is set to June 18th.
 |
In the above example, if the Offset by 1 Day Parameter is set to false, the Next Contact Date is set to June 17th, which is two days after the Promise Due Date. |
The Payment Settings tab provides the ability to manage how payment reversals are handled in Temenos Infinity when negative payments such as payments reversals and adjustments are supported by the Host.
|
To learn more about how payment reversals are supported in a specific Core, please see the applicable Core Connector Guide. |
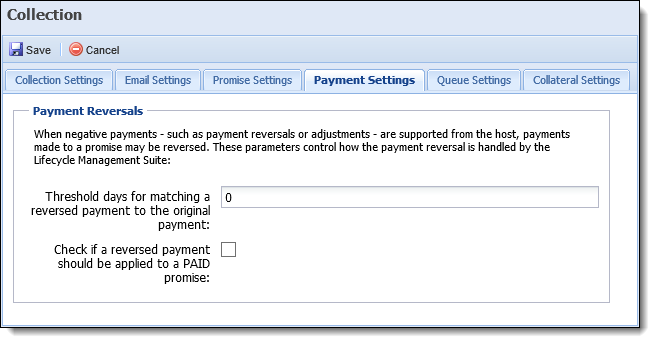
The following fields display within this tab:
| Field | Description |
| Threshold days for matching a reversed payment to the original payment |
Enter the number of days a reversed payment can be matched to an original payment within Temenos Infinity. |
| Check if a reversed payment should be applied to a PAID promise |
Select this check box to change the status of a promise if any payments made match the promise. |
The Queue Settings tab allows administrators manage options that affect queuing in Temenos Infinity.
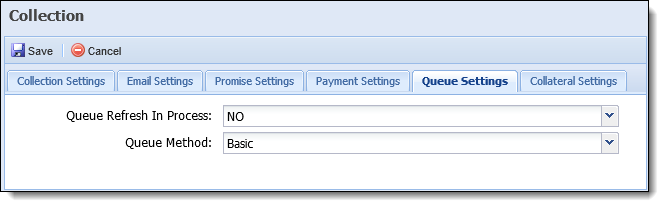
The following options display in this tab:
| Field | Description | ||
| Queue Refresh In Process |
Displays as “YES” when a Queue Refresh is currently processing. Change the option to “NO” to stop the Queue Refresh process.
|
||
| Queue Method |
Select the method of queuing to be applied in Temenos Infinity.
Basic: With Basic Queuing, queues are built using account criteria and accounts fall into an individual queue. An evaluation of the person does not occur. Advanced: With Advanced Queuing, system administrators can author simple or complex business rules to determine Queue Eligibility and use account and/or account holder attributes to organize and assign accounts and persons to a collections queue. This method of queuing provides the ability to not only queue individual accounts, but also the person and all of their eligible, non-queued accounts as well. With Advanced Queuing, administrators can define Queuing Rules in System Management > Collections > Rules Management to determine Queue Eligibility and automatically assign a person and all of their accounts to specific queues as rule conditions are met. Please see the Advanced Queuing topic within this Guide for more information. To learn more about authoring Business Rules, click here.
|
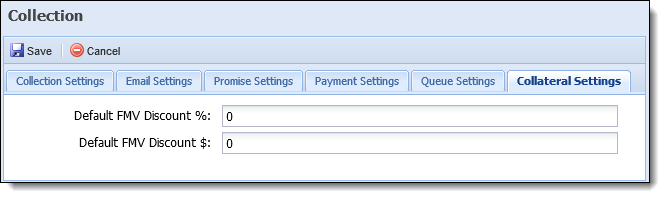
The following fields display on this page:
| Field | Description |
| Default FMV Discount % | Set the default Fair Market Value percentage. This value appears by default in the Equity Analysis screen but can be overwritten by the user. |
| Default FMV Discount $ | Set the default Fair Market Value dollar amount. This value appears by default in the Equity Analysis screen but can be overwritten by the user. |
When finished configuring settings within the Collection page, click Save. Click Cancel to close the page without saving any changes.
