You can link any type of document to a client record from the Docs tab.
This topic contains these sections:
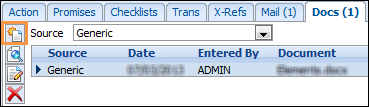
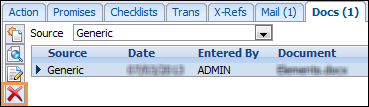
Select the Docs tab in the Workspace. On this page you can link, view or delete a document.

Create/Link a New Document
- Click the Docs tab on the Workspace. The total number of documents that are currently linked to this client is displayed in brackets on the Docs tab.
- All documents for this client are displayed on the Docs page.
- Select Generic from the listbox.
- Click the New button. Some users may have restricted access to this button depending on their Security Profile.
- By default the document will be linked to the highlighted loan and contact.
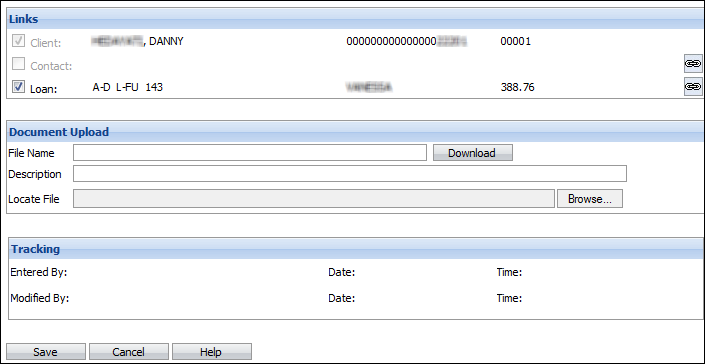
Fields Description Links Clear the checkmarks in the Links section if you do not wish to link the document to either the loan or the contact. Description Enter a description of the document. Browse Click the Browse button to locate the file you want to link to this loan/client. You can select any type of file (e.g. document, spreadsheet, image, pdf, etc.). - Click Save.
View a Document
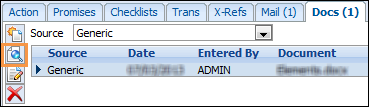
- Click the Docs tab. The total number of documents that are currently linked to this client is displayed in brackets on the Docs tab.
- Click on the document that you want to view.
- Click the View button.
Edit a Document
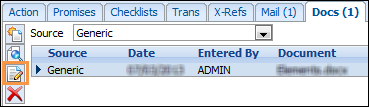
- Click the Docs tab. The total number of documents that are currently linked to this client is displayed in brackets on the Docs tab.
- Click the document that you want to edit. You can attach a different document, change the description or change which loan the document is attached to.
- Click the Edit button.
Delete a Document
- Click the Docs tab. The total number of documents that are currently linked to this client is displayed in brackets on the Docs tab.
- All documents for this client are displayed on the Docs page.
- Select the document that you wish to delete.
- Click the Delete button.
If you delete a document you are just unlinking it from this record. The file itself will still exist.
