Temenos Lifecycle Management Suite - Loan Origination Product Guide
Users
| Administrator Guide > Security and Permissions > Users |
The System User functionality is used to create and maintain the Temenos Lifecycle Management Suite users for the organization. The Users page displays all users for the organization. The default view of this page is the All Users view, which lists all users in alphabetical order by username. The following columns display in the Users page:

| Column Name | Description |
| Username | Displays the user name of the user. |
| Name | Displays the full name (Last, First) of the user. |
| Active | If checked, the user name is active in the Lifecycle Management Suite. |
| Logged In | If checked, the user is currently logged into the Lifecycle Management Suite. |
| Last Login | Displays when the date and time of when the user was last logged in. |
From the Users page, administrators can perform the following actions:
Click  . The New User screen appears. The following tabs display on the new user screen:
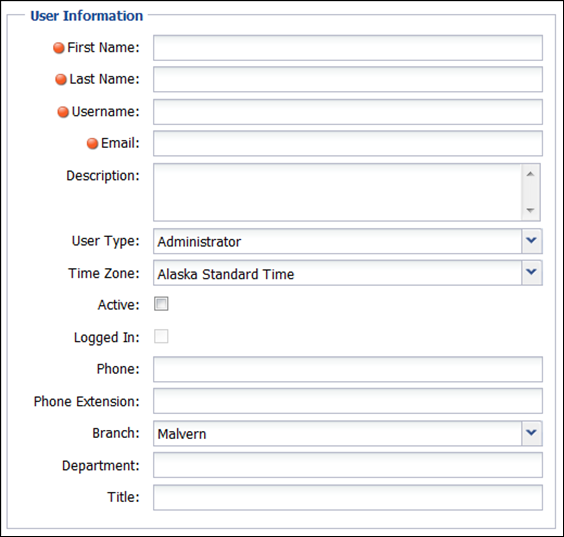
The User Information tab displays by default. Certain fields within this section can be included within letter and email templates. The following fields display within the User Information section in the tab:
| Field Name | Description |
| First Name | Enter the first name of the new user. This is a required field. |
| Last Name | Enter the last name of the new user. This is a required field. |
| Username | Define a username for the new user. This is used to log into the Lifecycle Management Suite if not using Windows Authentication. This is a required field. |
| Enter in the new user’s email address. This is a required field. | |
| Description | If necessary, enter in a description for the new user. |
| User Type | Define the role of the user within the Lifecycle Management Suite from this drop down. This correlates to the workflow history colors under System Management > Administrative Settings. The security for the user is not determined by this drop down. |
| Time Zone | Define the time zone for the user. This reflects the time that displays in a workflow history screen when an account is worked. |
| Active | Check this box to make the user an active user in the Lifecycle Management Suite. Leave this box unchecked to deactivate a user. |
| Logged In | If checked, this box indicates whether the user is logged in (this is used as a reference for when an existing user is being edited). |
| Phone | Enter in the phone number of the new user. |
| Phone Extension | Enter in the phone extension of the new user. |
| Branch | If there are multiple branches, select the branch where the user works. This is System defined. |
| Department | Enter the name of the user's department. |
| Title | Enter the job title of the new user. |
Within the Framework Authentication section, define the sign-in method of the new user. If System is selected, the user is required to enter in a username and password to sign into the Lifecycle Management Suite. The administrator must define the password in this section.
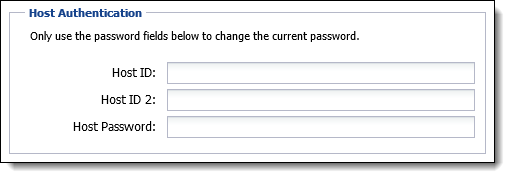
Within the Host Authentication section, define the Host ID, Host ID 2, and Host Password for the host system.
 |
These settings are only for the DataSafe, Summit, Symitar, and XP2 Origination host systems. |
Within the Company Information tab the following sections display: Company Information and Organization Structure.
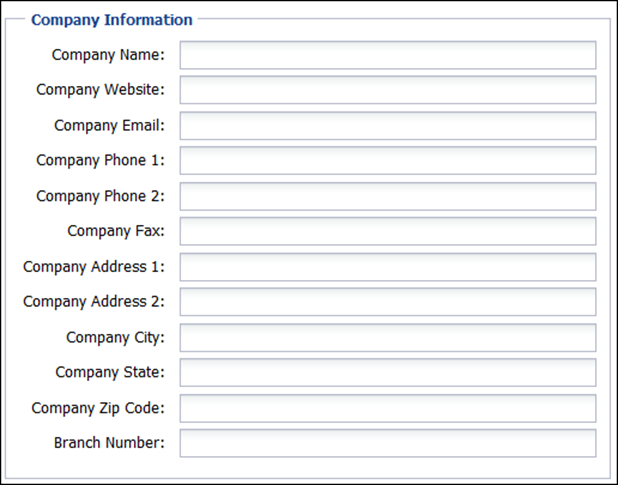
The following fields display within the Company Information section:
|
The fields within the Company Information section are for informational purposes only. |
| Field Name | Description |
| Company Name | Enter the name of the company. |
| Company Website | Enter the website URL for the company. |
| Company Email | Enter the email address for the company. |
| Company Phone 1 | Enter in the primary phone number for the company. |
| Company Phone 2 | Enter an additional phone number in which the company can be reached. |
| Company Fax | Enter in a fax number for the company. |
| Company Address 1 | Enter the first line of the company address. |
| Company Address 2 | Enter in the second line of the company address. |
| Company City | Enter the city in which the company is located. |
| Company State | Enter the state in which the company is located. |
| Company Zip Code | Enter the zip code in which the company is located. |
| Branch Number | Enter the branch number of the company. |
Within the Organization Structure section, define how the user is to be grouped for easier reporting purposes. These fields are defined in System Management > Field Configurations.

Within the Personal Information tab, define the new user’s personal information. The following fields display in this tab:
|
The fields within the Personal Information section are for informational purposes only. |

| Field Name | Description |
| Address 1 | Enter the first line of the user’s home address. |
| Address 2 | Enter the second line of the user’s home address. |
| City | Enter the city in which the user resides. |
| State | Enter the state in which the user resides. |
| Zip Code | Enter the Zip Code in which the user resides. |
| Home Phone | Enter the home phone number of the user. |
| Other Phone | Enter an additional phone number of the user. |
| Home Email | Enter in the personal email address of the user. |
Within the Collections Settings tab, set collection standards for the new user. These fields are used by administrators to track collection performance.
The following fields display within this tab:

| Field Name | Description | How contributes to User Performance | ||
| Daily Work Hours | Identifies the number of hours per a day that the user is expected to work. | N/A | ||
| Total Calls per Hour | Identifies the number of calls that a collector is expected to make per hour. |
Used to determine:
|
||
| Target % Contacts | Identifies the percentage of calls placed by the user expected to result in a successful, valid contact. |
Used to determine:
|
||
| Target % Promises | Define the percentage of successful promises the user must meet. |
Used to determine:
|
||
| Target % Promises Kept | Define the percentage of successful promises kept the user must meet. |
Used to determine:
|
||
| Max Promise Days | Identifies the maximum number of days a collector can define for the time period in which the total promise must be fulfilled. For example, if the max promise days is set to 30 days and the user sets the promise to be completed in 45 days, the promise goes to management for approval. |
N/A | ||
| Max First Payment Days | Identifies the maximum number of days in advance that a collector can schedule the first promise payment. For example, if the max first payment days is set to 10 days and the user schedules the first payment in 20 days, the promise goes to management for approval. |
N/A | ||
| Max promise payments |
Identifies the maximum number of payments in which a user is able to divide a promise payment.
For example, if the max promise days in System Management > Solution > Collection is equal to 4, and the user sets up 5 payments, the promise is deferred to management approval. |
N/A | ||
| Max % Promise Tolerance |
Identifies the maximum percentage of the total promise amount that a user can accept to satisfy the promise payment. A promise payment can be short without being considered broken as long as the payment meets the discount requirement specified here.
|
N/A | ||
| Min Promise Value As % of DQ Amount |
Identifies the minimum % of the total promise amount that the user is allowed to accept. |
N/A |
|
For additional information on User Performance, please see the User Performance Web Part topic in the User Guide. |
Within the Security Groups tab, assign the new user to a Security Group. The Security Groups that are available are defined in System Management > Groups > Security Groups.
|
A user can be assigned to multiple security groups. |

Within the Permissions tab, manage the new user’s access to several features throughout the Lifecycle Management Suite.
This tab contains two columns: Function and Permission. Click under the Permission column in the corresponding row of the screen and a drop down appears. Change the value in this drop down to change the user's access to the screen. The following are permission options that are available through the permission drop down:
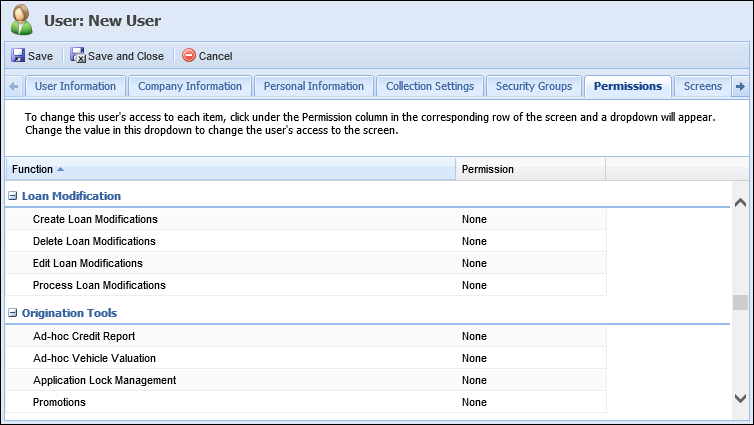
Below is a list of all the permissions that can be customized by the administrator and their description.
| Application Processing | |||||||
| Name of Permission | Description | ||||||
|
Add and Delete Fees on Application:
Allows a user to add and remove fees that have been automatically or manually added to an application. |
None = Add, Delete buttons are disabled on the Fees grid of Fees panel. Edit is disabled for Fees grid.
Change = Add, Delete buttons are enabled on the Fees grid of Fees panel. Edit is enabled for Fees grid. |
||||||
|
Approve Loan:
Allows a user to manually approve an application. |
None = "Approve" button is disabled in the Workflow and Application Toolbar.
Change = "Approve" button is enabled in the Workflow and Application Toolbar if Status <> Incomplete, Disbursed or Not Eligible. |
||||||
|
Bypass OFAC Alert:
Allows a user to override an OFAC alert presented by the OFAC interface on the OFAC screen and continue to disburse the loan. |
None = user does not have permission to override an OFAC hit and is presented with an override pop-up window.
Change = user has permission to override OFAC hit and is not presented with override pop-up. Also allows user to input credentials into the override pop-up for other users. |
||||||
|
Change Applicants Receiving Adverse Action Notice:
Allows user to change the field to send an adverse action notice to a particular applicant from the Reject Application & Withdraw Application windows. |
None = applicant check boxes are disabled on Reject Application and Withdraw Application windows.
Change = applicant check boxes are enabled on Reject Application and Withdraw Application windows. |
||||||
|
Change Application After Decision:
Allows a user to change data in fields that have been locked down by the system once a decision has been rendered on the application. |
None = the entire application is read-only (includes both fields and actions) if the application has been decisioned (Decision Date is not null).
Change = the entire application is read-only EXCEPT those fields and actions that are identified as editable post-decision if the application has been decisioned (Decision Date is not null). |
||||||
|
Change Application After Disbursement:
Allows a user to change data in fields that have been locked down by the system once an application has been disbursed. |
None = the entire application is read-only (includes both fields and actions) if the application has been disbursed.
Change = the entire application is read-only EXCEPT those fields and actions that are identified as editable post-disbursement if the application has been disbursed. |
||||||
|
Change Assets on Application:
Allows a user to manually add assets to an application, delete manually added assets and edit assets that have been added either manually or via a core interface. |
None = Add/Edit/Delete buttons are disabled on Assets screen.
Change = Add/Edit/Delete buttons are enabled on Assets screen. |
||||||
|
Change Effective Date on Application:
Allows a user to update the Effective Date field on the application screen that collects loan term information. |
None = user does not have permission to override and is presented with an override pop-up window if the field has been modified.
Change = user has permission to override and is not presented with override pop-up if the field has been modified. Also allows user to input credentials into the override pop-up for other users. |
||||||
|
Change Fees from Sub-Product:
Allows a user to modify amounts for fees that have been automatically added to an application by the system. |
None = user does not have permission to override and is presented with an override pop-up window if the field has been modified.
Change = user has permission to override and is not presented with override pop-up if the field has been modified. Also allows user to input credentials into the override pop-up for other users. |
||||||
|
Change Interest Rate on Application:
Allows an Underwriter to manually change the interest rate on an application. This field is only available on the Manual Underwriting screen. |
None = "Actual Interest Rate", "Reason for Interest Rate Change", and "Other Reason for Interest Change" fields are disabled on the Approve Application window.
Change = "Actual Interest Rate", "Reason for Interest Rate Change", and "Other Reason for Interest Change" fields are enabled on the Approve Application window. |
||||||
|
Change Introductory Term on Application:
Allows a user to manually change the introductory term that is used for Introductory Rate calculations. |
None = Introductory Term field is disabled on the Loan Terms screen.
Change = Introductory Term field is enabled on the Loan Terms field |
||||||
|
Change Liabilities on Application:
Allows a user to manually add liabilities to an application, delete manually added liabilities and edit liabilities that have been added either manually or the credit report & core interfaces. |
None = Add/Edit/Delete buttons are disabled on Liabilities screen.
Change = Add/Edit/Delete buttons are enabled on Liabilities screen. |
||||||
|
Change Max Cross-sell Amount:
Allows an Underwriter to set a maximum loan cross-sell amount that the sum of all an application’s new/replacement Cross-sell offers cannot exceed. This field is only available on the Manual Underwriting screen. This does not affect what is offered/pitched as cross-sells; rather, it just affects the max dollar amount an applicant could accept in cross-sell offers without requiring an override. |
None = "Max Loan Cross-sell Amount", "Reason for Max Cross Sell Amt Change", and "Other Reason for Cross-sell Amt Change" fields are disabled on the Approve Application window.
Change = "Max Loan Cross-sell Amount", "Reason for Max Cross Sell Amt Change", and "Other Reason for Cross-sell Amt Change" fields are enabled on the Approve Application window. |
||||||
|
Change Non-Loan Cross-sell Product Amount:
Allows a user to change the Amount field in the Cross-sell grid for Non-loan Cross-sell products. |
None = The Amount field in the Cross-sell grid is not able to be updated for Non-loan Cross-sell products.
Change = The Amount field in the Cross-sell grid is able to be updated for Non-loan Cross-sell products. |
||||||
|
Change Product on Application:
Allows a user to change the product being applied for on an application prior to a decision being rendered on the application. |
None = Change Product button is disabled in the Properties pop-up box.
Change = Change Product button is enabled in the Properties pop-up box. |
||||||
|
Change Source and Channel on Application:
Allows a user to change the application Source and Channel fields during the application process. |
None = Source and Channel fields are disabled in the Properties pop-up box.
Change = Source and Channel fields are enabled in the Properties pop-up box. |
||||||
|
Change Variable Rates:
Allows a user to change the Variable Rate fields (listed below) on the Loan Terms screen.
|
None = user does not have permission to edit fields. If fields have been changed by the user they are presented with an override pop-up window.
Change = user has permission to edit fields and is not presented with override pop-up. Also allows user to input credentials into the override pop-up for other users. |
||||||
|
Change Vendor on Application:
Allows a user to change the Vendor/Dealer field during the application process. |
None = Vendor field is disabled in the Properties pop-up box when Dealer Purchase or Indirect are selected as Source.
Change = Vendor field is enabled in the Properties pop-up box when Dealer Purchase or Indirect are selected as Source. |
||||||
|
Complete Manual To-Do:
Allows a user to complete a Manual To-Do. |
None = The Complete button within the Manual To-Do's Notification pop-up is disabled. User does not have permission to complete Manual To-Dos.
Change = The Complete button within the Manual To-Do's Notification pop-up is enabled. User has permission to complete Manual To-Dos. |
||||||
|
Counteroffer- Add, Edit and Delete:
Allows a user to Add, Edit and Delete a Counteroffer on the Counteroffer screen. |
None = User does not have permission to Add, Edit or Delete a Counteroffer.
Change = User has permissions to Add, Edit and Delete a Counteroffer. |
||||||
|
Counteroffer - Approve Application on Counteroffer Acceptance:
Allows a user to accept a Counteroffer. |
None = User does not have permission to accept a Counteroffer.
Change = User has permission to accept a Counteroffer. |
||||||
|
Create New Application:
Allows a user to enter an account application in the system. |
None = New Application icon is not available within the Ribbon Bar.
Change = New Application icon is available within the Ribbon Bar. |
||||||
|
Create New Member Account for an Existing Member: Allows a user to create a new member account for an existing account holder during the application process. |
None = Generate button is disabled in the Change Account/Loan Number screen.
Change = Generate button is enabled for an existing account holder in the Change Account/Loan Number screen. |
||||||
|
Cross-sells In Loan Amount Exceed Approval Tolerance:
Allows a user to override the Approval Tolerance Amount that is set on the sub-product definition (only if it is exceeded because of cross-sells being included in the loan amount, such as GAP & MBC). |
None = user does not have permission to override and is presented with an override pop-up window.
Change = user has permission to override and is not presented with override pop-up. Also allows user to input credentials into the override pop-up for other users. |
||||||
|
Decline Loan:
Allows a user to decline a loan application. |
None = "Decline" button is disabled in the Application Toolbar and Workflow.
Change = "Decline" button is enabled in the Application Toolbar and Workflow if Status <> Incomplete, Disbursed, or Not Eligible. |
||||||
|
Disburse Loan:
Allows a user to Disburse and book the loan to the core system. |
None = The Disburse button is not able to be selected in the Application Toolbar and Workflow.
Change = The Disburse button able to be selected in the Application Toolbar and Workflow. |
||||||
|
Do Not Pull Credit:
Allows the user to select to not pull credit for a particular applicant on an application. |
None = “Do Not Pull Credit” checkbox is disabled on the screen used to collect applicant information.
Change = “Do Not Pull Credit” checkbox is enabled on the screen used to collect applicant information. |
||||||
|
Edit Adverse Action Reasons:
Allows a user to add Reject & Adverse Action Reasons to an application via the Other Actions button. |
None = "Collect Adverse Actions" is disabled in the Other Actions dropdown.
Change = "Collect Adverse Actions" value in the Other Actions dropdown list is active and can be selected. |
||||||
|
Edit Disbursement Date:
Allows a user to edit the Disbursement Date field. |
None = Disbursement Date is disabled on the application screen that collects loan term information.
Change = Disbursement Date field is enabled on the application screen that collects loan term information. |
||||||
|
Edit Doc Stamps Program:
Allows a user to edit fields in the application related to the Doc Stamps Program. |
None = User does not have permission to edit fields.
Change = User has permission to edit fields. |
||||||
|
Edit Finance Charge on Application Fee:
Allows a user to set the flag for a fee to be considered a finance charge. |
None = Finance Charge column is disabled on the Fees grid on the Fees panel.
Change = Finance Charge column is enabled on the Fees grid on the Fees panel. |
||||||
|
Edit First Notification, Second Notification and Expiration Dates:
Allows a user to edit these fields on the Loan Terms screen. |
None = User does not have permission to edit fields.
Change = User has permission to edit fields. |
||||||
|
Exclude Applicant From Precise ID:
Allows a user to exclude an applicant from being processed through the Precise ID interface. |
None = "Exclude Applicant from Precise ID" checkbox on Applicants screen is disabled.
Change = "Exclude Applicant from Precise ID" checkbox is enabled. |
||||||
|
Exclude Payee from OFAC:
Allows a user to exclude a check payee from being checked via the OFAC interface during the Disbursement. |
None = "Do Not Run OFAC" Checkbox is disabled on Edit Payee OFAC Information window.
Change = "Do Not Run OFAC" Checkbox is enabled on Edit Payee OFAC Information window. |
||||||
|
Get Vehicle Valuation in Application:
Allows a user to get a book value on a vehicle within an application via the NADA or KBB interfaces. |
None = "Get Valuation" button is disabled on the application screen that collects Collateral information, when Source = NADA or KBB.
Change = "Get Valuation" button is enabled on the application screen that collects Collateral information, when Source = NADA or KBB. |
||||||
|
Initial Amount Exceeds Min/Max for Sub-Product:
Allows a user to override the Min/Max Amount values that are set at the sub-product definition. For example: New Auto has a min amount of $1500.00. An application is being submitted and the Requested Amount is $1000.00. An override box pops-up for users who do not have this permission and requires someone with this authority to put in their credentials in order for the user to proceed with the application. |
None = user does not have permission to override and is presented with an override pop-up window.
Change = user has permission to override and is not presented with override pop-up. Also allows user to input credentials into the override pop-up for other users. |
||||||
|
LO Approval – Display Adverse Actions:
Allows user to view/edit the Adverse Action panel on the Approve Application screen. |
None = Adverse Action sub-panel is not displayed on the Approve Application screen.
Change = Adverse Action sub-panel is displayed and editable on the Approve Application screen. |
||||||
|
Loan Cross-sells Exceed Max Amount:
Allows a user to override the Max Loan Cross-Sell Amount (the sum of all an application’s new/replacement Cross-sell offers) that can be set by an underwriter on the manual underwriting screen. For example: An underwriter has set the Max Loan Cross-Sell amount to be $10,000.00 on the underwriting screen. The end user gets to the Cross-Sell screen and pitches the Cross-sell products. The applicant wants all the available cross-sell offers, which total $15,000.00. An override box appears for users who do not have this permission and requires someone with this authority to put in their credentials in order for the user to proceed with the application. |
None = user does not have permission to override and is presented with an override pop-up window.
Change = user has permission to override and is not presented with override pop-up. Also allows user to input credentials into the override pop-up for other users. |
||||||
|
LTV Exceeds Min/Max for Sub-Product:
Allows a user to override the Min/Max LTV value that is set at the sub-product definition. For example: New Auto has a max LTV of 110%. An application is being processed and the LTV is calculated to be 112%. An override box pops-up for users who do not have this permission and requires someone with this authority to put in their credentials in order for the user to proceed with the application. |
None = user does not have permission to override and is presented with an override pop-up window.
Change = user has permission to override and is not presented with override pop-up. Also allows user to input credentials into the override pop-up for other users. |
||||||
|
Manually Disburse Application:
Allows a user to mark an application as being disbursed to core if an error message was returned during the disbursement process. If the box is checked, the system does not try to create the record in core via the interface and the end user needs to manually create the record in the core system. |
None = Disbursement Complete checkbox is available and disabled.
Change = Disbursement Complete checkbox is available and enabled. |
||||||
|
Origination Workspace
Allows a user to access and use the Search feature in the Ribbon Bar.
|
None = Users are unable to use the Search feature, and the  is disabled in the Ribbon Bar. Additionally, users are unable to open applications from the Queues, Views, and/or Dashboards page. is disabled in the Ribbon Bar. Additionally, users are unable to open applications from the Queues, Views, and/or Dashboards page.
View = Users can use the Search feature, and open applications from the Queues, Views, and/or Dashboards page; however, the selected application opens as READ ONLY in the workspace, and no changes can be made. Only a comment can be added to an application while in this state. Change = Users can access applications using the Search feature, as well as from the Queues, Views, and/or Dashboards page, and can perform actions within the selected application when open in the workspace.
|
||||||
|
Override Identity Results:
Allows a user to override the Precise ID interface results. |
None = user does not have permission to override Precise ID results and is presented with an override pop-up window.
Change = user has permission to override Precise ID results and is not presented with override pop-up. Also allows user to input credentials into the override pop-up for other users. |
||||||
|
Pin Application to Queue:
Allows a user to manually Pin and UnPin applications from queues. |
None = Pin to Queue and Un-pin buttons are disabled on the application toolbar.
Change = Pin to Queue and Un-pin buttons are enabled on the application toolbar. |
||||||
|
Remove Decision on Application:
Allows a user to remove the decision that has been rendered on an application and reprocess the application. |
None = Remove Decision button is disabled in the Application Toolbar.
Change = Remove Decision button is enabled in the Application Toolbar. |
||||||
|
Remove Withdraw Status From Application:
Allows a user to remove the withdraw status from the Other Actions menu on the Application. |
None = The Remove Withdraw button is disabled in the Application Toolbar.
Change = The Remove Withdraw button is enabled in the Application Toolbar. |
||||||
|
Send Custom Emails:
Allows a user to send a custom email from the Other Actions drop-down within an Application. |
None = The Compose Email button is disabled on the Other Actions drop-down menu within an Application.
Change = The Compose Email button is enabled on the Other Actions drop-down within an Application. |
||||||
|
Stipulations - Add/Clear:
Allows a user to manually add stipulations and mark a stipulation as being met. |
None = User cannot add stipulations. Met checkbox is disabled when editing stipulations in the Stipulations panel.
Change = User can add new stipulations. Met checkbox is enabled when editing stipulations in the Stipulations panel. |
||||||
|
Stipulations – Allow Delete:
Allows a user to delete stipulations. |
None = User is not able to delete stipulations.
Change = User is able to delete stipulations. |
||||||
|
Stipulations – Change stipulations:
Allows a user to modify the stipulation that was added and modify if the stipulation is required for approval or disbursement. |
None = Stipulation and Required For fields are disabled when editing stipulations in the Stipulations panel.
Change = Stipulation and Required For fields are enabled when editing stipulations in the Stipulations panel. |
||||||
|
Stipulations – Do Not Require Comments:
Allows a user, who has permission to mark stipulation as met or waived, to proceed without adding a comment on the stipulation. |
None = User must enter a comment if they select waive/met.
Change = User is able to select waive/met without entering a comment. |
||||||
|
Stipulations - Waive on Application:
Allows a user to mark a stipulation as being waived. |
None = Waive checkbox is disabled when editing stipulations in the Stipulations panel.
Change = Waive checkbox is enabled when editing stipulations in the Stipulations panel. |
||||||
|
Suggest Decline for Application:
Allows a user to suggest an application be declined. |
None = "Suggest Decline" button is disabled in the Decline Application window.
Change = "Suggest Decline" button is enabled in the Decline Application window if Status <> Incomplete, Disbursed, or Not Eligible. |
||||||
|
Update Application From Core:
Allows a user to update the Application From the Core by selecting the Core Update from the Core drop-down in the Application toolbar. |
None = The Last Core Update button is disabled in the Core drop-down in the Application toolbar.
Change = The Last Core Update button is enabled in the Core drop-down in the Application toolbar. |
||||||
|
Withdraw Application:
Allows a user to withdraw an application from processing. |
None = Withdraw button is disabled on workspace toolbar.
Change = Withdraw button is enabled on workspace toolbar. |
||||||
| Origination Tools | |
| Name of Permission | Description |
|
Ad-hoc Credit Report:
Allows the user to pull a credit report without starting an application. |
None = Credit Report Tool not available on Desktop ribbon.
Change = Credit Report Tool available on Desktop ribbon. |
|
Ad-hoc Vehicle Valuation:
Allows the user to get a book value for a vehicle without starting an application. |
None = Vehicle Valuation Tool not available on Desktop ribbon.
Change = Vehicle Valuation Tool available on Desktop ribbon. |
|
Application Lock Management:
Allows the user to view and/or unlock applications that are currently in use/locked by another user. |
None = Application Lock Management Tool not available on Desktop ribbon.
View = Application Lock Management Tool available on Desktop ribbon in a view only mode Change = Application Lock Management Tool available on Desktop ribbon in view and edit mode. |
|
Promotions:
Allows a user to view and work the offers for each promotion as well as provides the ability to create an application from an offer. |
None = Promotions icon not available on Desktop ribbon.
Change = Promotions icon available on Desktop ribbon. |
| Solutions | |
| Name of Permission | Description |
|
SOLUTION.ORIGINATION:
Allows a user to view and change settings on the Origination settings page within System Management. Any changes made within Solution.Origination apply for all of within the Lifecycle Management Suite. |
None = Users cannot view or access lending settings under System Management > Solutions > Lending.
View = Allows users to view lending settings but not make any changes to them under System Management > Solutions > Lending. Change = Allows users to view and make changes to lending settings under System Management > Solutions > Lending. |
| System Management | |
| Name of Permission | Description |
|
Alerts:
Allows a user to view and edit system-wide alerts that appear each time a user logs into the system. |
None = Users can not view or access the Alerts page in System Management.
View = Allows users to view but not make any changes to the Alerts page in System Management. Change = Allows users to view and make changes within the Alerts page in System Management. |
|
Configuration Export:
Allows a user to view, edit and change Configuration Manager Exports. |
None = Users can not view or access the Export Configurations page in System Management > Configurations.
Change = Allows users to view and make changes within the Export Configurations page in System Management > Configurations. |
|
Configuration Import:
Allows a user to view, edit and change Configuration Manager Imports. |
None = Users can not view or access the Import Configurations page in System Management > Configurations.
Change = Allows users to view and make changes within the Import Configurations page in System Management > Configurations. |
|
Connectors:
Allows a user to access connectors that the institution utilizes within System Management. |
None = Users do not have access to the Connectors folder in System Management.
View = Allows users to access the connector pages but not save any changes within the page. Change = Allows users to have access to all Connectors in the Connectors folder in System Management. |
|
Custom Field Management:
Allows a user to create custom fields that are used to extend the Lifecycle Management Suite database. Custom fields can be used throughout the entire system. |
None = Users can not view or access the Custom Fields page in System Management.
View = Allows users to view but not make any changes to the Custom Fields page in System Management. Change = Allows users to view and make changes within the Custom Fields page in System Management. |
|
Dashboards:
Allows a user to view and change Dashboards from the Ribbon Bar. Dashboards are groups of different Web Parts in the system. Web Parts are predefined information boxes that display information about queues, user performance and applications. Views and Reports can also be added to dashboards. |
None = Users cannot access the Dashboards page from the Dashboards icon in the ribbon.
View = Allows users to view the Dashboards list in the Dashboards page from the dashboards icon in the ribbon, but cannot run dashboards. Change = Allows users to view the list of dashboards, and run dashboards from the ribbon. |
|
Exports:
Allows a user to view and change export settings within System Management. |
None = Users can not view or access the Exports page in System Management.
View = Allows users to view but not make any changes to the Exports page in System Management. Change = Allows users to view and make changes within the Exports page in System Management. |
|
Reports:
Allows a user to view and create an unlimited amount of reports from the Ribbon Bar. Reports can be run on-demand by anyone who has permission to run the report or can be scheduled to run at certain times. |
None = Users can not access the Reports page from the Reports icon in the ribbon.
View = Allows users to view the Reports list in the Reports page from the reports icon in the ribbon, but cannot run, see history or design any reports. Change = Allows users to view the list of reports, run reports, see history, and design reports from the reports icon in the ribbon. |
|
Security Groups:
Allows a user to view and change Security Groups in System Management. Security Groups are designed so that managers can set Temenos Lifecycle Management Suite access for a group rather than every individual user.
|
None = Users can not view or access the Security Groups page in System Management > Groups > Security Groups.
View = Allows users to view but not make any changes to the Security Groups page in System Management > Groups > Security Groups. Change = Allows users to view and make changes within the Security Groups page in System Management > Groups > Security Groups. |
|
Users:
Allows a user to view and change existing users within the system, as well as create new users. |
None = Users can not view or access the Users page in System Management.
View = Allows users to view but not make any changes to the Users page in System Management. Change = Allows users to view and make changes within the Users page in System Management. |
|
Views:
Allows a user to view and change Views from the Ribbon Bar. Views are interactive reports that can be run any time by anyone who has permissions to run the view. |
None = Users cannot access the Views page from the Views icon in the ribbon.
View = Allows users to view the Views list in the Views page from the views icon in the ribbon, but cannot run views. Change = Allows users to view the list of views, and run views from the ribbon. |
| System Management - Loan | |
| Name of Permission | Description |
|
Base Rate Tables Management:
Allows a user create and maintain the base interest rate table for pricing applications. |
None = System Management screen not available to user.
View = System Management screen can be viewed but not edited by user. Change = System Management screen can be viewed and edited by user. |
|
Cross-sell Product Management:
Allows a user to create and maintain the products that are available for cross-sell offers. |
None = System Management screen not available to user.
View = System Management screen can be viewed but not edited by user. Change = System Management screen can be viewed and edited by user. |
|
Debt Protection Plan Management:
Allows a user to maintain the user friendly descriptions and core codes for credit insurance/debt protection options that are imported from the calculator rate file. |
None = System Management screen not available to user.
View = System Management screen can be viewed but not edited by user. Change = System Management screen can be viewed and edited by user. |
|
HMDA Reporting Management:
Allows a user to generate a properly formatted FFIEC HMDA-LAR file. The administrator has the ability to review/exclude specific applications, validate data, correct incorrect or missing data, and generate a summary report. |
None = System Management screen not available to user.
View = System Management screen can be viewed but not edited by user. Change = System Management screen can be viewed and edited by user. |
|
Loan Application Type Management:
Allows a user to define a hierarchy of products (Categories, Products and Sub-Products). |
None = System Management screen not available to user.
View = System Management screen can be viewed but not edited by user. Change= System Management screen can be viewed and edited by user. |
|
Pricing Model Management:
Allows a user to tie appropriate pricing rules together to determine the final rate for a product. |
None = System Management screen not available to user.
View = System Management screen can be viewed but not edited by user. Change = System Management screen can be viewed and edited by user. |
|
Promotions Management:
Allows a user to create and manage promotions. |
None = System Management screen not available to user.
View = System Management screen can be viewed but not edited by user. Change = System Management screen can be viewed and edited by user. |
|
Risk Model Management:
Allows a user to define a naming convention for risk tiers (e.g. A+, A, B, Platinum, Gold, Silver), and to create/maintain the risk models. |
None = System Management screen not available to user.
View = System Management screen can be viewed but not edited by user. Change = System Management screen can be viewed and edited by user. |
|
Vendor Management:
Allows a user to create and manage a list of Vendors/Dealers that the financial institution does business with. |
None = System Management screen not available to user.
View = System Management screen can be viewed but not edited by user. Change = System Management screen can be viewed and edited by user. |
|
Workflow Model Management:
Allows a user to configure the workflow screens that are presented for a loan application. Also enables a user to assign Validation rules. |
None = System Management screen not available to user.
View = System Management screen can be viewed but not edited by user. Change = System Management screen can be viewed and edited by user. |
| System Management - Origination | |
| Name of Permission | Description |
|
Applicant Types:
Allows a user to create an maintain the applicant types available to assign within an applcation.
|
None = Applicant Types screen is not available to the user.
Change = Applicant Types screen can be viewed and editied by the user. |
|
Batch Disbursement Management:
Allows a user to view and reconcile batches disbursed to credit card processors for fulfillment. |
None = Batch Disbursement Management screen is not available to user.
View = Batch Disbursement Management screen can be viewed but not edited by user. Change = Batch Disbursement Management screen can be viewed and edited by user. |
|
Batch Queue Processing:
Allows a user to view and schedule Batch Queuing process to run ad-hoc. |
None = User is not able to schedule the Batch Queuing Process to run.
Change = User is able to view and schedule the Batch Queuing Process. |
|
Decision Model Management:
Allows a user to create and maintain the decision models used to underwrite an application. |
None = System Management screen not available to user.
View = System Management screen can be viewed but not edited by user. Change = System Management screen can be viewed and edited by user. |
|
Document Template Management:
Allows a user to create and maintain Document Templates for use with third party connectors such as DocuSign and Silanis. |
None = System Management screen not available to user.
View = System Management can be viewed but not edited by user. Change = System Management screen can be viewed and edited by user. |
|
Editability:
Allows a user to create and maintain Field, Collection and Action Editability rights. |
None = Editability screen within System Management is not available to user.
View = Editability screen within System Management can be viewed but not edited by user. Change = Editability screen within System Management screen can be viewed and edited by user. |
|
Email Template Management:
Allows a user create and maintain Email Templates for use within the Application. |
None = System Management screen not available to user.
View = System Management can be viewed but not edited by user. Change = System Management screen can be viewed and edited by user. |
|
Event Processing:
Allows a user to create and maintain event and action pairings. |
None = Event Processing screen within System Management is not available to user.
View = Event Processing screen within System Management can be viewed but not edited by user. Change = Event Processing screen within System Management screen can be viewed and edited by user. |
|
Field List Configurations:
Allows a user to map up to 20 commonly-used Aggregates and Ratios and 10 commonly-used Scores for reporting. |
None = Field List Configurations screen in System Management is not available to user.
View = Field List Configurations screen in System Management can be viewed but not edited by user. Change = Field List Configurations screen in System Management can be viewed and edited by user |
|
Notification Groups:
Allows a user to view and change the notification groups in System Management. The Notification Group page allows administrators to group users together into functional groups that are able to receive notifications about Applications based on Lifecycle Management Suite events. |
None = Users can not view or access the Notification Groups page in System Management > Groups > Notification Groups.
View = Allows users to view but not make any changes to the Notification Groups page in System Management > Groups > Notification Groups. Change = Allows users to view and make changes within the Notification Groups page in System Management > Groups > Notification Groups. |
|
Origination Queue Management:
Allows a user to create queues, which provide a way to manage applications throughout the loan process. |
None = System Management screen not available to user.
View = System Management screen can be viewed but not edited by user. Change = System Management screen can be viewed and edited by user. |
|
Rules Management:
Allows a user to author and maintain a library of all business rules needed by the loan origination modules (e.g. decisioning, data validation). |
None = System Management screen not available to user.
View = System Management screen can be viewed but not edited by user. Change = System Management screen can be viewed and edited by user. |
|
Screens:
Allows a user to author and maintain screens. |
None = System Management screen not available to user.
View = System Management screen can be viewed but not edited by user. Change= System Management screen can be viewed and edited by user. |
|
Summary Screens Management:
Allows a user to create and manage the summary panels that are available as part of Loan Application Types. |
None = System Management screen not available to user.
Change = System Management screen can be viewed and edited by user. |
|
Validation Model Management:
Allows a user to create and manage validation models.
|
None = System Management screen not available to user.
View = System Management screen can be viewed but not edited by user. Change= System Management screen can be viewed and edited by user. |
|
WebLoan:
Allows a user to configure the workflow models, settings and panels for WebLoan applications, and administrator to configure header and footer messages to be used on the various pages of the WebLoan. |
None = System Management items not available to user.
View = System Management items can be viewed but not edited by user. Change = System Management items can be viewed and edited by user. |
| Virtual Capture | |
| Name of Permission | Description |
|
Blacklisted IP Addresses
Allows a user to view and edit the Blacklisted IP Addresses screen in System Management. |
None = System Management screen not available to user.
View = System Management screen can be viewed but not edited by user. Change = System Management screen can be viewed and edited by user. |
|
Virtual Capture Screens
Allows a user to view and change screens in System Management. |
None = System Management screen not available to user.
View = System Management screen can be viewed but not edited by user. Change = System Management screen can be viewed and edited by user. |
|
Virtual Capture Settings
Allows a user to view and change the Virtual Capture user interface through System Management. |
None = System Management screen not available to user.
View = System Management screen can be viewed but not edited by user. Change = System Management screen can be viewed and edited by user. |
|
Virtual Capture Workflow Model Management
Allows a user to configure the workflow screens that are presented for a web application. |
None = System Management screen not available to user.
View = System Management screen can be viewed but not edited by user. Change = System Management screen can be viewed and edited by user. |
Within the Screens tab, assign available screens to the user. If a screen is assigned, the user has access to the screen in the left navigation panel when a person/account is open in the workspace.
|
If the security group the user is assigned to has access to the screen, by default the user has access to the screen even if they do not at the user level. |
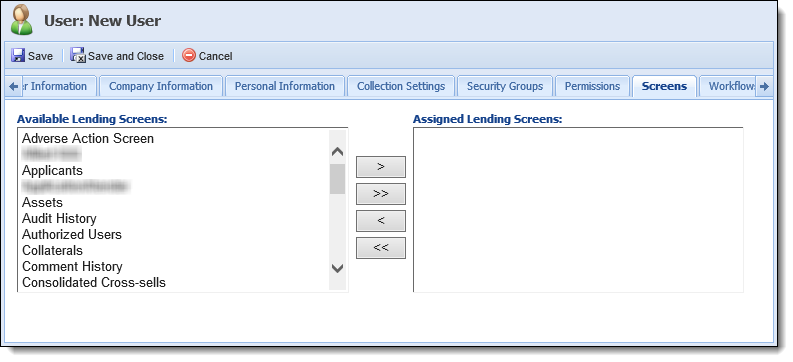
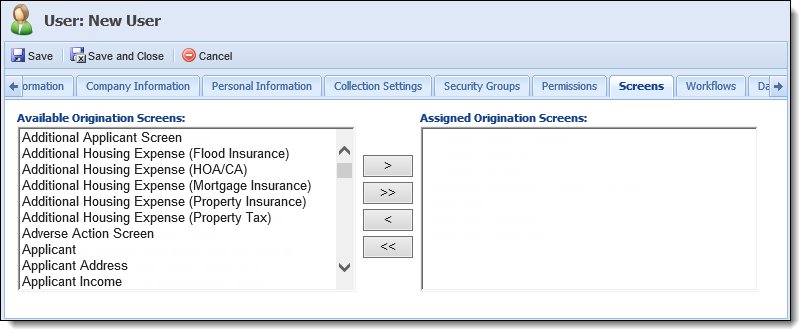
|
The screens and boxes that display on the User Edit screen are determined by the enabled module. For example, if loan origination is not active, origination screens are not available to be assigned and the Available and Assigned Origination Screens boxes do not display on the Screens tab. |
In the Workflows tab, workflows can be assigned to “None,” “View,” or “View & Execute.” If a workflow is assigned to None, the user is not able to view the workflow history associated to the workflow nor execute the workflow. If assigned to View, the user can view the workflow history associated to the workflow but cannot execute it. If assigned to View & Execute, the user can view the workflow history and execute the workflow on an account, case, or person.
|
If the security group the user is assigned to has access to the workflow, by default the user has access to the workflow even if they do not at the user level. |
In order for a user to have access to a workflow on an Area, the following criteria must be met:
For each Workflow, security can be set on the Area and the User or Security Group level. This security only applies when a user enters the Workspace of an Area. For example, if a workflow is not assigned to an Area, the workflow does not appear in the Area regardless of the security applied to the workflow.
When assigning a workflow to an Area or assigning Users and Security Groups to a workflow, there are three levels of security:
None is the lowest level of security and View & Execute is the highest level of security.

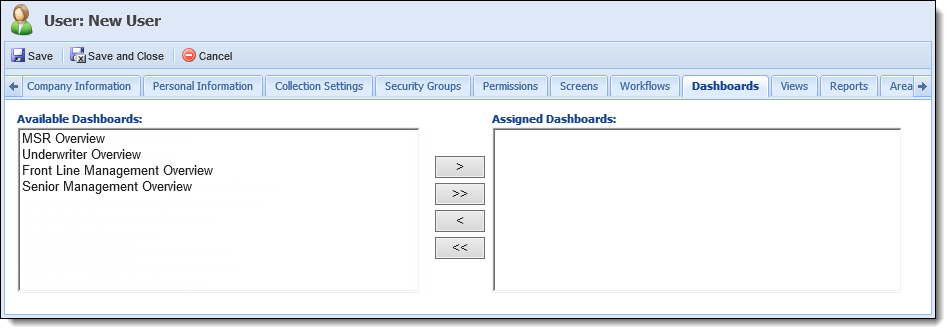
In the Dashboards tab, assign available dashboards to the user. If assigned the user is able to open the dashboard from the dashboard icon in the Lifecycle Management Suite ribbon.
|
If the security group the user is assigned to has access to the dashboard, by default the user has access to the dashboard even if they do not at the user level. |
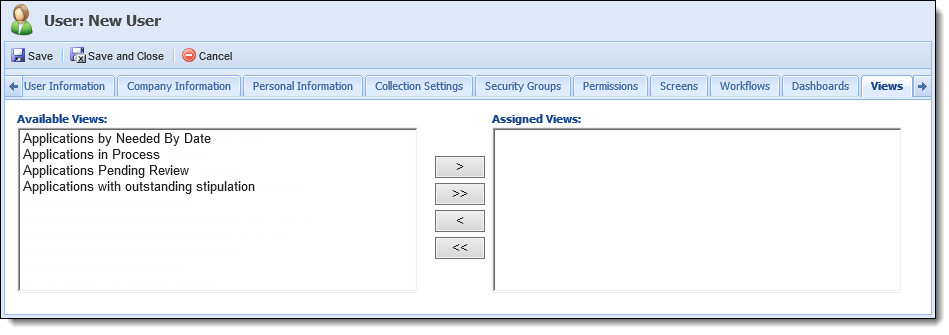
In the Views tab, assign available views to the user. If assigned, the user is able to open the view from the views icon in the Lifecycle Management Suite ribbon.
|
If the security group the user is assigned to has access to the view, by default the user has access to the view even if they do not at the user level. |
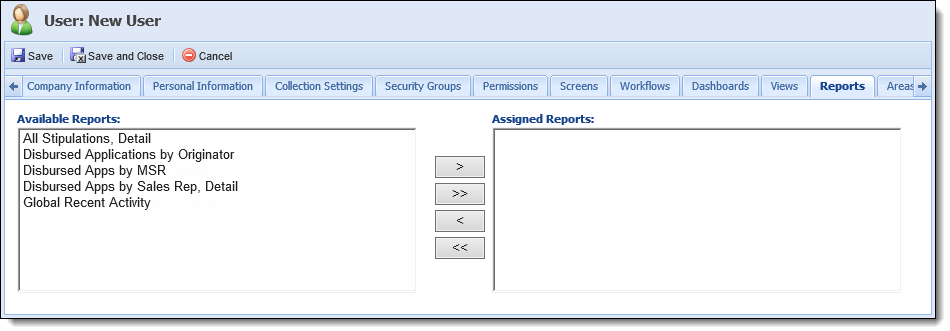
In the Reports tab, assign available reports to the user. If assigned, the user has the ability to view/run the reports from the reports icon in the Lifecycle Management Suite ribbon.
|
If the security group the user is assigned to has access to the report, by default the user has access to the report even if they do not at the user level. |
In the Areas tab, assign available areas to the user. These assigned areas are available to the user in the Areas drop down in the workspace.
|
If the security group the user is assigned to has access to the area, by default, the user has access to the area even if they do not at the user level. |
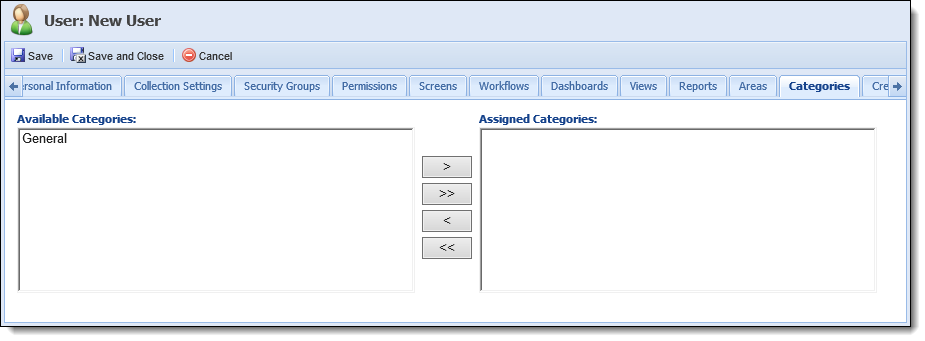
In the Categories tab, assign available categories to the user.
User Credentials enable administrators to assign user specific IDs required for certain functionality throughout the Lifecycle Management Suite.
|
Credentials may be used as a prerequisite when activating certain connectors within the Lifecycle Management Suite. For more information on whether credentials are needed, refer to the individual Connector Guides. |

Administrators can add and remove credentials for a user by means of the Credentials toolbar. Once a credential is added, the below attributes may be assigned in the grid displayed:
| Field | Description | ||
| Type |
Select the type of user credential being added for the user. Credentials may be system-defined or specific to a connector. System-Defined Credentials:
|
||
| ID | Provide a user ID. | ||
| Password |
If necessary, provide a password for the user.
|
||
| Confirm Password | If necessary, resubmit the password defined in the Password field. |
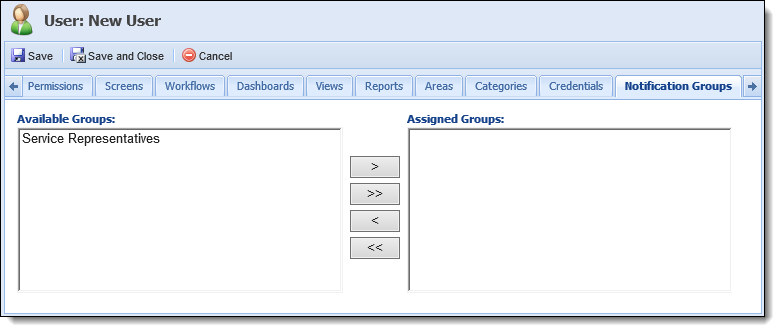
In the Notification Groups tab, assign available notification groups to the user. If assigned, the user has the ability to receive notifications when a comment is added to an application via email or from the Notifications icon in the ribbon bar.
Restriction Codes are used to identify accounts containing personal information for individuals employed by or related to a financial institution.
This section allows System Administrators to restrict users from accessing specific accounts within the Lifecycle Management Suite. System Administrators can assign codes to a user that grant the user access to accounts that are restricted. Additionally, System Administrators can prevent users from accessing a person's account by adding the person's identifier to the Restricted Persons Grid.
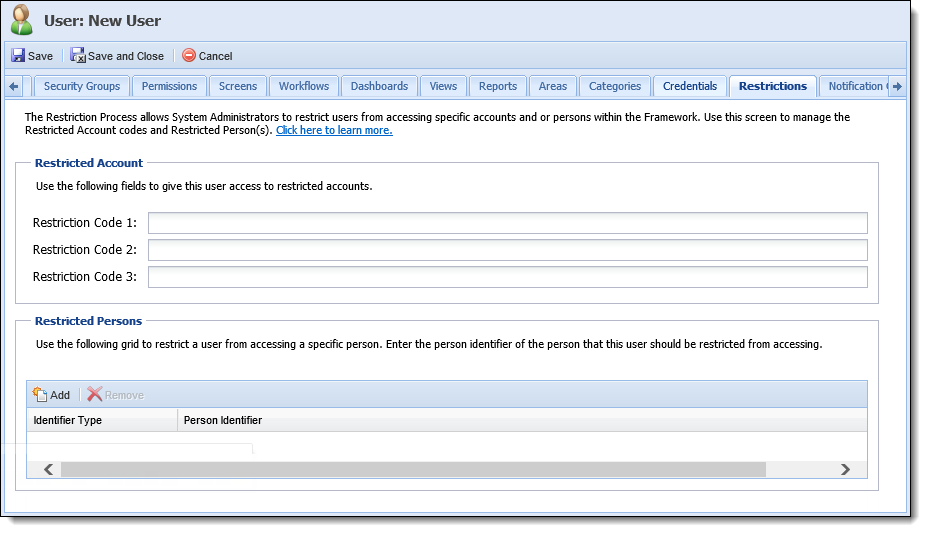
Account Restriction allows access to restricted accounts to be controlled on an account by account basis. Permissions are set on each user to give access to restricted accounts.
To enable Account Restriction in the Lifecycle Management Suite, click the "Enable Account Restriction" checkbox on the Security Tab under the Administrative Settings screen.
The restriction level on an account is determined by the Account Restriction Code field in the Lifecycle Management Suite. If Account Restriction Processing is enabled in the Lifecycle Management Suite, then a user must be given the appropriate permissions in order to view restricted accounts.
By default, all users have access to accounts with a 0 or no Account Restriction Code. To give a user access to restricted accounts, go to System Management > Users > Create/Edit > Restrictions for the user and enable access under the Account Restriction Access section.
The possible values in the Restricted Access field on each account are 0-6. The numeric values represent the following types of restricted accounts.
(0) Normal
(1) Restricted
(2) Sensitive
(3) Employee
(4) Employee Family
(5) Employee Sensitive
(6) Employee Sensitive Family
In order for a user to view an account with a Restricted Access level of 1 or higher, the user must have an Account Restriction Access of equal or greater value. For example, if an account has a Restricted Access level of 3, then a user must have a 3, 4, 5, or 6 entered in the "Restriction Code 1" field in order to view the account.
System Administrators can restrict persons from a user which prevents that user from gaining access to the person’s account workspace. When a person is restricted all of the person's related accounts, cases, and tickets are restricted.
|
If a user is in a workspace and the secondary on a person's account is restricted, the account does not display in the workspace. |
In order to view an account, the user must be allowed based on both the Restriction Code and Restricted Persons.
Lending Settings enables administrators to assign Application Sources and Restricted Account Types to a User.
At the top of the Lending Settings tab, a multi-grid containing the following tables control which application sources users are able to process applications for:
| Table | Description |
| Available Application Sources | Contains a list of all the application sources that have not been assigned to the user. Upon assigning an application source the user, it is removed from the available list. |
| Assigned Application Sources | Contains a list of all application sources that have been assigned to the user. |
Use the multi-grid controls to assign or un assign the desired application sources.
At the bottom of the Lending Settings tab, a multi-grid containing the following tables control which restricted account types users are able to process applications for:
| Table | Description |
| Available Restricted Account Type | Contains a list of all the restricted account types that have not been assigned to the user. Upon assigning a restricted account type the user, it is removed from the available list. |
| Assigned Restricted Account Type | Contains a list of all restricted account types that have been assigned to the user. |
Use the multi-grid controls to assign or un assign the desired restricted account types.
When finished navigating through all of the tabs and correctly entering in information, click  to retain the new user and return to the Users page. The new user populates in the Users page and can now be assigned to features throughout the Lifecycle Management Suite. Click
  to return to the Users page without saving.
To copy an existing user, perform the following actions:
 .
. .
.To edit an existing user that needs updating, perform the following actions:
 ..
..When a user is deactivated, the Active check box on the General tab is disabled.
To unlock a user that has been deactivated, perform the following actions:
 . to retain the user settings.
To delete a user, perform the following actions:
 .
. User Information Tab