Temenos Lifecycle Management Suite - Recovery Product Guide
Lifecycle Management Suite Workspace
| End-User Guide > Lifecycle Management Suite Workspace |
This section explains how to navigate within the workspace in the Lifecycle Management Suite.
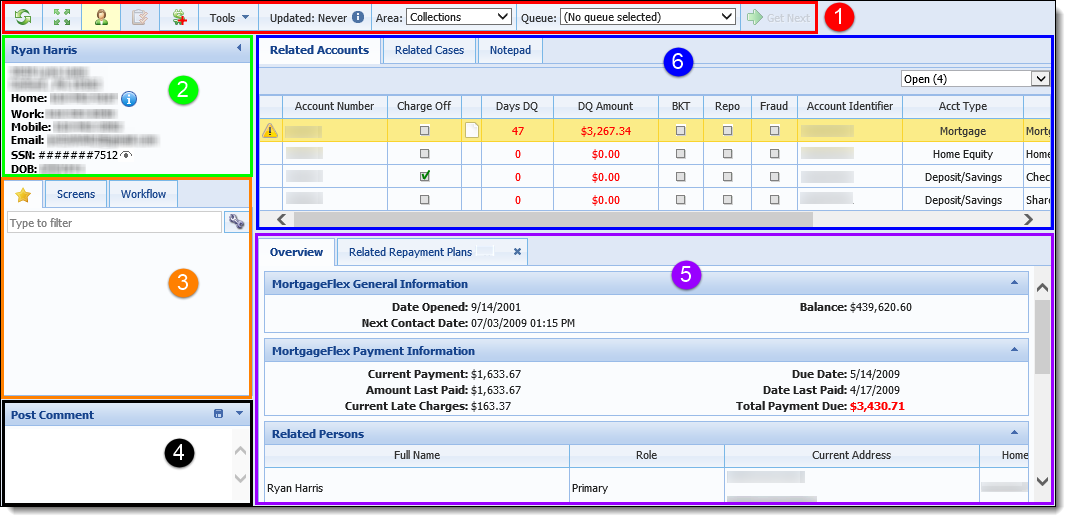
The workspace displays a 360 degree overview of a person in the Lifecycle Management Suite and provides the ability to work all accounts and for that person on one screen. Workspace screens can be configured by administrators to display institution-specific information within various person, account, or panels in the overview section
 |
While only one workspace is typically displayed for a single person in the Lifecycle Management Suite, there are instances where one person may have multiple distinct workspaces, with different accounts, due to the information received from the core or third party import. Reference the section below for an overview of the scenarios that could occur to create more than one workspace for a person in the Lifecycle Management Suite:
Scenario 1: Financial institution is on a person-centric core. During the core import, information is sent to the Lifecycle Management Suite that identifies two distinct person records. For example, if the core sends a Person Number, and the person has two different Person Numbers on record in the Lifecycle Management Suite, the information is not linked to a current workspace as the system cannot determine the Person Number to which the information should be linked. Scenario 2: Sufficient information is not sent for a person during a Third Party Import or Create Profile Import. For example, if the third party, or profile import, sends an unformatted SSN, the system may not be able to determine if the number is associated with an SSN or EIN; therefore, the information is not linked to a current workspace as there is not enough information to safely link the data in the import with a record in the Lifecycle Management Suite. |
The workspace toolbar is located on the top of all workspaces.

 |
When a screen is enlarged, the icons on the workspace toolbar wrap to the next line and are left-justified in order to maintain accessibility. |
Below is a list of the Toolbar icons and their descriptions:
| Toolbar Icon | Description | ||||||||||||||
 |
Click the Refresh icon to refresh the workspace being viewed. Any updates made to the workspace are displayed upon selecting this icon. | ||||||||||||||
 |
Click the Full Screen icon to maximize the amount of space available to work a person. When selected, the icon appears active
|
||||||||||||||
 |
Click the Person Verification icon to turn Person Verification on or off for the workspace. This feature is controlled by the system administrator in System Management > Areas. When this feature is active, a person verification screen displays upon opening a person workspace through a Search. This screen contains security information used to verify a person’s identity. 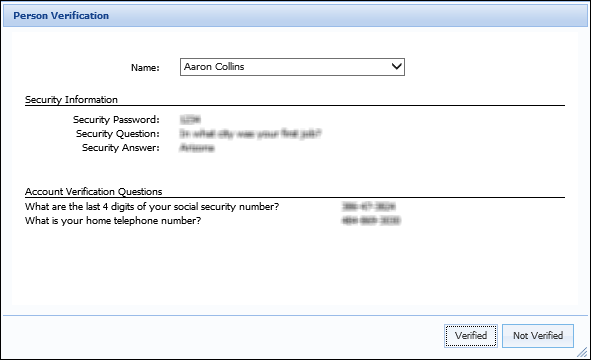
When Person Verification is on, the icon appears active and hovering over it displays a message to Turn Person Verification off.
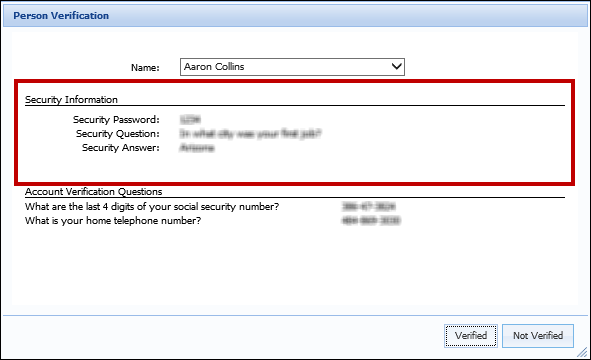
Within the Person Verification message, a section for Security Information appears that includes a Security Password, Security Question, and Security Answer. These fields are configured on the Person Verification Screen created by a system administrator in System Management > Screens. When in a person workspace, the Person Verification screen can be accessed from the Screens tab on the Left Navigation panel. Once this screen is selected, it populates next to the overview tab in the workspace. The Person Verification screen consists of three fields:
Once all fields on the screen are complete, click Save. A success message appears to confirm that the screen saved successfully: The Security Password, Security Question, and Security Answer defined on this screen now display within the Person Verification message for the person in the workspace.
|
||||||||||||||
 |
The Queue Contents icon opens the list of accounts in the queue and provides access to other accounts in the current queue. This feature is controlled by the system administrator in System Management > Areas.
|
||||||||||||||
 |
Click the Create Repayment Plan icon to create a new repayment plan for the charged-off account in context in the workspace. The ability to use this feature is a security permission set by the system administrator.
For more information on repayment plans, please reference the Repayment Plans topic of this guide. |
||||||||||||||
 |
Click the Create New Case icon to create a new case for the person in the workspace. The ability to use this feature is a security permission set by the system administrator.
For more information on cases, please reference Cases under the Lifecycle Management Suite Features topic of this guide. |
||||||||||||||
 |
The Tools drop-down provides quick links to external websites, such as the Temenos website and the websites defined by system administrators in System Management > Hyperlinks. | ||||||||||||||
 |
The Updated icon refreshes the person workspace from the host and displays when the last update occurred. If changes are made during the refresh, an information icon appears within this notification to alert users of these changes. Hovering over the
|
||||||||||||||
| The Area drop-down identifies the area being worked, as well as other areas that are available. | |||||||||||||||
|
The Queue Selector drop-down displays the name of the queue being worked. Select the drop-down to see a list of all assigned queues and navigate to other queues. Selecting a queue from the drop-down opens an account in that queue. If no accounts are available in a queue, a message displays stating that no accounts are available in the selected queue and prompts to select another queue from the list.  When a queue is selected from the Queue Selector drop-down, an information icon appears and hovering over this icon displays the number of persons and accounts remaining to be worked in that queue. This feature is controlled by system administrators in System Management > Areas.
|
|||||||||||||||
 |
The Get Next button allows the user to advance to the next person in the queue. This feature is controlled by the system administrator in System Management > Areas.
System administrators can configure icons to appear in a column within the Related Accounts panel to identify the accounts that must be worked before selecting Get Next. If Get Next is selected before the required accounts are worked, the following error message displays:
While working a case queue, the Get Next button allows users to skip active tasks in a case and get the next case in the queue. When tasks are skipped, they are rescheduled to be worked the following workday, adhering to the workday schedule assigned to the task.
|
||||||||||||||
 |
If another user is currently working the person in the workspace, an In Process message displays on the workspace toolbar. An information icon appears within this message to alert users that more information is available. Hovering over the icon displays the user that is also working the person.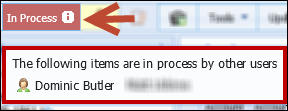
|
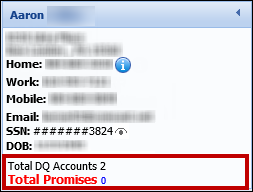
The Person Summary Panel is designed to provide a quick, high-level overview of a person. The information that appears within this panel is system-defined and includes home address; the home, work, and mobile phone numbers related to the record for the person-in-context; email address; Social Security number (SSN); and date of birth. The address that displays within the Person Summary panel is the Default Home address identified in the database for that person.
|
The content in the Person Summary Panel is driven by the person record selected to access the workspace. A person may include multiple person records such as joint checking accounts, third party mortgages, and third party credit cards that are grouped by SSN under a single Person Master record. This may cause a variation in the name displayed, as well as the home address. If a person record does not have a home address, any address associated to the person master record may be displayed.
|
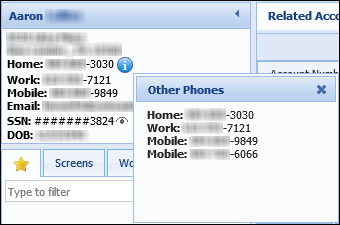
The phone numbers displayed in the Person Summary panel are related to the record for the person-in-context. Click the  that appears next to the first phone number in the panel to open the Other Phones window that lists all phone numbers recorded for the person in the Person Master record:
|
By default, only the Home, Work, and Mobile phone numbers related to the record for the person-in-context are displayed in the Person Summary panel. Any phone numbers with a type of Fax or Other appear within the Other Phones window. |
 |
The Other Phones window displays all phone numbers recorded for the person in the Person Master record, including the phone numbers that appear in the Person Summary panel. |
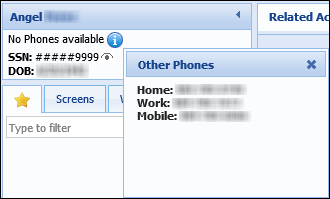
When the record for the person-in-context does not include a phone number, a message stating "No Phones available" displays in the Person Summary panel and clicking the icon opens the Other Phones window to access any additional phone numbers in the Person Master record:
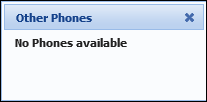
If there are no additional phone numbers recorded in the Person Master record, the Other Phones window displays the following message:
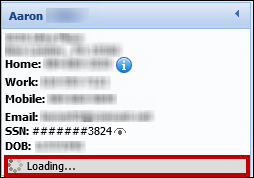
Administrators can also configure additional data to appear in the Person Summary by assigning Presentation rules to this area of the workspace. If rules are assigned to this area, a message displays within the panel to notify that rules are executing:
The additional data configured through rules appears below the current system-defined information once the workspace has completely loaded.
|
A tooltip is included in the Person Summary panel to display only the last four digits of a Social Security number. The rest of the SSN is masked until the
|
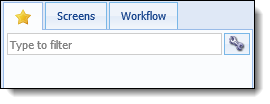
The Left Navigation Panel displays tabs: Use the filter within each tab for easy navigation to items within the lists. Simply type the name of the item that is being searched.
| Tab | Description | ||||
| Favorites |
Contains a list of configured . Commonly used can be added to this list for easier access.
The Favorites tab is configured by selecting the
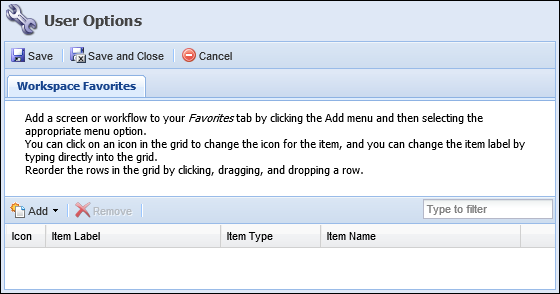
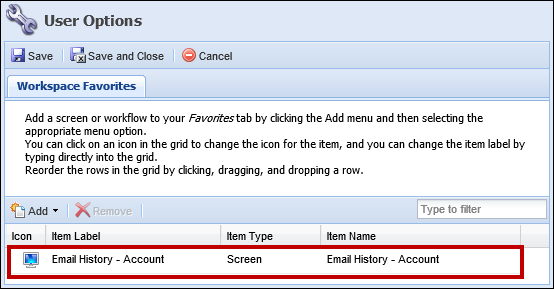
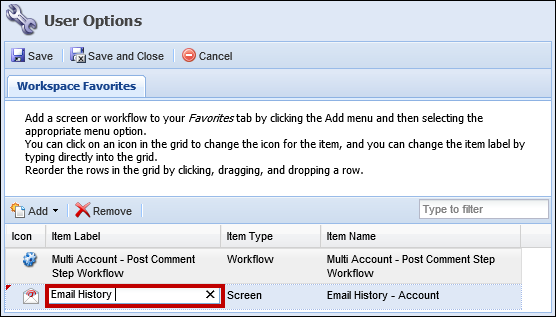
Selecting the Within User Options, the following actions can be performed to customize the Favorites tab of the workspace: To add a screen to the Favorites tab:
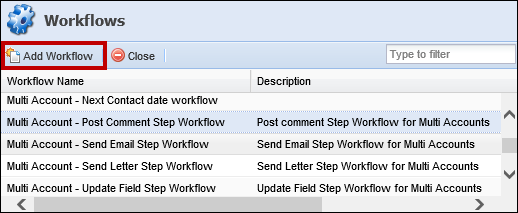
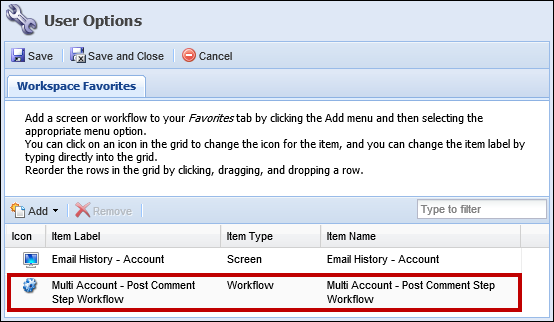
To add a workflow to the Favorites tab:
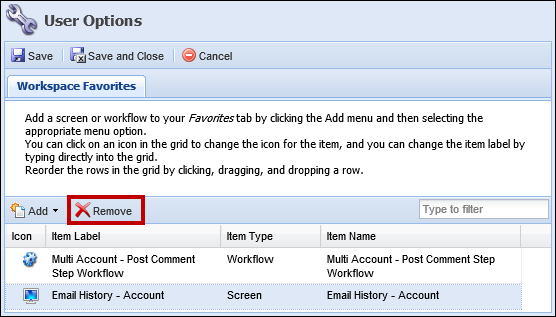
Upon clicking Save, the desired items appear in the Favorites tab in the workspace. To remove a from the Favorites tab:
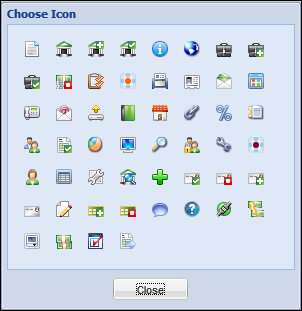
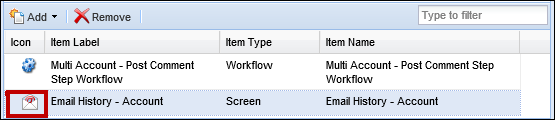
To change the icon that appears for a specific within the Favorites tab:
To change the name that appears for a specific screen or workflow within the Favorites tab:
Click Save when all User Option configurations have been made. A success message appears confirming that the User Option saved successfully. Selecting Save and Close saves the changes made and returns to the workspace. Click Cancel to return to the workspace without saving the changes made to User Options. Once all User Options have been saved, the changes appear on the Favorites tab in the workspace. |
||||
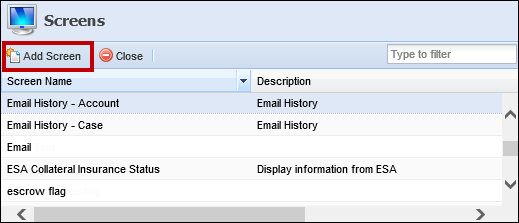
| Screens |
Contains a list of available screens. These screens are configured by the system administrator in System Management > Screens. The screens that appear in this list depend on the type of account or case in context in the workspace.
For each screen, icons display to identify if the Screen is Person-, Account- related. The icons are as follows:
|
||||
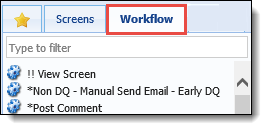
| Workflows |
Contains a list of available workflows. These workflows are configured by the system administrator in System Management > Workflow > Workflows. The workflows that appear in this list depend on the type of account in context in the workspace.
|
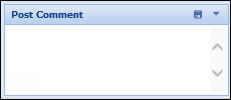
The Post Comment Box appears on the left navigation panel of the workspace. Comments are automatically posted to the person's workspace. Comments can be associated to specific accounts in addition to the account holder.
Enter any text into the Post Comment text box shown below.
To post the comment click the  icon. A Select Items pop-up window appears to associate accounts to that comment.
After selecting the accounts click OK to post the comment. The comment appears on the Workflow History screen. Click Cancel to cancel the comment.
|
Selecting an account is not required in order to post a comment. If an account is in context when posting a comment, that account is selected by default. If an account is not selected, the comment is posted for the person. |
To collapse the Post Comment Box, click the  icon. When the Post Comment Box is empty, clicking the icon also collapses the box.
The Overview Screen appears in the section of the workspace and is used to display information on the person being worked, as well as the account or in context. This screen cannot be closed.
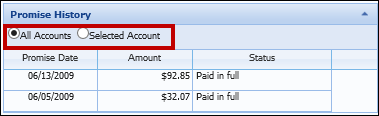
Information within some panels displayed in the overview screen can be viewed for all accounts or only the selected account by clicking All Accounts or Selected Account within the panel.
|
Panels default to a selection of All Accounts. |
Through some panels, screens can be accessed and other workspaces can be opened. For example, if the overview screen is configured to include the Related Persons panel, clicking on a Person within that panel displays a new workspace for that related person in a separate tab.
|
Information for a Joint account holder, such as the Joint account holder's primary address, appears in the Related Persons panel when the panel is configured to appear in the Workspace Overview. |
Similarly, clicking on a workflow on the Workflow History Panel opens the Workflow History screen.
When accessing screens and executing workflows for a person, account, or , the screen or workflow tab loads next to the overview tab as shown below:
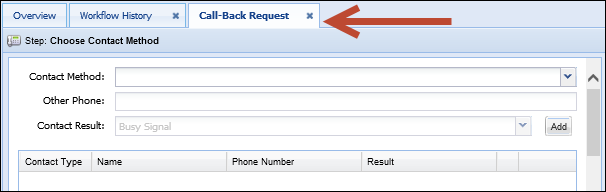
The information displayed within the overview screen automatically refreshes upon the selection of a new account or in the Related Accounts or Related Panel.
|
In order for information within a panel on the overview screen to update as a new account or is selected, the panel must be configured to appear on the person screen mapped to the overview tab in the workspace. Clicking a row within the Related Accounts or Related panel only refreshes the information within the overview screen. |
This automatic refresh does not occur when a new screen is opened. When a new screen is opened in the workspace, the information for the selected account or displays and does not refresh if a new account or is chosen within the Related Panels. To change the information that displays on a new Account screen, use the drop-down within the top of the Screen tab.
The overview screen can be configured by system administrators to include Person, Account, or panels that populate to display information regarding the specific account or in context. When a new account or is selected within a related panel, the information on the Account or panel of the overview tab automatically refreshes to reflect information for the account or in context.
Depending on the configuration of the Overview screen, additional panels may display when users change the account or in context.
|
If any address, phone or email panels are configured on the overview screen, the information in these panels cannot be edited as these panels are read-only. |
 Multiple Person Workspace Scenarios
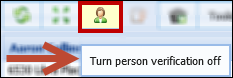

 icon displays the information that changed as well as any errors that occurred.
 icon next to the SSN is clicked to display the full number. When the click is released, the masked SSN displays once again. SSN masking cannot be disabled as PCI compliance dictates an SSN cannot be displayed in clear text on a screen.
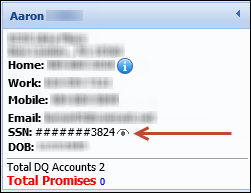
 icon.
icon.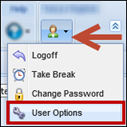


 - Account screen
 - Person Screen