
Temenos Lifecycle Management Suite - Origination Product Guide
Contacts
| Administrator Guide > Address Book > Contacts |
Contacts allows administrators to create and maintain contacts that have been configured for the institution. Administrators can associate these contacts to specific people and companies from the System Management > Address Book > Contacts page.
 |
Contacts can also be created in Address Book > Companies. See the Companies topic in this guide for more information. |
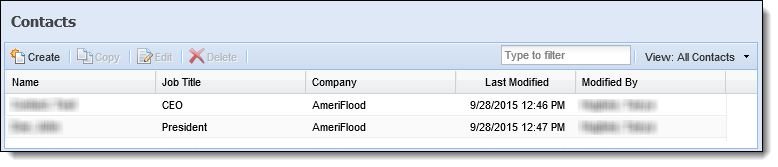
The following columns display on the Contacts page:
| Column Name | Description |
| Name | Displays the name of the contact. |
| Title | Displays the job title as it pertains to the company with which the contact is associated. |
| Company | Displays the name of the company with which the contact is associated. |
| Last Modified | Denotes when the last modification was made. |
| Modified By | Denotes who made the last modification for the contact. |
All contacts share common attributes that are defined while creating, copying or editing a contact.
General attributes are separated into six categories, General, Phone, Comments, Business Address, Home Address and Other Address, all of which are assigned on the General tab.
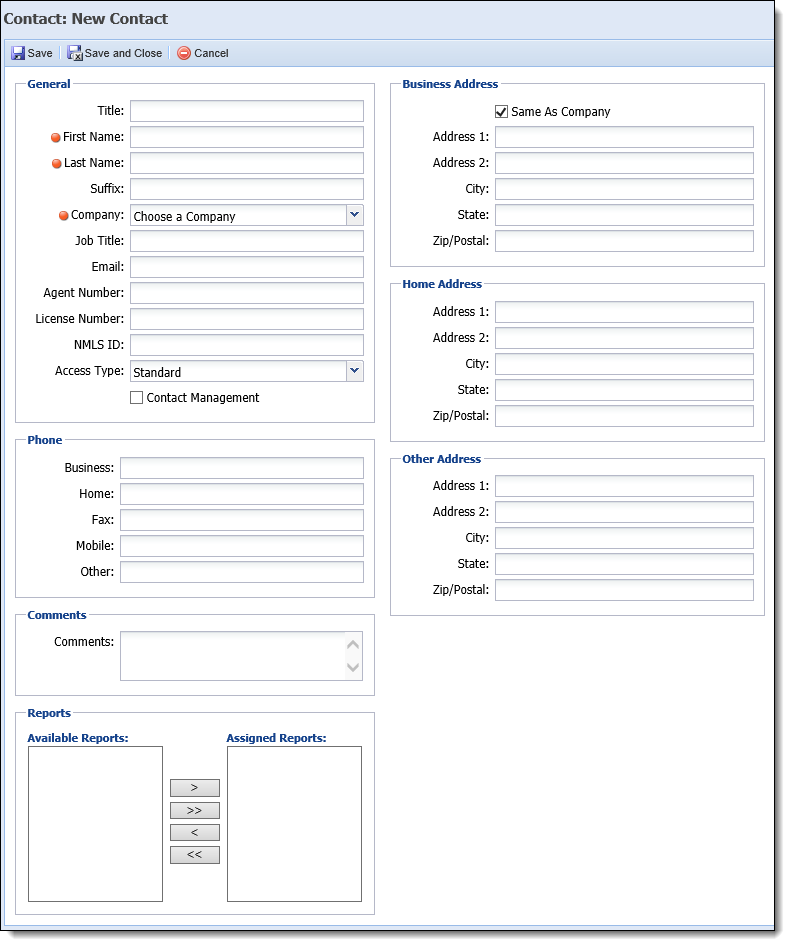
The following Contact attributes can be assigned within the General tab:
| Attribute | Description | ||||||||||||||||||||||
| General |
The general contact information includes seven fields:
|
||||||||||||||||||||||
| Phone | Enter any or all of the contact's Business, Home, Fax, Mobile and Other numbers. | ||||||||||||||||||||||
| Comments | Enter comments for the contact. | ||||||||||||||||||||||
| Business Address | Enter a business address for the contact. | ||||||||||||||||||||||
| Home Address | Enter a home address for the contact. | ||||||||||||||||||||||
| Other Address | Enter any other address for the contact. |
From the Contacts page, administrators can create a contact, copy an existing contact, edit an existing contact and delete contacts.
To create a contact:
To copy a contact:
To edit a contact:
To delete a contact:
 Creating a Contact