
Temenos Lifecycle Management Suite - Origination Product Guide
Vendor Management
| Administrator Guide > Vendor Management |
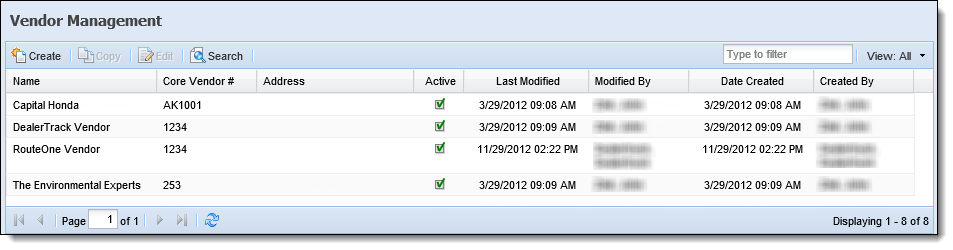
Vendor Management allows the administrator to create and manage a list of Vendors/Dealers with whom the financial institution does business. This list may include dealers associated with indirect application sources such as CUDL, Dealertrack or RouteOne, and vendors/dealers who submit applications directly to the financial institution via fax or at a branch. The vendors within this list are used for reporting and the calculating vendor fees, such as dealer reserve.
The Vendor Management page in System Management (System Management > Origination > Loan > Vendor Management) allows administrators to create new vendors, as well as manage the attributes of existing vendors. If an institution contains an existing list of vendors, users are able to utilize the Vendor Search functionality from this page.
The Vendor Management topic contains the following information:
Within the Vendor Editor window, administrators are able to define vendor attributes within the following tabs:
General attributes consist of the demographic and inspection review details for each vendor.

While managing vendors, define the following General attributes:
| Field | Description | ||
| General Properties | |||
| Name |
Enter the name or DBA of the vendor.
|
||
| Legal Name |
Enter the legal name of the vendor.
|
||
| Core Vendor # |
Enter the identification number used to identify the vendor's record on the core.
This is a required field/attribute.
|
||
| Active | Select the active check box to enable the vendor for use in the loan origination module. Inactive vendors cannot be selected when creating new applications. | ||
| Address 1 | Enter the vendor's street address. | ||
| Address 2 | Enter the vendor's street address. | ||
| City | Enter the city where the vendor is located. | ||
| State | Enter the state where the vendor is located. | ||
| Zip Code | Enter the zip code associated with the vendor's city and state. | ||
| Phone Number | Enter the vendor's phone number. | ||
| Extension | If applicable, enter the extension associated with the vendor's phone number. | ||
| Fax Number | Enter the vendor's fax number. | ||
| Email Address |
Enter the email address of the vendor representative(s) that correspondences and reports should be sent to.
|
||
| URL | Enter the URL of the vendor's website. | ||
| Termination Date |
Enter the date when the vendor ended its relationship with the institution or click |
||
| Representative |
Using the drop-down list, select the name of the individual at the financial institution who acts as the vendor's relationship manager.
|
||
| Market |
Using the drop-down list, select the name of the market/region where the vendor operates.
|
||
| Inspection Review | |||
| Identity Number | Enter the vendor's identity number. | ||
| Inception Date | Enter the date when the vendor began its relationship with the institution, or click  to select the inception date from a calendar. to select the inception date from a calendar. |
||
| Last Review Date | Enter the date of the vendor's last regulatory review, or click to select the last review date from a calendar. |
||
| Next Review Date | Enter the date of the vendor's next regulatory review, or click to select the next review date from a calendar. |
||
| Last Update Date | Enter the date that attributes for the vendor were last updated, or click to select a date from a calendar. This field can be used internally to track modifications made to each vendor and is not automatically updated in the Vendor Editor window. |
||
| Principal Credit Report Date | Enter the date of the vendor's last Principal Credit Report or click to select the date from a calendar. |
||
| Annual Review Date |
Enter the date of the vendor's annual regulatory review, or click |
||
| Termination Date | Enter the date when the vendor ended its relationship with the institution, or click to select the termination date from a calendar. |
||
| Last App Date | Displays the most recent date that a direct or indirect application was created for the vendor. | ||
| Last Booked Date | Displays the most recent date that an application was disbursed for the vendor. | ||
| Approve Credit Limit |
If the vendor is restricted to a certain credit limit, enter the monetary amount of credit that an application for the vendor cannot exceed.
|
||
| Business Credit Report Date | Enter the date of the vendor's last Business Credit Report or click to select the date from a calendar. |
||
The Vendor Types multi-grid contains the following tables to allow administrators to assign type attributes to a vendor:
| Attributes | Description | ||
| Available Vendor Types |
Contains a list of all vendor types that have not been assigned. Upon assigning a vendor type, the vendor type is removed from the available list.
|
||
| Assigned Vendor Types | Contains a list of all vendor types that have been assigned to the vendor. Once the vendor is saved, the vendor types in this table become the vendor type attribute(s). |
The Channels tab allows an administrator to set the channel specific information for each vendor.
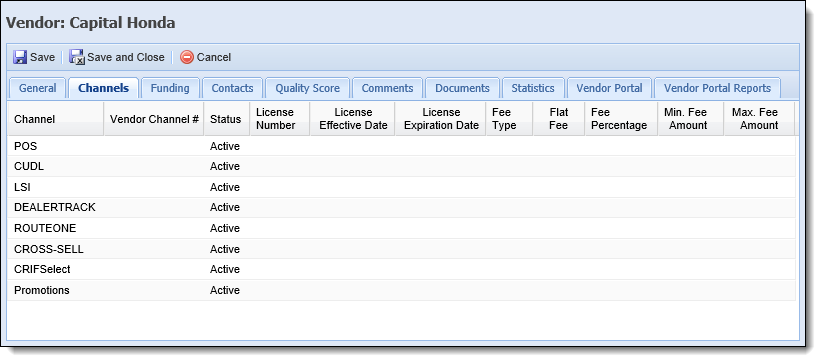
While managing vendors, define the following channel attributes:
| Field Name | Details | ||
| Channel |
Read-only field that populates from the Lending.Channel table in the database.
|
||
| Vendor Channel # |
The specific vendor ID number that may be associated for that specific channel.
|
||
| Status |
The current status of the dealer for that channel. Select an appropriate status from the drop-down list by double-clicking in the field:
|
||
| License Number | Provides the ability to track license or agreement number. | ||
| License Effective Date | The date in which the vendors license became effective. | ||
| License Expiration Date | The date in which the vendors license will expire. | ||
| Fee Type |
Select an appropriate fee type from the drop-down list by double-clicking in the field:
|
||
| Flat Fee | Field becomes enabled if Flat Fee is selected as the fee type. Enter the dollar amount to be paid per loan to the dealer. | ||
| Fee Percentage | Field becomes enabled if Percentage of Loan Amount is selected as the fee type. Enter the percentage to be paid per loan to the dealer. | ||
| Minimum Fee Amount | Enter the minimum fee that would be paid to the vendor. | ||
| Maximum Fee Amount | Enter the maximum fee that would be paid to the vendor. |
Update each row/column with the vendor's appropriate channel data.
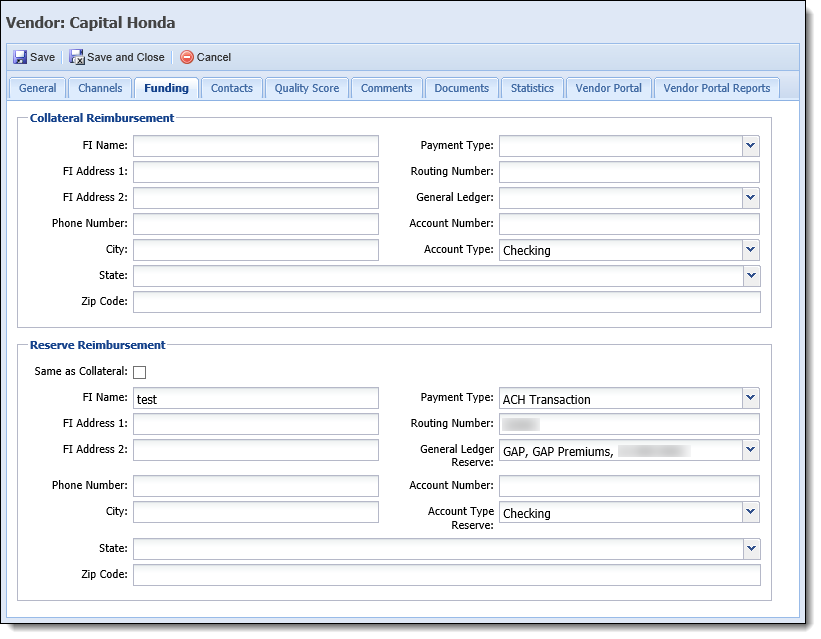
The Funding tab allows institutions to define specific funding information for each vendor. This tab includes two sections that provide administrators with the ability to capture the financial institution and account information used to compensate a vendor for the collateral on an approved application (Collateral Reimbursement) and enter the payment information used to submit reserve commission to the vendor (Reserve Reimbursement).
When funding occurs during the application process, the information configured in this tab is used to send collateral and reserve reimbursement payments to the applicable vendor according to the payment type selected.
 |
The Payment Type can be set to any of the available values for informational purposes; however, ACH Transaction is the only payment type that is able to be automatically submitted to a vendor for payment from a Temenos application. When an ACH Transfer funding record is added to an application for the vendor, the information entered within this tab pre-populates in the Edit Funding window in the workspace, and the Business flag is automatically set to true for the ACH Transfer record |
The following attributes are defined within each section of the Funding tab:
 |
If funding information is the same for both Reserve Reimbursement and Collateral Reimbursement, select the Same as Collateral check box in the top of the Reserve Reimbursement section. When this check box is selected, the fields in the Reserve Reimbursement section populate with the information entered for Collateral Reimbursement. |
| Field Name | Details | ||||
| FI Name | Enter the name of the financial institution to which the vendor payment is being issued. | ||||
| FI Address 1 | Enter the street address for the financial institution. | ||||
| FI Address 2 | Enter the second line of the street address for the financial institution. | ||||
| Phone Number | Enter the phone number for the financial institution. | ||||
| City | Enter the city for the financial institution. | ||||
| State | Select the state for the financial institution. | ||||
| Zip Code | Enter the zip code for the financial institution. | ||||
| Payment Type |
Select the type of payment to be issued to the vendor. This drop-down includes the following values:
|
||||
| Routing Number | Enter the routing number for the financial institution. | ||||
| General Ledger (Reserve) |
If payment is being sent to a vendor from a General Ledger, select the General Ledger from which the payment is to be made.
|
||||
| Account Number | If payment is being issued to a specific account, enter the account number where the vendor payment is to be sent. | ||||
| Account Type (Reserve) | Select Checking or Savings to identify the type of account receiving the payment. |
|
The Contacts tab is disabled until a vendor is created. Once a new vendor is saved, the Contacts tab is enabled within the New Vendor window. |
The Contacts tab enables institutions to retain a list of important contacts and contact information associated with the vendor. This list of contacts provides institutions a point of reference for key contacts at dealerships.
 |
A list of a vendor's contacts is available for an end user to view within the Vendor Contact panel. |
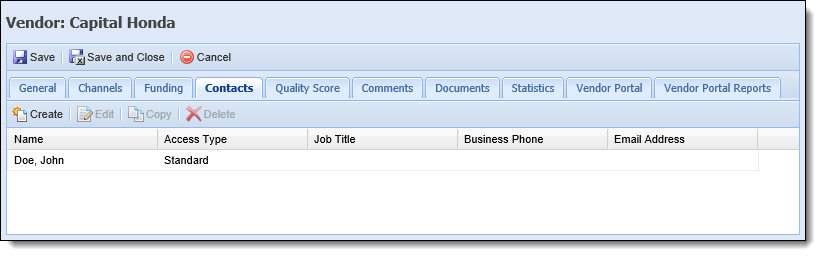
Within the Contacts tab, the following contact attributes are displayed for each contact:
| Field Name | Details |
| Name | Displays the name of the contact at the vendor. |
| Access Type | Displays the contact's access type. |
| Job Title | Displays the contact's job title. |
| Business Phone | Displays the contact's phone number. |
| Email Address | Displays the contact's email address. |
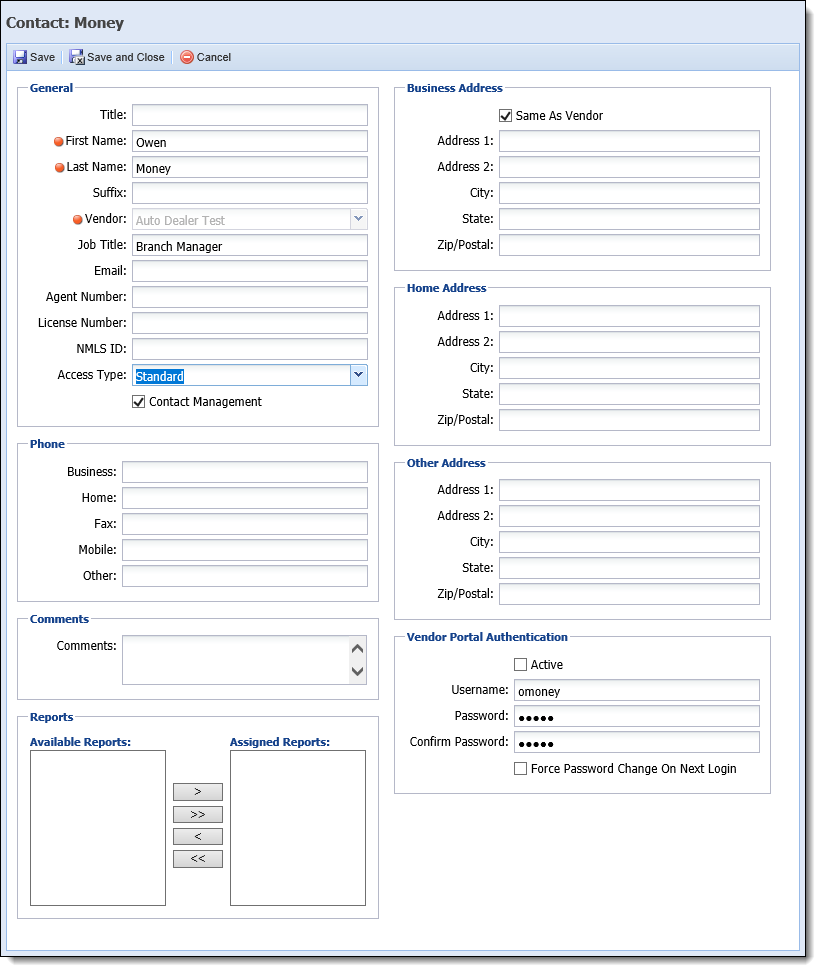
All contacts share common attributes that are defined while creating, copying, or editing a contact.
| Attribute | Description | ||||||||||||||||||||||||||||||||||||||||
| General |
The general contact information includes the following fields:
|
||||||||||||||||||||||||||||||||||||||||
| Phone | Provide any or all of the contact's Business, Home, Fax, Mobile, and Other numbers. | ||||||||||||||||||||||||||||||||||||||||
| Comments | Provide comments for the contact. | ||||||||||||||||||||||||||||||||||||||||
| Reports |
Use the two-box control to determine which Vendor Portal Reports are available to a contact within the Vendor Portal. The contact has access to all assigned reports within the Vendor Portal Reports page.
|
||||||||||||||||||||||||||||||||||||||||
| Business Address |
Provide a business address for the contact.
|
||||||||||||||||||||||||||||||||||||||||
| Home Address | Provide a home address for the contact. | ||||||||||||||||||||||||||||||||||||||||
| Other Address | Provide any other address for the contact. | ||||||||||||||||||||||||||||||||||||||||
| Vendor Portal Authentication |
The Vendor Portal Authentication section provides the ability to grant each contact at a vendor access to the vendor instances of Virtual Capture. Within this section, administrators are able to define the credentials for a contact to use to create and submit applications for a customer through a vendor instance of Virtual Capture This section includes the following attributes:
|
|
The Quality Score tab is disabled until a vendor is created. Once a new vendor is saved, the Quality Score tab is enabled within the New Vendor window. |
The Quality Score tab enables institutions to grade vendors according to the quality of the deals they transmit. The quality scores may be used to set review indicators to aid in decisioning.
|
Vendor quality scores are available to end users within the Vendor Quality Score panel. |

Within the Quality Score tab, the following contact attributes are displayed for each of the vendor's quality scores:
| Field Name | Details |
| Score | Displays the Lookup Description of each score listed within the VENDOR_SCORE_TYPE field lookup. |
| Value | Displays the calculated score of each score. |
| Modified By | Displays the name of the user who modified the score. For system calculated scores, "Lending System" displays. |
| Modified Date | Displays the date when the record was calculated/updated. |
The scores within the Quality Score tab populate according to the values within the VENDOR_SCORE_TYPE lookup in Field Configurations (System management > Origination > Field Configurations):
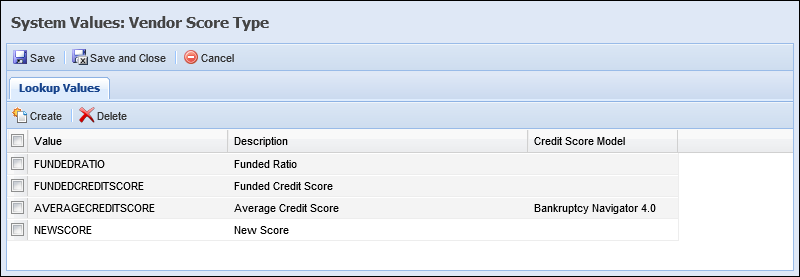
The following system-defined scores populate within this lookup and cannot be deleted:
|
Custom scores can be added to the VENDOR_SCORE_TYPE field lookup by clicking  . However, the institution must contact their Temenos Customer Care Representative to write code logic to calculate these custom scores. Please see the Field Configurations topic in this guide for more information on creating lookup values. . However, the institution must contact their Temenos Customer Care Representative to write code logic to calculate these custom scores. Please see the Field Configurations topic in this guide for more information on creating lookup values. |
| Field Name | Details | ||
| Average Credit Score |
This Quality Score provides the average Credit Score for all submitted applications for a vendor.
|
||
| Funded Credit Score |
This Quality Score provides the average Credit Score for all funded applications for a vendor.
|
||
| Funded Ratio |
This Quality Score provides a percentage based on the number of approved applications versus the number of funded applications.
|
The Akcelerant.Lending.Exe.VendorScoreCalculation process is used to calculate the quality scores of each vendor. By default this process occurs nightly at 8 PM.
|
Institutions may customize the run day/time by contacting their Temenos Customer Care Representative. |
|
The Comments tab is disabled until a vendor is created. Once a new vendor is saved, the Comments tab is enabled within the New Vendor window. |
The Comments tab enables institutions to track any comment associated with the Vendor record. Leveraging rules can provide the most recent comment as an informational message to Temenos users.
|
Vendor comments are available to end users within the Vendor Comments panel. |
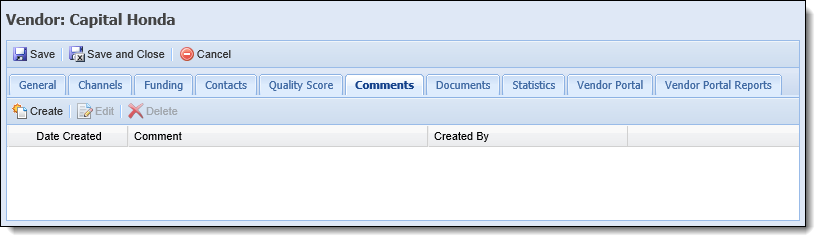
Within the Comments tab, the following comment attributes are displayed for the vendor:
| Column Name | Description |
| Date Created | Displays the date the comment was added to the vendor record. |
| Comment | Displays the comment. |
| Created By | Displays the name of the user who added the vendor comment. |
Clicking or  opens the comment dialogue box.
|
The Documents tab is disabled until a vendor is created. Once a new vendor is saved, the Documents tab is enabled within the New Vendor window. |
The Documents tab enables institutions to view and maintain a list of documents related to the vendor, such as annual regulatory reports/audits.
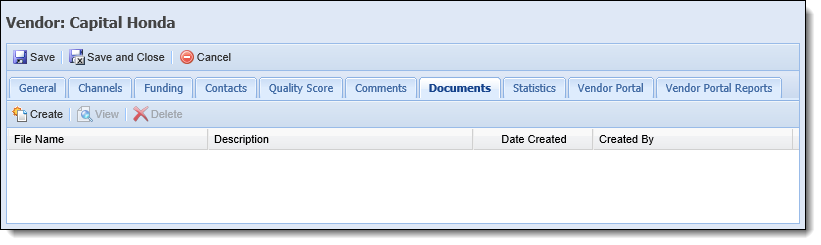
Within the Documents tab, the following attributes are displayed for each vendor document:
| Column Name | Description |
| File Name | Displays the name of the vendor document. |
| Description | Displays the document's description. |
| Date Created | Displays the date the document was added to the vendor record. |
| Created By | Displays the name of the user who added the document to the vendor record. |
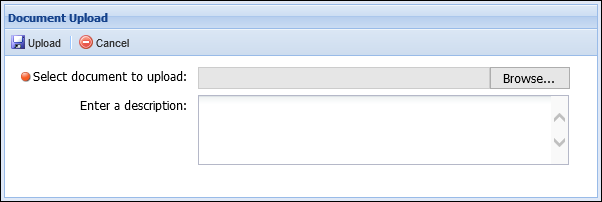
Clicking opens the Document Upload window to provide the ability to browse to a desired file and upload it to the vendor record.
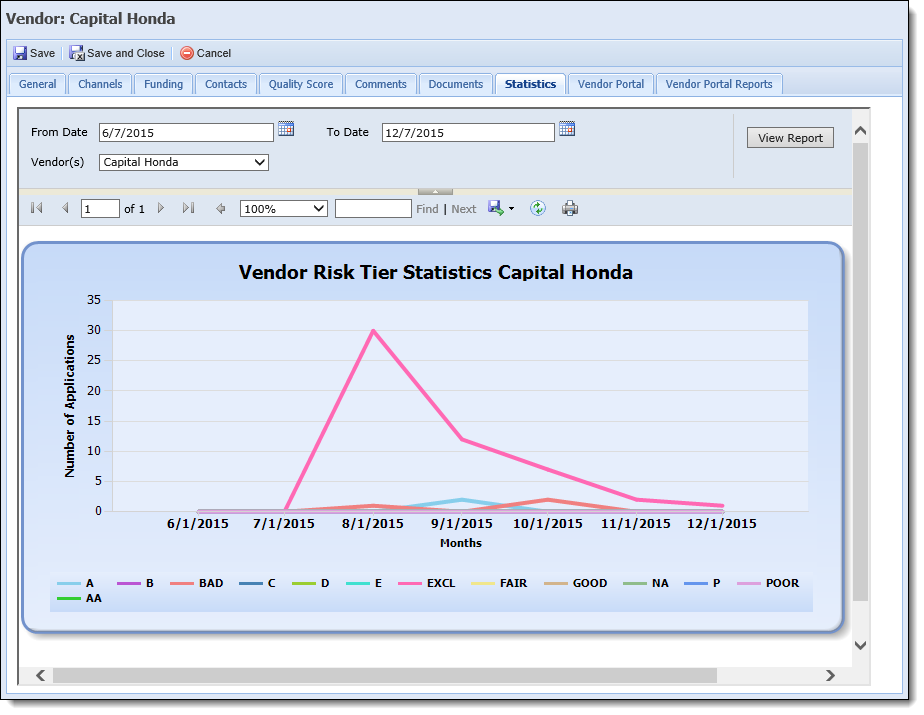
The Statistics tab provides institutions with quick and easy access to the Vendor Statistics report, which displays a statistical view of the number of applications submitted from a vendor according to risk tier to assist in determining the quality of loans produced by the vendor. This report displays a line chart that illustrates the total number of applications disbursed for the vendor based on the risk tier(s) associated with the applications. Upon opening the Statistics tab, the report populates with data for the selected vendor.
Within the top of the tab, the following attributes are available to allow administrators to determine the data that is displayed for the Vendor Statistics report:
| Attribute | Description | ||
| From Date |
Enter the desired start date for the report or click
|
||
| To Date |
Enter the desired end date for the report or click
|
||
| Vendor(s) | Select the vendor on which the report is to be run. This drop-down defaults to the vendor in context, but includes a list of all vendors configured in Vendor Management to allow the value to be modified. |
Reference the table below for an overview of the data that populates when the report is generated:
| Section of Report | Description |
| Number of Applications (Vertical Axis) | Displays the number of applications in a range from 0 to the highest number of applications submitted by the vendor. This range defaults to display in increments of five; however, when the number of applications for the vendor is less than five, this range is displayed in increments of one. |
| Months (Horizontal Axis) | Displays the months included within the date range specified for the report. The dates that display are the first of each month that is within the date range defined in the From Date and To Date parameters. |
| Chart | Displays one or more color-coded lines which correspond to the risk tier(s) associated with the application(s) submitted by the vendor. |
| Risk Tier Legend | Displays as a list along the bottom of the report to identify the color assigned to each risk tier configured in the Tiers tab in System Management > Origination > Loan > Risk Models. |
The Vendor Portal tab enables institutions to determine which Vendor instances and products a vendor can access in Virtual Capture.
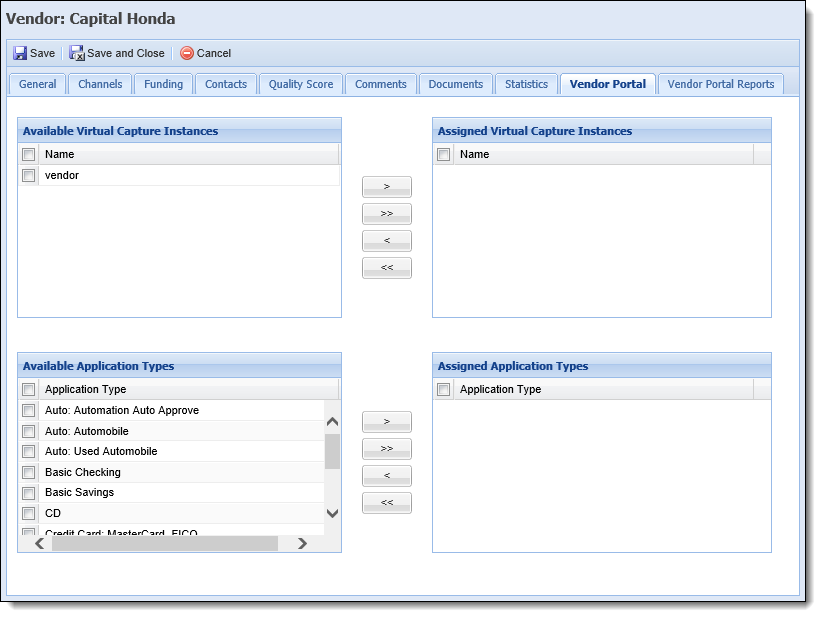
This tab includes the following two-box controls, which allow administrators to assign a vendor access to specific instances and products in Virtual Capture.
| Attribute | Description | ||||
| Virtual Capture Instances | |||||
| Available Virtual Capture Instances |
Displays a list of the Virtual Capture instances to which the vendor can be assigned. This list includes all active instances configured in System Management > Origination > Virtual Capture > Virtual Capture Settings that have an Instance Type of Vendor, and do not use the Login settings of another instance.
To assign an instance to the vendor, select the desired instance from the list, and move it to the Assigned Virtual Capture Instances box using the arrows, or by dragging and dropping the value.
|
||||
| Assigned Virtual Capture Instances |
Displays a list of the Virtual Capture instances that a vendor is permitted to access.
|
||||
| Application Types | |||||
| Available Application Types |
Displays a list of the loan application types and account products used to create a product for Virtual Capture in System Management > Origination > Virtual Capture > Virtual Capture Products.
To assign an application type to the vendor, select the desired product from the list, and move it to the Assigned Application Types box using the arrows, or by dragging and dropping the value.
|
||||
| Assigned Application Types |
Displays a list of the products that can be accessed by the vendor in Virtual Capture. Once the vendor is saved, the products in this list are available for selection by the vendor when a new application is created in an assigned instance of Virtual Capture.
|
||||
The Vendor Portal Reports tab enables institutions to determine which vendor reports can be accessed by the vendor in Virtual Capture.

This tab includes the following two-box control, which allows administrators to assign a vendor access to specific reports in a vendor instance of Virtual Capture.
| Attribute | Description | ||
| Available Reports |
Displays a list of the vendor reports configured within the Reports page in the Ribbon Bar. This list includes all active Application type reports with the Vendor Portal parameter set to true in the Define tab of the report configuration window.
To assign a report to the vendor, select the desired report from the list, and move it to the Assigned reports box using the arrows, or by dragging and dropping the value.
|
||
| Assigned Reports |
Displays a list of the vendor reports that a vendor is permitted to access in Virtual Capture. |
From the Vendor Management screen, administrators are able to perform the following actions:
To create a vendor from the Vendor Management page:
to open the New Vendor window. to create the vendor., the Contacts, Quality Score, Comments and Documents tabs are enabled.
To create a new contact:
. |
Please see the Contacts section in this topic for an overview of the fields in the New Contact screen. |
 to retain the details and return to the Contacts tab. The contact now appears in the Contacts list and can be associated to an account/person from their Contacts screen.
To copy a contact:
 . to finalize the creation of the new contact.
To edit a contact:
. to retain the updated contact.To delete a contact:
 .
.To create a comment:
. to add the comment to the Comments tab. A success message appears to confirm that the comment was added. Click OK to close the message and return to the Comments tab.
To edit an existing comment:
. to retain the updated comment.To delete a comment:
.To upload a new document:
to open the Document Upload window. to attach the document to the vendor.
To view a document:
 .
.To delete a document:
. to retain the vendor settings and return to the Vendor Management page. The new vendor appears within the Vendor Management grid.To copy a vendor:
. to finalize the creation of the new vendor.To modify an existing vendor:
. to retain the updated vendor.Search allows the administrator to search the entire Vendor List by vendor name (full name or partial name).
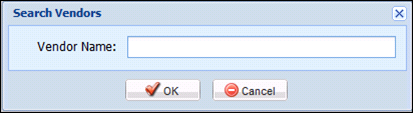
To complete a vendor search:
 within the top of the Vendor Management page..
In addition to manually adding vendors and their associated contacts within Vendor Management, institutions are able to perform a one-time import to add vendors and contacts. To perform a one-time vendor import, institutions must create an Excel spreadsheet containing the following information, in the specified format.
|
This process is performed during implementation with the assistance of Temenos Professional Services. After implementation, vendors and contacts are added through Vendor Management. |
|
To perform this import, it is recommended that Microsoft Excel is temporarily installed on the server where the document is being imported. This installation assists Temenos Professional Services with troubleshooting failed imports. |
The Excel spreadsheet should consist of two sheets:
| Sheet Name | Description | ||||
| Sheet1 |
Contains information about the vendor. The following columns must be included in Sheet1:
|
||||
| Sheet2 |
Contains information about each contact associated with each vendor. The following columns must be included in Sheet2:
|
Once the spreadsheet is created, save it locally on the app server. While on the server, navigate to the Exe folder located within the app server (or dedicated app/web server) C:\Program Files (x86)\Akcelerant\Framework\Exe.
Within the Exe folder, locate and select the VendorImport application. Within the Import Vendors pop-up, Browse to the location of the vendors spreadsheet and click Import.
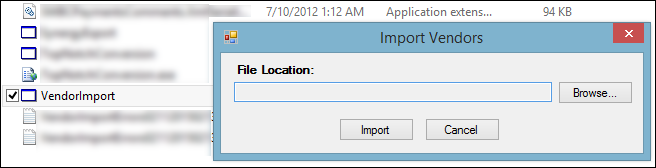
Once the import successfully executes, click OK in the notification message.
|
An exception record returns for all Vendors which do not contain a Vendor Name or Core Vendor Number. |
All vendors included in the spreadsheet, populate within the Vendor Management page in System Management. All vendor contacts included in the spreadsheet, populate within each associated vendor.
|
Any data that was not imported, must be added manually by editing the vendor in Vendor Management. |
 Create Contacts