Specific loan records and all of their related items, such as follow-up notes, letters, emails and contacts, can be removed from Elements. Loans and related items are removed based on administrator defined criteria. Once data is purged, it can no longer be accessed in Elements.
 |
Because purging loans is irreversible, database backups should be performed on a nightly basis to ensure any changes can be rolled back. |
From System Management, select Collection > Purge Loans from the Security and Maintenance group on the Configure tab. The Purge List screen is displayed. The Purge List screen shows all purges that have already been defined in Elements.
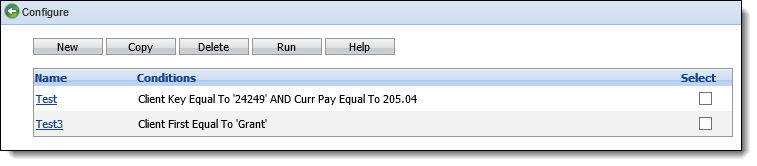
The following columns display on the Purge List screen.
| Column Name | Description |
| Name | The name of the Purge. |
| Conditions | The criteria defined for the Purge. |
| Select | Use this checkbox to select a purge to Copy, Delete or Run. |
 |
Access to Purge Loans is based on a user's security profile. Please see the Security Profiles topic for more information on user security. |
From the Purge List screen, administrators can create, edit, execute, copy and delete a purge.
Purge Attributes
All purges share common attributes that are defined while creating, copying or editing a purge.
General
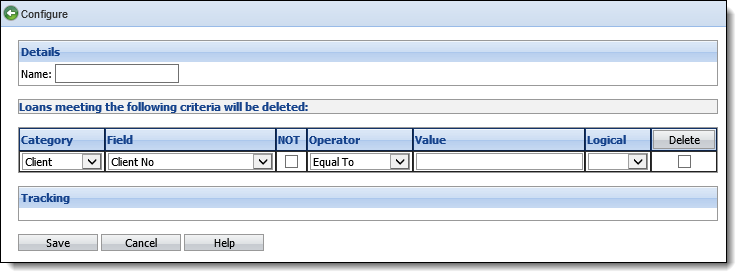
General attributes are located on the Purge Detail screen.
| Attribute | Description | ||
| Name | Enter a name for the new purge criteria. | ||
| Category | Select the category to be Client or Loan. These categories dictate what field selections are available. The Client category allows client-level fields, such as name and address, to be available. The Loan category allows loan-level fields, such as delinquency status and current balance, to be available. | ||
| Field | Select the desired field from the drop-down. The available values are displayed based on the chosen Category. For example, if Client is the Category, Loan fields such as Loan Type or Days Delinquent are not available in the Field drop-down. Only Client-related fields, such as Client Last or First Name, are available. | ||
| NOT | Select this checkbox to use "NOT" in conjunction with the selected operator. | ||
| Operator |
Select the desired Operator, such as Less Than, More Than or Equal To. The available values are displayed based on the type of Field chosen. For example, Equal To is the only Operator value available for flag fields.
|
||
| Value | Select the Value for the field. The type of value (date, flag, character) that can be entered is based on the Field and Operator chosen. For example, a value of True or False is the only allowed value for flag fields. | ||
| Logical |
Select the Logical value.
|
||
| Delete | Select this checkbox and click the Delete button to remove the line of criteria. |
Creating a Purge
- To create a new purge, click the New button at the top of the Purge List screen.
- The Purge Detail screen displays.
- Define the criteria for the purge by using the General attributes defined above. Loans must meet this criteria in order to be purged.
- When finished, click Save. The new purge is listed on the Purge List screen and the purge can be performed.
Editing a Purge
- To edit an existing purge, click the Name link of the purge.
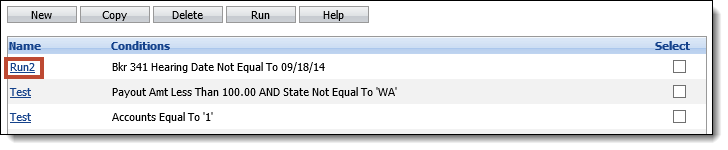
- The Purge Detail screen displays.
- Make any modifications to the purge criteria and click Save.
Executing a Purge
- To perform a purge, click the Select checkbox next to the desired purge on the Purge List screen and click Run.
Criteria must be defined and saved before a purge can be executed.
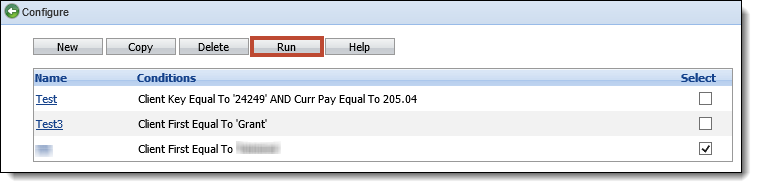
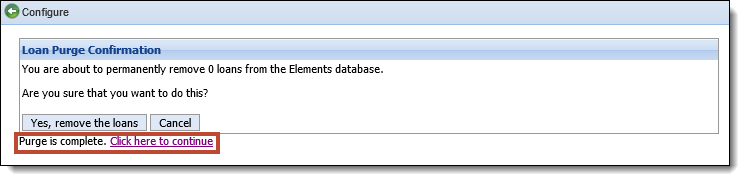
- A prompt appears indicating the number of loans that the purge will permanently remove. Click Yes to start the purge. Click Cancel to disregard the purge.

- When Yes is selected, text appears below the confirmation to indicate the status of the purge. When the purge is complete, click the Click here to continue link to return to the Purge List screen.
If all of a client's loans are purged, the client record is not purged. The client's demographic (phone numbers, addresses) and contact information is still present in the workspace.
If a loan is purged and imported back into Elements, it is treated as a new account. Therefore, purged data related to the loan, such as follow-up notes, is not available. This occurs if a loan is still in the file downloaded from the core after it has been purged from Elements.
Copying a Purge
- To copy criteria of an existing purge, click the Select checkbox next to the desired purge on the Purge List screen and click Copy.
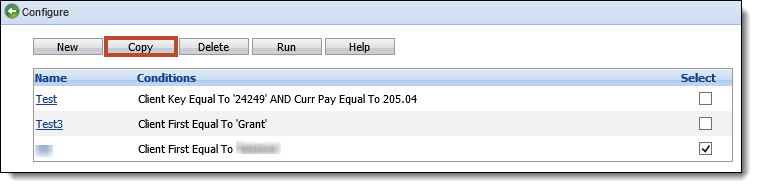
- The Purge Detail screen displays. Edit any information and click Save. Click Cancel to disregard any changes.
- The purge appears on the Purge List screen and can be executed.
Deleting a Purge
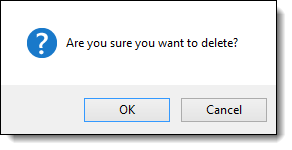
- To delete a purge, click the Select checkbox next to the desired purge on the Purge List screen and click Delete.
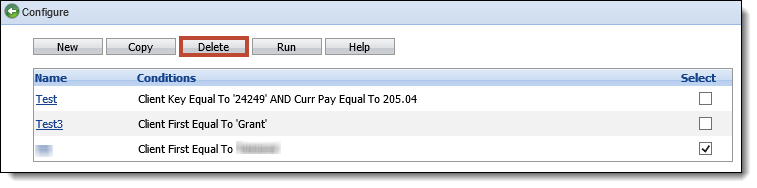
- A prompt appears confirming that the purge should be deleted. Click OK to proceed with the deletion. Click Cancel to disregard the deletion.
-
Once OK is selected, the purge is deleted and removed from the Purge List screen.