On the Elements tab, select the System Management button on the toolbar. Under the Elements group on the menu, select Collection, then select Mail Templates from the Communication Group on the Configure tab. Access to this form is controlled by your Security Profile.
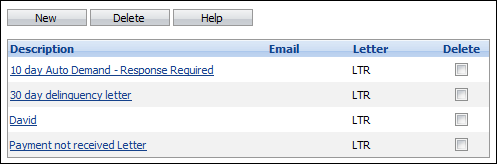
A Mail Template is the basis of all standard form letters and e-mails sent from the Collection Element. You can type the body of the document using the word processing feature and insert merge fields into the document. A list of all the current Mail Templates is displayed on this page. Here, you can create, edit or delete a Mail Template.
 |
Printed letters can be formatted to be inserted into windowed-envelopes or you can create a separate template for generating envelopes. If you use the separate template, you will need to specifically print both the letter and the envelope. An alternative solution is to use Print to Mail where letters are directed to a specific printer that folds and seals the letter automatically. |
Merge Fields
Specific information or merge fields can be placed into each letter such as the client first and last name, default mailing address, and loan specific information such as the current amount due and days delinquent. The merge fields are extracted from merge tables. These are:

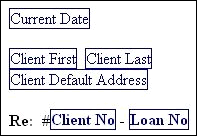
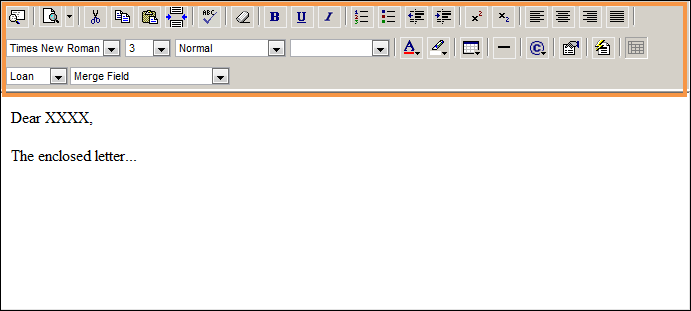
An example of how Merge Fields look when inserted into a mail template is displayed below. The current date is located in the 'Other' table, the Client Name and Address and Client No are located in the 'Client' table and the Loan Number is located in the 'Loan' table.
Create a New Mail Template
The section contains the following topics:
Creating a New Mail Template
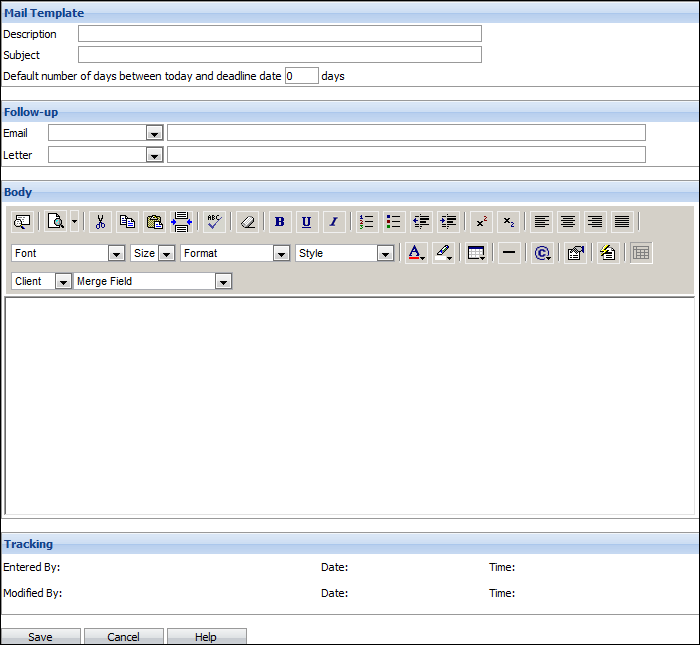
Enter the following information:
| Field | Description | ||
| Description | Make this description unique and informative. This will be the title displayed in the mail dropdown list that you will use to select the document you want to generate. | ||
| Subject Line | Required only if you will be emailing this document. This will be inserted automatically as the subject line of your email. | ||
| Days | Set the number of days that you normally grant to clients to respond to this letter. In each mail template you can add a merge field called Deadline. If you use this merge field, when the letter is generated the deadline date will be calculated based on the current date plus the number of days specified here. | ||
| Call Type | Select the call types that you want to insert automatically when you generate a letter or an e-mail. | ||
| Body |
Type the body of the document.
|

To format your letter
- To start a new line, press Shift+Enter.
- To start a new paragraph, with a blank line before the start of the new paragraph, press Enter.
- To set your margins, click on the Page Properties button.
-
- The default top and bottom margins are 15. An additional 10 units will increase the margin by about 1/4 of an inch.
- The default left and right margins are 10. An additional 10 units will increase the margin by about 3/16 of an inch.
- The actual margin for the printed letter will be a combination of the settings for the template PLUS the settings for the computer printing the letter (set under Internet Explorer > File > Page Setup).
- Select a font. The default font in Elements is Times New Roman.
-
- Select a different font from the dropdown list before you start typing OR select the text that you wish to change the font for and then select the new font from the dropdown list.
- Select a text size. The default text size is 3. Elements letters are produced using HTML, therefore the text sizes are different than you may be used to in your standard word processing applications. The text sizes run from 1 (the smallest) to 7 (the largest). The text size of 2 is roughly equivalent to 10 point in Word; 3 is roughly the same as 12 point.
- Use the various formatting features as you would with any other word processor.
To add a merge field
- Select the correct Table from the dropdown list. The options are Client, Loan, Contact and Other.
- Click in your letter at the point where you want the merge field inserted.
- Select the merge field from the dropdown list. There are different merge fields for client and contact information (i.e. name, address, etc.). Be sure you select the right demographic merge fields.
Table Field Name Function Loan Loan Table
Rep Fee Table
Inserts a lit of all the client's loans/accounts. Includes all accounts regardless of delinquency.
Inserts a list of Repo Fees entered from the selected account.
User Custom
Deadline
Can server any functional required. These are text fields. The user will be to able to key in the information required prior to printing the letter. Note, the user's profile must allow him/her to edit letters.
Calculates and displays a date based on the printing date PLUS the number of days specified for the template.
Do not include Custom or Contact merge fields in mail templates that will be used to generate Batch documents. Do not include the merge fields Loan Table or Repo Fee Table if you want to send your letters to the XPress third party letter printing service.
To insert your logo or other image file on your letter
- Provide a copy of your logo file to your Akcelerant representative. They will place a copy of the logo onto the Collection Element server and provide you with the URL.
- Open another session of Internet Explorer.
- Enter the URL you have been provided. The path will look like http://servername/elements/images/yourlogoname.jpg.
- When the logo is displayed in Internet Explorer, highlight it and copy it (right-click and select copy).
- Return to your mail template and paste the image in the correct place (right-click and select paste).
- HINT: Your logo image should be approximately 105 pixels high by 225 pixels wide. If your logo is bigger than 105 x 225, it will be cropped and may not display correctly.
To create a table
You cannot create columns of information in HTML. So, if you want to have a number of lines in your letter that will align nicely, you might want to consider putting them in a table. For example, you may want to create an account information summary at the start of your letter that contains client/loan information.
If you do not put it in a table it would look like this:

You can see that the Client No merge field does not align with the Security Year merge field on the next line. To make them align you would create a table.
- Place your cursor in the location in your letter template where you wish to insert the table.
- Click the
 insert table button on the toolbar.
 - Enter the number of rows and columns in the Table Maintenance form. In this example you will need two rows and two columns.
- Set the border value to 0 - this will hide the lines on the table and make the text look like it was tabbed.
- Enter a value into width to what percentage of the page you want the table to take. If you leave it at 100%, the table will be as wide as the body of your letter.
- Click on the Insert Table button.
- Key the information into the correct cells in the table. Insert the merge fields as appropriate. You will notice that the size of the cells will change as you type into them.
- Right-click on the table to edit the table or cell properties, and add or delete columns or rows.

To insert page breaks in your letter template
- Place your cursor in the location in your letter template you wish to insert the page break.
- Click the
 button on the letter template toolbar.
To insert a custom merge field
- If you want to include information in the template that will vary from letter to letter that is not available from one of the data merge fields, you can use a custom field. Immediately prior to printing the letter you will be able to enter the specific text you wish to include in the letter.
- Position your cursor where you want to insert the column field.
- Select the User table from the dropdown list.
- Select one of the Custom Fields (1 through 20). Note a custom field can server different functions in different letters.
- When you Save your mail template, a Custom Field Labels form will be displayed.
- Enter a Field Label for each Custom Field. The custom fields can accommodate multiple lines of text.
- Click Save.
Do not include Custom merge fields in mail templates that will be used to generate Batch documents.
Edit a Mail Template
- Click on the Mail Template Description that you want to edit.
- Change any of the information on the Mail Template page.
- Click Save to save your changes or Cancel to return to the list of templates without saving your changes.
Deleting a Mail Template
- Click the Delete checkbox(es) next to the Mail Template(s) you want to delete.
- Click Delete.
You cannot delete Mail Templates that are linked to existing Batches.