The Collection Element allows you to record information about returned checks and link them to specific accounts. You can also link images of the check (front and back) to the record.
This topic contains these sections:
From the Loan Maintenance page, click on Returned Checks. On the Returned Check Maintenance page you can create, edit or delete a returned check.

Create a New Returned Check
- Click New.

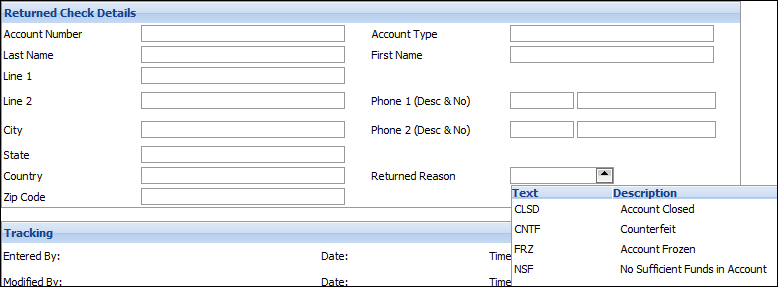
On the Returned Check - Check Details Page
- Enter a description of the check.
- Enter the returned check details, including maker name, address, account, etc.
- Select the Returned Reason code from the displayed list.
- Click Save.
Save an Image of the Check
- On the Returned Checks page, select the check you just entered and click on the description.

- On the Returned Check page, click on Browse to locate the image of the front of the check. Images must be in jpeg, gif or bmp format. Click on Upload to save the image in the Collection Element database. Since a copy of the image is saved within the Collection Element, the original image does not need to be located on the server or a shared network drive.
- Repeat to locate and load the image of the back of the check.

- Click Save.
Edit a Returned Check
- On the Returned Checks page click on the description of the check you want to edit.
- Modify required details.
- Click Save.
Delete a Returned Check
- On the Returned Checks page click on the delete checkbox next to the check(s) you want to delete.
- Click Delete.
