Temenos Lifecycle Management Suite - Account Origination Product Guide
Funding
| End-User Guide > Application Processing > Post-Decision > Approval > Funding |
When funding approved applications, users are able to fund accounts via Check, Credit Card, ACH Transfer, or Internal Transfer.
Users are able to complete the funding of an application by performing the following actions:
The generation of new loan account numbers and suffixes can be an automated process if the core supports account number auto-generation. This process is enabled by the Host supports account number auto-generation parameter within the System tab in the Solution.Origination page. For more information, please see the applicable Core Connector Guide.
User-defined Account Product screens can be created to allow users to update account numbers and fund approved applications. While account numbers can be generated by clicking  within the Application Toolbar and selecting Change Account/Loan Number, applications must be funded by navigating to an Account Product screen that contains the Funding panel.
This topic provides the following information to assist users in funding an application:
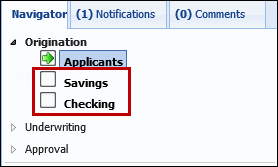
Depending on the configuration of the Workflow Model, an itemized list of the account products added to an application may appear under different Workflow categories within the Application Navigator.
 |
The Account Products system screen must be assigned to a workflow category in order for the list of account products to appear within the application workflow. For more information, please see the Account Products topic within the Administrator guide. |
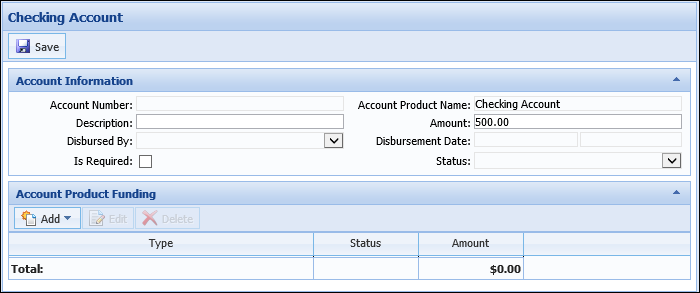
Clicking a product name opens the Account Product screen assigned by the system administrator. System administrators can configure these user-defined screens to include different fields and panels that display and capture information for the account.
If the screen assigned to the account product is configured to include the Account Product Funding panel, users are able to capture funding information for an account directly within the Account Product screen.
|
Whether or not funding for an account product is required is determined by the value entered in the Amount field. Funding is required for any account product that has a value greater than 0 in the Amount field. If there is a minimum amount required to fund the account product, system administrators can dictate this value through business rules. |
|
For more information on account products in an application, please see the Account Products topic within this guide. |
|
The Account Product Funding panel can be added to an Account Product screen in System Management > Origination > Screens. |
The Account Product Funding Panel provides users with the ability to identify a funding type for the new account product(s) and capture the information necessary to transfer funds into the new account(s) at time of disbursement.
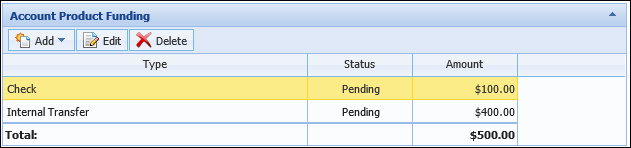
The grid within this panel displays the following columns of information about each funding record:
| Column | Description | ||
| Type |
Displays the type of funding selected. The available funding types are:
|
||
| Status |
Displays the status of the account’s funding. One of the following statuses may appear within this column:
Identifies that account funding has not yet occurred and the funding record is awaiting transfer. A status of Pending displays after a funding record is added and prior to the transfer of funds at time of disbursement.
Identifies that account funding has occurred and the funds were transferred successfully at time of disbursement.
Identifies that a failure occurred while trying to fund the account at time of disbursement. If a failure occurs, a message is received to indicate which transaction failed and the reason for the failure.
|
||
| Amount | Displays the amount of funds being transferred into the account. | ||
| Total | Displays the total amount of funding to occur at time of disbursement. This amount reflects the sum of the funding records added to the panel and updates each time a new funding record is added. |
From the Account Product Funding panel, users are able to perform the following actions:
| Icon | Description |
 |
Allows a user to identify a funding type and add a funding record to the application. |
 |
Allows a user to edit a funding record. |
 |
Allows a user to delete a funding record. |
When is clicked, a drop-down list populates with the available funding options.
Select one the following options to fund an account product:
|
Since certain funding types do not require processing, system administrators have the ability to determine the funding types that are automatically processed in the Account Origination module through the PRODUCT_FUNDING_TYPE lookup. When a funding type is configured to automatically process funding within the lookup value, it is determined that the funding record does not need to be processed in order to disburse the application. By default, Cash and Check are the only funding types set to automatically process funding in System Management > Origination > Field Configurations. |
When ACH Transfer is selected as the funding option, the Edit Account Product Funding – ACH Transfer window appears. This window provides users with the ability to enter the information required to fund an account through an ACH Transfer from an outside financial institution.
 |
If the connector being used to support ACH transactions is inactive, the ACH Transfer option appears as an available funding option; however, the account product cannot be successfully funded without the connector enabled. For more information, please see the applicable connector guide. |
![]()
Enter information within the following fields to fund an account through an ACH Transfer:
|
All fields within the Edit Account Product Funding – ACH Transfer window are required. |
| Field | Description |
| ACH Account Type | Select an option from the list to identify the type of account from which funds are being transferred. This drop-down includes the values configured for the ACH_Account_Type lookup in System Management > Field Configurations. |
| Amount | Enter the amount of funds to be transferred. |
| Account Holder Name | Enter the name of the account holder. |
| ACH Routing Number | Enter the routing number of the source account. |
| ACH Account Number | Enter the account number of the source account. |
Once all fields are complete, click OK to add the funding record to the application. The ACH Transfer record populates within the Funding grid with a Status of Pending.
![]()
When Cash is selected as the funding option, the Edit Account Product Funding – Cash window appears. This window provides users with the ability to enter the information required to fund an account through a cash transaction at the institution.
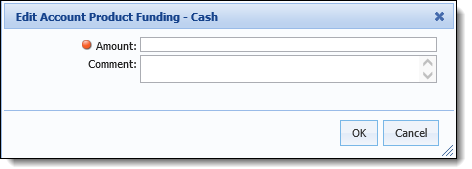
Enter information within the following fields to fund an account through a cash transaction:
| Field | Description | ||
| Amount | Enter the amount of funds to be accepted. | ||
| Comment |
If desired, enter any comments related to the cash transaction.
|
Once all fields are complete, click OK to add the funding record to the application. The Cash record populates within the Funding grid with a Status of Pending.

When Check is selected as the funding option, the Edit Account Product Funding – Check window appears. This window provides users with the ability to enter the information required to fund an account with a check.
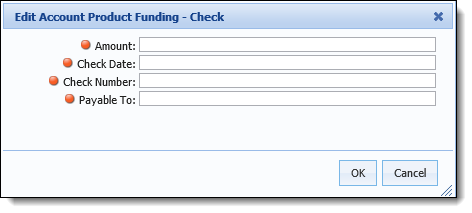
Enter information within the following fields to fund an account by Check:
|
All fields within the Edit Account Product Funding – Check window are required. |
| Field | Description |
| Amount | Enter the amount of funds to be transferred. |
| Check Date | Enter the date recorded on the check. Clicking within this field displays a calendar to select a date, but a date can also be manually entered. |
| Check Number | Enter the Check Number. |
| Payable To | Enter the name recorded within the "Pay to the order of" line of the check. |
Once all fields are complete, click OK to add the funding record to the application. The Check record populates within the Funding grid with a Status of Pending.

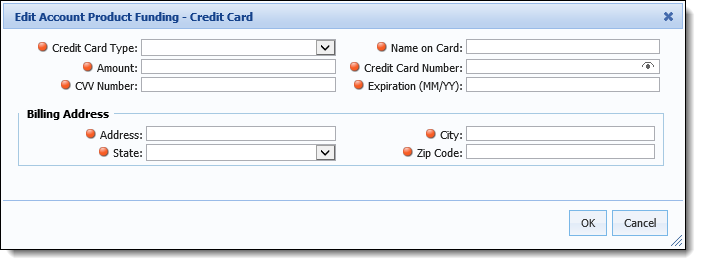
When Credit Card is selected as the funding option, the Edit Account Product Funding – Credit Card window appears. This window provides users with the ability to capture the information required to fund an account through a credit card transaction.
|
If the connector being used to support credit card transactions is inactive, the Credit Card option appears as an available funding option, however, the account product cannot be successfully funded without the connector enabled. For more information, please see the applicable connector guide. |
Enter information within the following fields to fund an account with a credit card transaction:
|
All fields within the Edit Account Product Funding – Credit Card window are required. |
| Field | Description | ||||||||||||||
| Credit Card Type |
Select the type of credit card being used to fund the account from the drop-down list. The Credit Card Type options are:
|
||||||||||||||
| Amount | Enter the amount of funds to be transferred. | ||||||||||||||
| CVV Number |
Enter the three digit Card Verification Value (CVV) number located on the back of the credit card.
|
||||||||||||||
| Name on Card | Enter the credit card holder’s name as it appears on the card. | ||||||||||||||
| Credit Card Number |
Enter the credit card number.
|
||||||||||||||
| Expiration (MM/YY) | Enter the credit card expiration date in a MM/YY format. | ||||||||||||||
| Billing Address | Enter the credit card holder's billing Address, City, State, and Zip Code. |
Once all fields are complete, click OK to add the funding record to the application. The Credit Card record populates within the Funding grid with a Status of Pending.

When GL Voucher is selected as the funding option, the Edit Account Product Funding – GL Voucher window appears. This window provides users with the ability to enter the information required to fund an account from a General Ledger account.
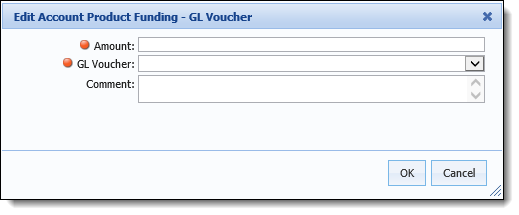
Enter information within the following fields to fund an account from a General Ledger account:
| Field | Description | ||
| Amount | Enter the amount to be funded from the General Ledger account. | ||
| GL Voucher |
Select the GL Voucher from which the deposit account is to be funded. This drop-down list includes all General Vouchers identified within the Lending.GLVoucher table in the database. |
||
| Comment |
If desired, enter any comments related to the GL Voucher transaction.
|
Once all fields are complete, click OK to add the funding record to the application. The Cash record populates within the Funding grid with a Status of Pending.

|
The Internal Transfer option is only available when the primary applicant is a current account holder. |
When Internal Transfer is selected as a funding option, the Edit Account Product Funding – Internal Transfer window appears. This window provides users with the ability to enter the information required to use funds from an account within the financial institution to fund the new account product.
![]()
Enter information within the following fields to fund an account through an Internal Transfer:
|
All fields within the Edit Account Product Funding – Internal Transfer window are required. |
| Field | Description | ||
| Amount | Enter the amount of funds to be transferred. | ||
| Deposit Account |
Select a source account from the drop-down list. This list includes the deposit accounts on record at the institution for all applicants related to the application.
|
Once all fields are complete, click OK to add the funding record to the application. The Internal Transfer record populates within the grid in the Funding panel with a Status of Pending.
![]()
After all funding records have been added, click  within the screen toolbar to retain the funding information.
|
Clicking OK within the Edit Account Product Funding window does not save the funding record to the application. The screen including the Account Product Funding panel must be saved in order to permanently add the funding record to the application. |
The records within the Account Product Funding panel are processed when  is clicked within the application.
|
If the total amount of funding to occur for an account product does not match the value entered within the Amount field in the Account Product screen, an error is received at time of disbursement. |
 |
For an overview of the Funding process at time of disbursement, see the Disburse topic within this guide. |
|
All funding types are editable prior to disbursement. |
. to retain the changes. |
All funding types can be deleted prior to disbursement. |
 .
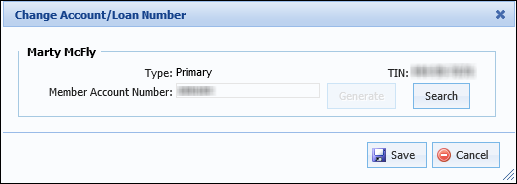
.At any time while processing an application, users are able to click  within the Application toolbar and select Change Account/Loan Number to determine the account number for the account holder assigned to the application.
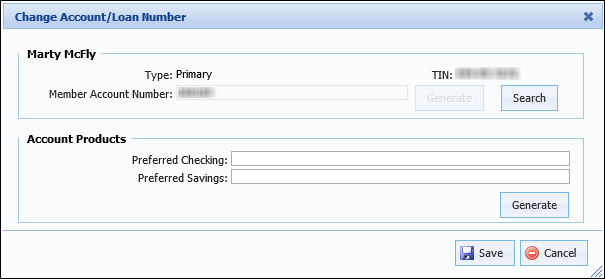
Selecting this opens the Change Account/Loan Numbers screen:
|
If an account application is created with no account products assigned, the Change Account/Loan Number screen appears as follows:
|
The Change Account/Loan Number screen is divided into the following sections:
The Member Account Number section enables users to create a member account number for a new primary applicant, generate a new member account number for an existing primary applicant, or change the account number currently assigned to the application. The Member Account Number may be determined manually by users within the Change Account/Loan Number screen or automatically using Event Processing.
At the bottom of the Change Account/Loan Number screen, the Member Account Number section populates with the name, applicant type, tax identification number, and member account number for the primary applicant assigned to the application.

Once Generate is clicked within this section, an account number for the primary applicant is generated and automatically populated within the Member Account Number field.
When the primary applicant is an existing account holder, and the user is granted the appropriate permission by the system administrator, the Generate button is enabled and provides the ability to create a new record for the applicant in the core system.
Users also have the ability to click Search to retrieve account numbers associated with the applicant’s TIN from the core system.
|
The Search function is only available for Member Account Numbers. |
The Search process enables users to change the member account number assigned to the application. If the applicant is a current account holder, theAccount Origination module searches the core for account numbers associated with the applicant’s TIN.
|
If the applicant is configured as a non-member, the Search function can be used to locate existing member accounts that may be associated with the TIN provided. |
Search results return in the Select Applicant window.
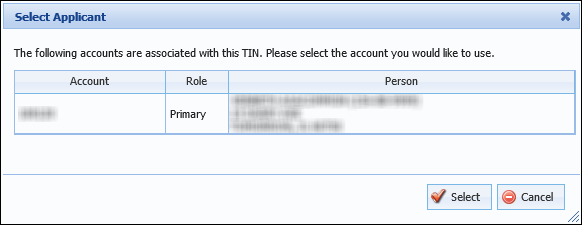
Associated accounts populate in the grid with the following information:
| Column | Description |
| Account | Displays the account number associated with the applicant. |
| Role | Displays the applicant’s role on the account. |
| Person | Displays the applicant’s name and address. |
Highlight an account within the grid and click  to change the account number to that of the associated account.
The selected account number populates in the applicant’s Member Account Number field on the Change Account Numbers screen.
|
Please see the Generate section within this topic for more information on generating an account number. |
The Member Account Number may generate automatically, based on configurations made within Event Processing. If configured, the Member Account Number generates when the corresponding event occurs. The Create Member Account Number action creates and returns an account number to the module for the application's primary applicant based on the following logic:
|
If a rule to set the value of the NewMembership field to Create New Member Account has been authored by the system administrator, a new record for an existing primary applicant is automatically created in the core during the specified stage in the application process. For more information on rule configurations to automatically create an applicant record in the core, please see the Core section under Workspace Toolbar in the Administrator Guide's Application Processing Overview topic. |
|
Queue routing rules execute if the application is not currently in process by a user. |
|
From the Event Processing page in System Management, the following event/action pair can be configured to execute during the document generation process:
Upon clicking |
|
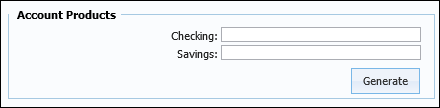
This section only appears within the Change Account/Loan Numbers screen when at least one account product is assigned to the application. |
The Account Products section allows users to manually enter or generate/reserve a new account number (or suffix) from the core system for each account product. Account Product Numbers may be determined manually by users within the Change Account/Loan Number screen or automatically using Event Processing.
Within the Account Products section, a field appears for each type of account product assigned to the application. Users can manually enter an account number for each account product or click Generate to populate an account number from the core.
|
The ability to manually enter an account number for each account product within this section is controlled by a parameter within the Solution.Origination page. The Account Product Number (suffix) is editable and required parameter within the System tab must be set to Yes in order for users to be able to manually enter an account number within this section. |
Once Generate is clicked within this section, an account number for each account product is generated and automatically populated within the applicable field(s). If multiple account products are assigned to the application, the account numbers are generated in sequence.
|
Please see the Generate section within this topic for more information on generating an account number. |
An Account Product Number/Suffix may generate automatically, based on configurations made within Event Processing. If configured, the Loan Account Number/Suffix generates when the corresponding event occurs. The Generate Account Number action assigns a new product account number/suffix based on the following logic:
|
Queue routing rules execute if the application is not currently in process by a user. |
|
The Generate button is disabled when:
|
The generate account number process creates a record for the account holder in the core system and updates the information on the screen with the new account number(s).
|
If configured by the system administrator, a system-defined event may also execute upon clicking  to automatically create a record for the account holder in the core system and generate a member account number for the application’s primary applicant. This allows for the addition of account numbers to application documents before disbursement occurs. For more information, please see the Event Processing Event/Action Pair section within this topic. to automatically create a record for the account holder in the core system and generate a member account number for the application’s primary applicant. This allows for the addition of account numbers to application documents before disbursement occurs. For more information, please see the Event Processing Event/Action Pair section within this topic. |
Upon clicking Generate within the Member Account NumberAccount Products section, an account number from the core populates within the associated field.
When the primary applicant is an existing account holder, clicking Generate within the Member Account Number section creates a new record for the applicant in the core system. Upon clicking Generate, a message displays to alert that the primary applicant has an existing account and confirm that a new member account should be created. Click Yes to create a new record for the applicant in the core system or No to return to the Change Account/Loan number screen. Once generated, the new account number for the applicant populates within the Member Account Number field. Upon disbursement of the application, the new Member Account Number is created within the core and the primary applicant's account number is set to the new account number in the application.
Once all account numbers have been entered or generated, click to retain the updated account numbers.
|
During disbursement, an account number is only generated when the account number for the is left blank. A Validation error is received to prevent an application from being disbursed if an account number for an is required and not present. For more information, please see the Disburse topic within this guide. |
Clicking triggers the following processes:
|
The behavior that occurs during this process may vary in each core. For core specific information, please see the applicable core connector guide for the institution. |
 Pending
 icon that appears in the CVV Number field does provide the ability to temporarily unmask the value of the CVV number by hovering over the icon. Navigating away from the icon once again masks the credit card number.
 to enable the ability to delete the entire credit card number. Once a number is re-entered and the user clicks outside of the CVV Number field, the new number appears masked and the