 |
It is recommended to perform tasks within the Rules Management Application after-hours as saving the Rules Application may result in slowness within the Framework. |
This section provides an overview of the Rules Management Application that displays upon selecting Launch Rules Management:
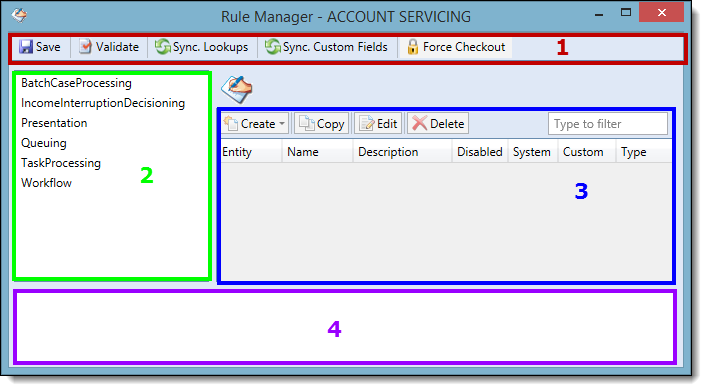
The Rules Management Application is comprised of four sections: the Application Toolbar, Left Navigation Pane, Main Window and Message Window.
1- Application Toolbar
The following provides an overview of the five functions in the Application Toolbar, located along the top of the application screen:
| Function | Description | ||
 |
Select Save to save all changes made within the Rule application.
|
||
 |
Select Validate to check for errors in the rule logic without saving the Rule Application. After editing or authoring a rule, it is advised to select this function. | ||
 |
Select Sync. Lookups to import all of the most current information populated in the Framework, such as any new account types or queues and incorporates them into the Rules application. Prior to writing new rule logic, it is advised to select this function. | ||
 |
Select Sync. Custom Fields to import all of the most current custom fields populated in the Framework. It is recommended to select this function prior to writing new rule logic if new custom fields were recently created in the Framework. | ||
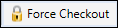 |
Rules Manager allows for only one user at a time to have Write capabilities within the application, providing subsequent users with the ability to view Rules Manager with Read-Only capabilities. If the application is checked out to another user, a message displays in the top right corner of the application, showing the name of the user and the date and time of check-out.
|


2- Left Navigation Pane
The Rules Management Application screen displays a left navigation pane containing Rule Categories.

Selecting a category from the left navigation pane determines the type of rules that populate within the main window.
|
A category must be selected before a rule can be created or edited. |
The following provides an overview of the categories in the Rules Management application and a description of when the category should be selected:
| Category | Description |
| Batch Case Processing | Rules to use within the Batch Case processing functionality to automatically add tasks/task processing to cases. |
| IncomeInterruptionDecisioning | Rules to use for the income interruption process to automatically approve, decline, set pending review, and determine the letters to be generated. |
| Presentation | Rules to define fields and/or aggregates to include in the Person Summary Panel and messages to be added in a Message Panel on Person Screens. |
| Queuing |
Rules to define queuing options for Advanced Queuing in the Framework. Advanced Queuing leverages business rules to enable administrators to write simple or complex criteria using account and/or account holder attributes to organize and assign accounts to a collections queue.
|
| TaskProcessing | Rules to use within Cases to automatically add tasks/task processes. |
| Workflow | Rules to use within the Execute Business Rules and Automated Decision workflow steps. |
3- Main Window
When a category is selected in the left navigation pane, the rules associated with that category populate within the Rules grid in the main window.
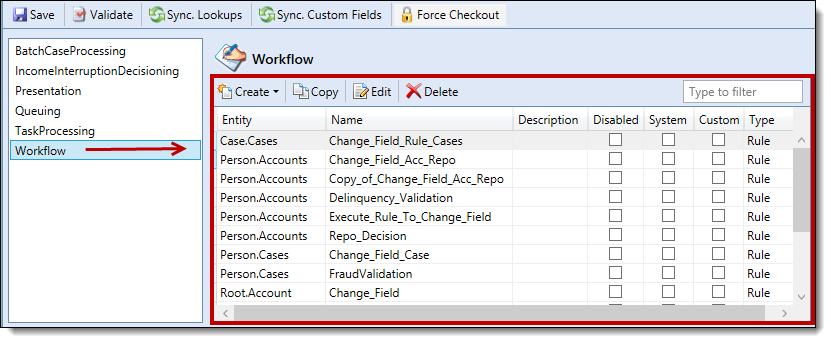
The Rules grid consists of the following columns to display information related to the rule:
From the Main Window, administrators have the ability to create new business rules or decision tables, copy existing rules, edit existing rules and delete existing rules by clicking the appropriate button along the top of the window. Type to filter through the list of rules that populate within the Rules grid.

4- Message Window
The Message Window displays messages for the Rule Application, including time of save or validation and whether or not the save or validation was successful.
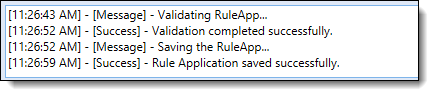
If an error occurs during Rule Validation, it displays within this window. Double-click on the error to navigate to the item that caused the error to occur.