 |
In order to efficiently author rules, it is important to be able to navigate through the Rules Management Application and to have an understanding for the available rule categories and entities. It is recommended to review the Getting Started with Rules Management topic within this guide prior to reviewing the following information regarding rule authoring. |
The Rule Authoring topic includes the following:
Overview
Business Rules use business language to link the following:
| Rule Language | Description |
| Condition | Logical circumstances, such as Fields, Field Values or Functions, which are met in order for an Action to be assigned. |
| Action | Activities that are performed as a result of Conditions being met. |
Rules can be used to create a logical statement such as, If [condition is true]…..then [perform this action]. If that condition is not met, then the logic can continue into an Else statement. You then can nest and add more If [condition is true]…..then [perform this action] statements.
Below are some guidelines to follow in preparation for authoring Business Rules:
- Write down what you are trying to accomplish before writing the rule. Remember that Business Rules can run on a person, an account or a case.
- Review the Data Dictionary in conjunction with entities to understand what data fields are available.
- Think about categories and entities together. Each Rule runs on data that is available at the entity level and that which is mapped in the Load Options.
The overall steps to writing a Business Rule are as follows:
- Select a category.
- Select an entity.
- Define the conditions.
- Specify the actions to take place when the conditions are met.
- Map the Load Options necessary for the rule to execute.
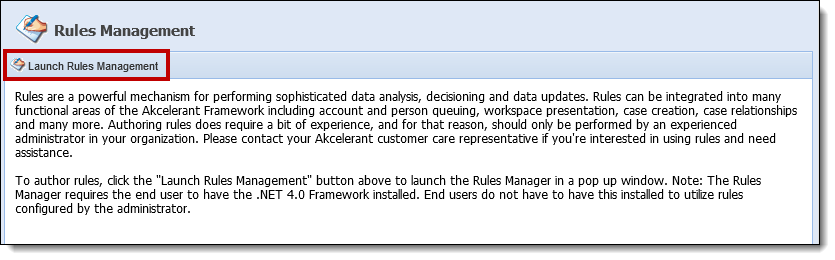
To begin authoring rules, click the Launch Rules Management button on the Rules Management Home Screen in System Management > Collections > Rules Management.
|
If rule authoring is not enabled, the Rules Management Application cannot be opened and an error message is received upon selecting Launch Rules Management. To discuss options for enabling Framework Account Servicing Rule Authoring, please contact your Akcelerant Customer Care Representative. |
Upon clicking this button, the Rules Management Application displays:
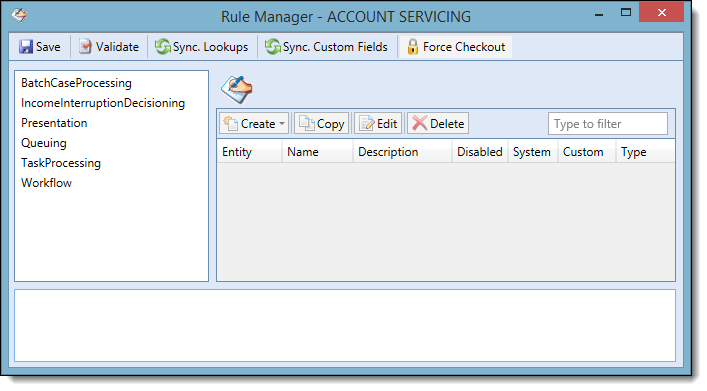
From this application, administrators have the ability to create new Business Rules or Decision Tables, copy existing rules, edit existing rules and delete existing rules.
Creating Rules
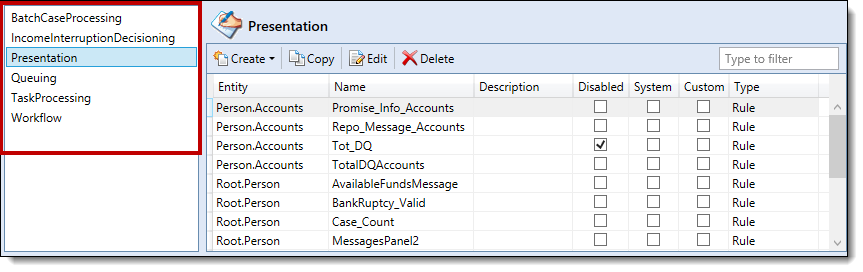
To create a rule, select the appropriate rule category from the left navigation pane.
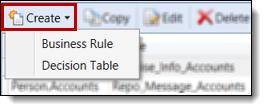
Click the Create drop-down and select one of the following options:
| Rule | Description |
| Business Rule | Business Rules are based upon condition(s) and associated action(s) expressed in business language. Rule logic is typically expressed in the form of "If...Then..." statements. |
| Decision Table | Decision Tables are helpful to use in order to maintain complex business situations in a simple manner and are a powerful way to represent a set of related business rules in a table format in order to avoid repeating rule logic in several “If” statements. The resulting decision table evaluates the conditions and assigned actions from the top down until it finds a path where all conditions resolve to True. |
After selecting Business Rule or Decision Table from the Create drop-down, a Select Entity pop-up window displays:

Select the appropriate Entity where the rule is to be applied and click OK. To learn more about Entities, click here.
 |
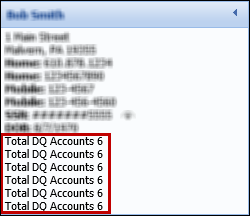
It is important to select the appropriate entity when authoring a rule to produce the desired results. For example John, an administrator, wants to use business rules to display in the person summary panel if any of the account holder’s accounts are delinquent. Initially, John created a rule using the Person.Account entity using the following logic: After testing the rule, John realized his rule was adding multiple fields to the person summary panel. Since the rule is written at the account level (Person.Account entity), the rule executes for each account individually and a separate field for each delinquent account is added.
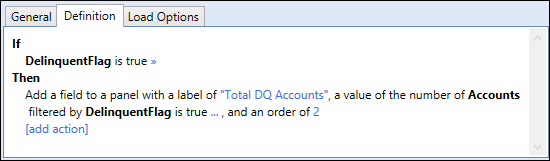
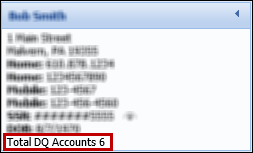
John remembers this concept and authors a new rule using the Root.Person entity. By selecting the Root.Person entity, the rule is executed one time for the account holder to show a total of all DQ Accounts. Notice how a single field has been added displaying the total number of delinquent accounts versus a separate field for each delinquent account.
|
Once an entity is selected, the New Rule window appears displaying three tabs: General, Definition and Load Options.
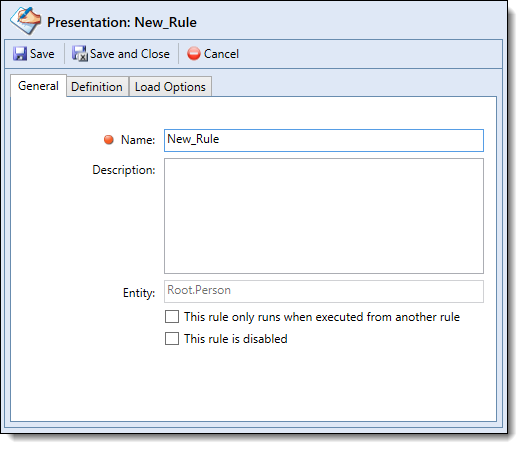
General
On the General Tab, the following fields display:
| Field | Description | ||||
| Name |
Enter a Rule Name. This field cannot contain spaces or special characters.
|
||||
| Description | Enter a Description. This field is not required, but is recommended in order to provide administrators with an understanding of the rule. | ||||
| Entity | Displays the name of the entity. This field is not editable. | ||||
| This rule only runs when executed from another rule |
If checked, the rule is not executed as part of a rule category and is only executed if explicitly called from another rule. Users are able to call a different rule through action execute rule set and select the rule that is to be executed. This checkbox can be used to control the order of execution for rules in a group.
|
||||
| This rule is disabled |
If checked, the rule is disabled and not executed. This checkbox can be used for creating rules to be activated at a later date. It is recommended to disable a rule rather than permanently delete it from the Rules Management Application.
|
Once all fields are complete, navigate to the Definition Tab.
Definition
The Definition tab contains the rule logic and is where administrators can modify and build a rule. The Definition tab appears different depending on the type of rule being created.
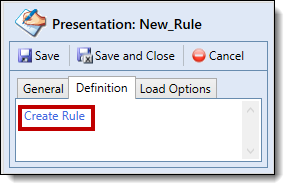
Business Rule
To begin building a Business Rule, click Create Rule.
Select a rule construct or action from the list that displays:
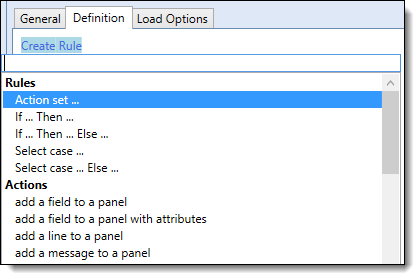
Rule
The following table provides the different business rule languages for each conditional template and their definition:
| Business Rule Language | Definition |
| Action Set | Take the following actions. |
| If...Then... | If the conditions are met, Then execute this action. |
| If...Then...Else | If the conditions are met, execute the Then action. If the conditions are not met, execute the Else action. |
| Select Case | Set up conditions within a case. If the case conditions are met, execute the Then action. The first case condition that is met gets executed. |
| Select Case...Else | Set up conditions within a case. If the case conditions are met, execute the Then action. The first case condition that is met gets executed. If no case conditions are met, then execute the Else action. |
Action
The following table displays the actions available when building a rule, what the action does, and the categories for which action can be used:
| Action | What it Does | Category Selection | ||
| add a field to a panel | Adds a field to the Person Summary panel- label, Order |
Presentation | ||
| add a field to a panel with attributes | Adds fields to the Person Summary panel- label, order and then attributes include size, color and style. |
Presentation | ||
| add a line to a panel | Adds a line to the Person Summary panel | Presentation | ||
| add message to panel | Adds a good, bad, warning or none (information) message to a panel on Person screens. | Presentation | ||
| assign account to queue | Assigns accounts to a queue | Queuing | ||
| assign person to queue | Assigns persons to queue | Queuing | ||
| display warning message | Displays a warning message within a workflow | Workflow in conjunction with Execute Business Rules Step | ||
| display error message | Displays an error message and prevents user from completing the workflow | Workflow in conjunction with Execute Business Rules Step | ||
| display informational message | Displays an informational message within a workflow | Workflow in conjunction with Execute Business Rules Step | ||
| execute decision table | Executes Decision Table already configured in the system | Can be used in any category | ||
| execute rule set |
Executes a rule already configured in the system
|
Can be used in any category | ||
| set queue eligibility for account | Sets the person/account as eligible or not eligible for Advanced Queuing | Queuing | ||
| set the value of a field | Sets the value of a field (can use all math operations, concatenations, etc) | Workflow (in conjunction with Execute Business Rules step), Task Processing, Batch Case Processing | ||
| set the workflow decision to no | Sets workflow decision to no to take user down the no path automatically | Workflow in conjunction with Automated Decision Step | ||
| Set the workflow decision to undetermined | Sets workflow decision to undetermined and presents a message to the user to manually answer yes/no | Workflow in conjunction with Automated Decision Step | ||
| Set the workflow decision to yes | Sets workflow decision to yes to take user down the yes path automatically | Workflow in conjunction with Automated Decision Step |
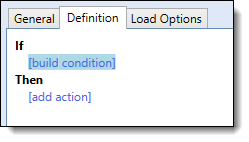
After a Rule or Action is selected, the rule template displays:
|
There multiple ways to author a rule. The following demonstration uses an If... Then expression to build a Presentation Rule for a Messages Panel and should be used for EXAMPLE ONLY. |
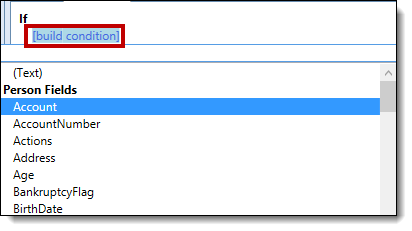
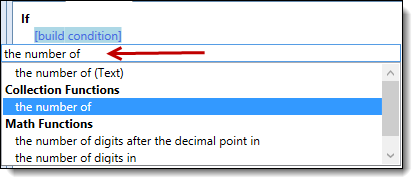
To begin building the rule condition, click [build condition]. A list of available fields and functions displays:
|
The fields that display within this list are determined by the Entity chosen. For example, since the Root. Person Entity was chosen for this demonstration, a list of Person Fields is displayed. For more information on the fields available for rules, please see the Data Dictionary. |
When building conditions and actions, select a field or function from the list or type in the drop-down to filter the selections.
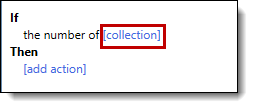
Based on this selection, blue links populate within the template in order to build a complete expression.
|
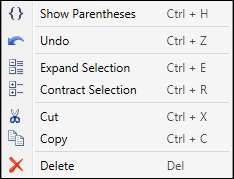
To undo or add to a selection, right click on the selected item and choose an edit option from the list that displays:
|
|
When deleting a field, expression, etc., all additional criteria after the deleted item is also removed. |
When an expression is incomplete, these links appear to indicate that an additional field or function is required in order to complete the rule expression. The blue links contain placeholders and special characters to alert to the following:
| Name | Prompt | Description |
| Open Placeholder |  |
Indicates that another template selection is required in order to complete the expression. |
| Named Placeholder |  |
Indicates that a value, field or additional template selection is required in order to complete the expression. |
| Chevron Extender | Indicates that the rule template can be extended by selecting a condition of “and” or “or.” | |
| Caret Extender | The ^ extender is used to append logic to the previous field, value or entire template, such as adding date or text functions. |
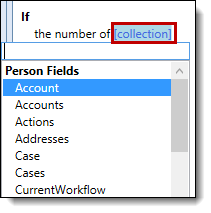
Select a field to display a list of all relevant expressions applicable to the field. For example, clicking [collection] displays a list of the applicable Person Fields.
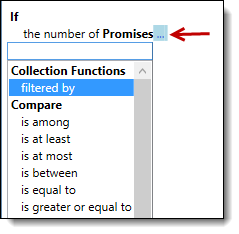
Click the … to display a list of the further information that is needed regarding the number of Promises. For this example, a value for the number of promises must be defined in order to complete this expression. Clicking the … populates a list of applicable Collection and Compare Functions.
Select a function from the list in order to populate the [value] field.
Click [value] and enter an integer value within the top of the list.

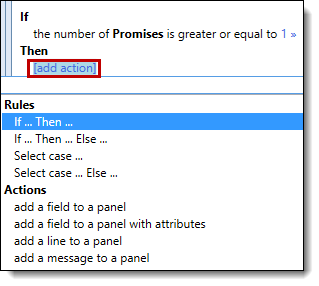
When all conditions are set, define the actions to occur as a result of those conditions.
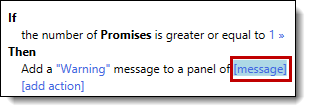
Click [add action] to define the resulting action and select an action from the list that displays.
|
Once one action is selected, a new [add action] link populates to allow for multiple actions to be defined.
|
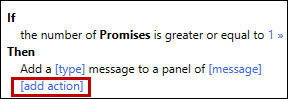
As aforementioned, based on this selection, blue links populate within the template in order to build a complete expression. Select [type] to define the message type.
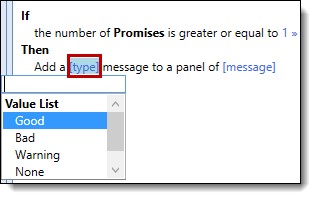
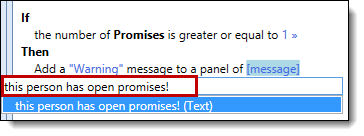
Once a type value has been selected, click [message] to define the panel message.
To add text, simply enter the message within the text box.
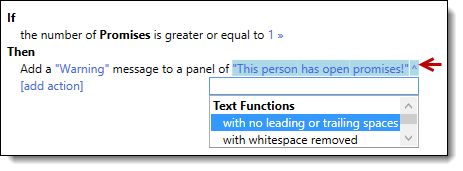
Click the ^ to define optional text options, such as with no leading or trailing spaces or with whitespace removed.
|
Upon the completion of this rule, the user has the following logical statement: If the number of Promises is greater than or equal to 1, then add a “WARNING” message to a panel of “This person has open promises!” |
Decision Table
Administrators can modify and build a decision table using the three boxes that display within the Definition tab:
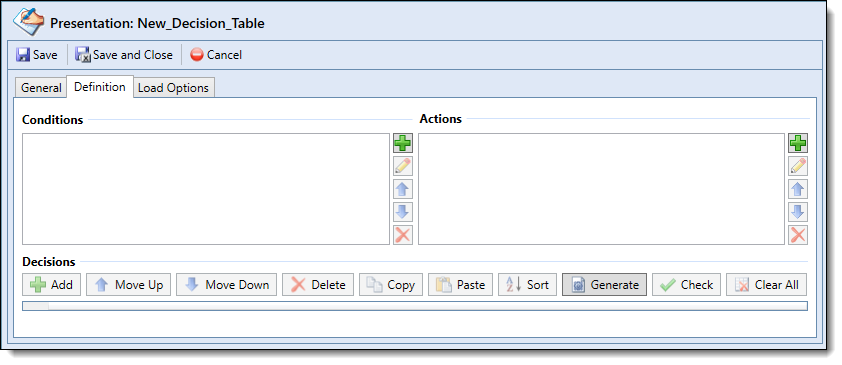
Conditions
In a Decision Table, multiple conditions can be built to compare individual field values or ranges of values. The Decision Table evaluates from top to bottom until it finds a result where all conditions resolve to True.
The Conditions box contains the following buttons:
| Button | Function |
 |
Add Condition |
 |
Edit an existing condition. |
  |
Move the order that conditions appear in the columns of the Decision Table. |
 |
Delete an existing condition. |
To add a condition, select the Add Condition button to begin building rule criteria.
The Add Decision Table Condition window appears:
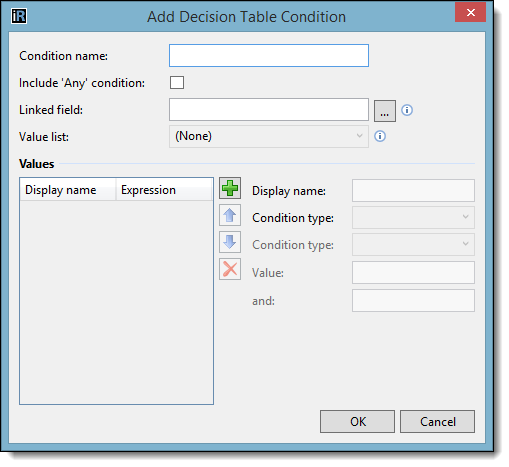
Using the table below, complete the applicable Add Decision Table Condition fields:
| Condition Field | Description | ||
| Condition name |
Specifies the name of the condition that appears in the Decision Table column header.
|
||
| Include 'Any' checkbox | Adds the ‘Any’ option to the list of conditions. Selecting ‘Any,’ in the table triggers that condition to be True under any circumstances. | ||
| Linked Field |
Specifies if the condition relates to a specific field. Enter the field name in the box or click the … icon to display a list of available fields.
|
||
| Value List |
If linked to a field, select a value list from the drop-down. This drop-down contains the lookup lists available from System Management> Field Configurations. When a Value List is selected, the field values associated with the list automatically populate within the Values grid.
|
||
| Values Grid |
Specifies the Display name and Expression for each field value. When a Value List is selected, this grid pre-populates with the field values associated with the selected value list.
|
||
| Display Name | Specifies the name that displays in the drop- down for the condition column of the Decision Table. | ||
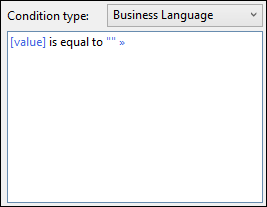
| Condition type |
Specifies if the condition set relates to a field or is defined using an expression or business language.
|
||
| Condition type |
Specifies the compare function used to define the condition criteria.
|
||
| Value | Specifies the ID Value in the database for the selected field value. |
Once all fields for the condition are configured, click OK to save the condition.
As aforementioned, multiple conditions can be created within a decision table. Before defining actions for the decision table, create all conditions following the above steps.
Actions
In a Decision Table, the end result of the logic path is determined by the defined actions. Multiple action sets can be created and associated with various conditions.
The Actions box contains the following buttons:
| Button | Function |
|
Add action |
|
Edit an existing action. |
| |
Move the order that actions appear in the columns of the Decision Table. |
|
Delete an existing action. |
To create an Action, click the button to select the desired action template.
The Add Decision Table Action window appears. Select one of the following action modes:
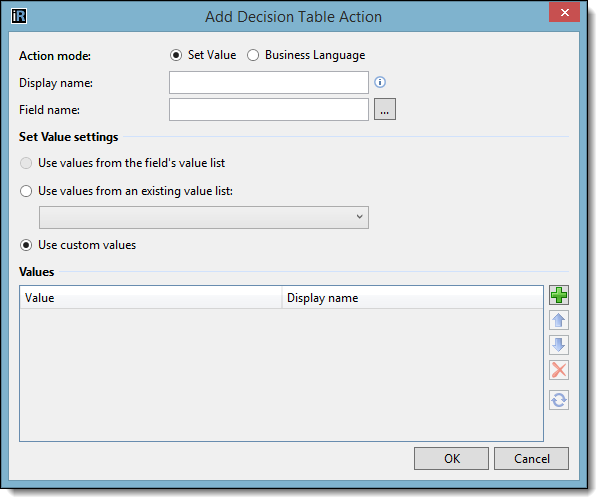
Set Value
Select Set Value to link the action to a specific field in the Framework.
Using the table below, complete the applicable Add Decision Table Action fields when Set Value is selected:
| Action Field | Description | ||
| Display Name |
Specifies the name that displays in place of the field name in the decision table column header.
|
||
| Field Name |
Specifies the name of the action that appears in the drop- down for the action column of the Decision Table. Enter a field name or click the
|
||
| Set Value Settings |
Select Use values from the field’s value list to add lookup values for the field defined within Field Name. This setting is disabled if a lookup value is not defined within Field Name.
|
||
| Values Grid |
Specifies the Value and Display Name for each field value.
|
Business Language
Select Business Language to define actions for the decision table using a rule template.
When the Business Language action mode is selected, The Add Decision Table Action window appears as follows:
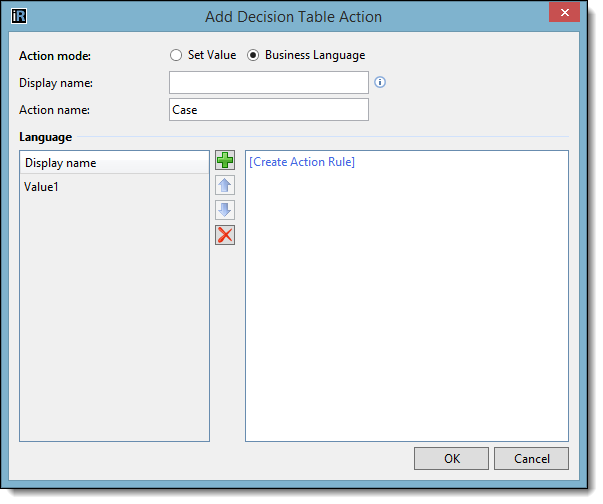
Using the table below, complete the applicable Add Decision Table Action fields when Business Language is selected:
| Action Field | Description | ||
| Display Name |
Specifies the name that displays in place of the field name in the decision table column header.
|
||
| Action Name |
Specifies the name of the action that appears in the drop- down for the action column of the Decision Table.
|
||
| Language |
Specifies the Display name for the action and provides a window to create an Action Rule.
|
Repeat the steps for the selected action mode until all options for the action are defined. Click OK to save the action.
Once all actions are created, navigate to the Decisions box to complete the Decision Table.
Decisions
The Decisions Table is ready to populate once all Conditions and Actions have been defined.
Within the Decisions Box, the following buttons display to configure the Decision Table:
| Button | Function |
 |
Add new row to the Decision Table. |
 |
Move selected row up. |
 |
Move selected row down. |
 |
Delete selected row. |
 |
Copy selected row. |
 |
Paste the copy of a row. |
 |
Select the sort order of the Decision Table. |
 |
Generate an exhaustive list of all possible options for the table. |
 |
Check Decision Table for any duplicated or missing options. |
| Delete all rows of the Decision Table. |
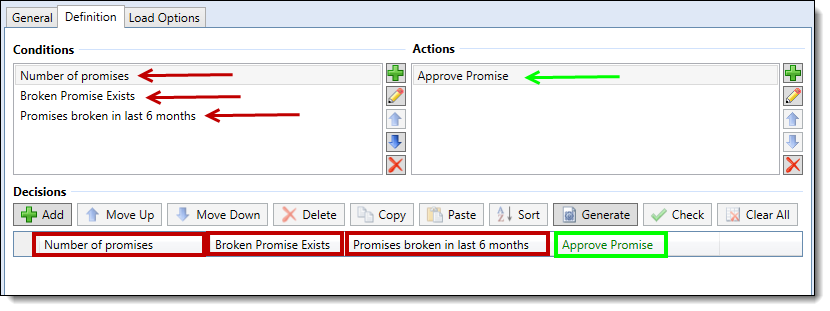
In the example below, notice how the defined Conditions and Actions have pre-populated within the top of the table:
Manually add rows to the Decision Table by clicking the  button or select the button to create an exhaustive list of all possible combinations for the table.
Using the associated drop-downs within an Action column, assign Conditions to Actions until all desired outcomes have been accounted for within the Decision Table.
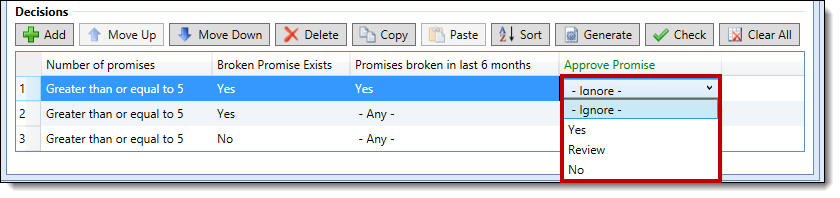
|
All Actions default to Ignore. When Ignore is selected, no action is taken for the associated condition. |
Once all rule logic has been defined, navigate to the Load Options tab within the New Rule window to assign the Load Options for the Decision Table.
|
It is recommended to click the button to check the Decision Table for any duplicated or missing options before saving. |
Load Options
Load Options define the data required to execute a rule and are used to improve performance by avoiding the transmission of unnecessary data. The Load Options for each rule are defined within the Load Options tab.
|
Load Options must be assigned for each rule. Rules that do not have Load Options assigned do not function as expected. When Load Options are not assigned for any rule containing a field, a value does not display for that field after the rule is executed. For example, in the demonstration above, if the Person.Accounts and Person.Promises Load Options are not assigned, the rule is unable to determine a value for the number of promises in order to display a message within the panel. For information regarding the fields available within Rules Manager to assist with assigning Load Options, please see the Data Dictionary. |
The Load Options tab displays two boxes: Available Options and Assigned Options:
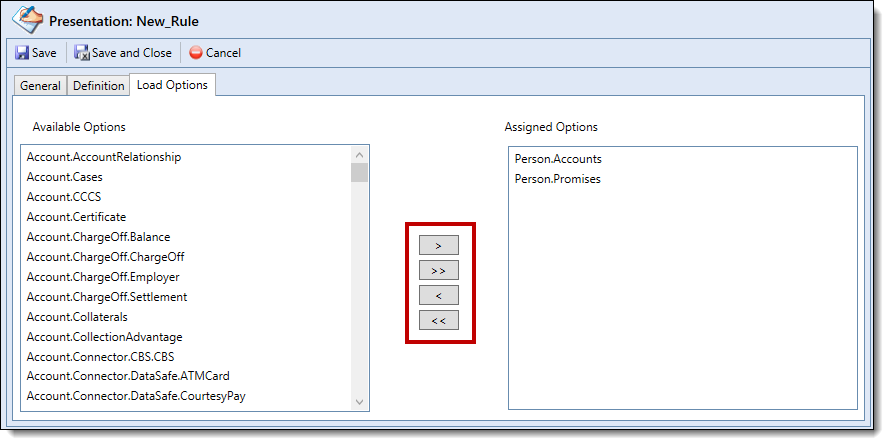
To assign Load Options to the rule, select the load option from the Available Options box and move it to the Assigned Options box using the arrows that display.
|
All available Load Options display within the Available Options box, including load options for various connectors that may not be applicable to every institution. |
In this demonstration, the rule being created is at the person level and, in order to retrieve promise information for each of the person’s accounts, account and promise entities are needed to execute the rule. The correct Load Options to assign for this rule are Person.Accounts and Person.Promises.
By assigning these load options, the information regarding all person accounts and promises made by the person are transmitted before the rule is executed, in order to display the warning message regarding outstanding promises.
|
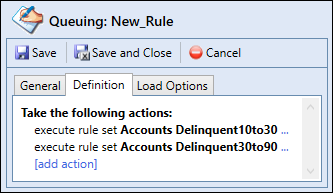
When defining an action of execute rule set to appear in a rule, the Load Options assigned to the rule being configured, or the parent rule, must include the same Load Options assigned to that of the rule set(s) being called, or the child rule(s). For example, in the screenshot below, the new Queuing rule being created is the parent rule and the Accounts Delinquent10to30 and Accounts Delinquent30to90 rule sets being called are the child rules. When assigning Load Options for the new Queuing rule, the Load Options assigned for the Delinquent10to30 and Delinquent30to90 rules must also be included in order for the rule to execute successfully.
|
Finalizing a Rule
Once all tabs are complete, click Save within the Edit Rule window to save the new rule.

Click Save and Close to save the new rule and return to the Rules Management Application screen.
Select Cancel to close the New Rule window without saving.
Once saved, the new rule populates within the Rules grid and is available for execution.
|
Save must also be selected on the Rules Management Application screen once all changes to rule logic or lookup syncs are complete. Clicking Save within the individual rule does not save rule logic to the Rule Application without this final save. |
Copying Rules
|
Before copying a rule, it is recommended to review the Creating Rules section of this topic for an overview of the information defined within each tab and to develop an understanding for how to configure rule logic. |
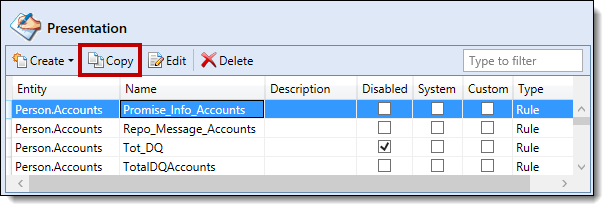
To copy a Rule, click to highlight a Rule within the Rules grid. Select Copy within the Application Toolbar.
The Copy Rule window appears. Navigate through the tabs and make any required/necessary changes.
When finished, click Save or Save and Close to save the new Rule and return to the Rules Management Application screen. Click Cancel to return without saving.
Editing Rules
|
Before editing a rule, it is recommended to review the Creating Rules section of this topic for an overview of the information defined within each tab and to develop an understanding for how to configure rule logic. |
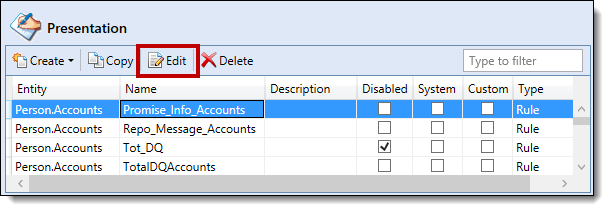
To edit a Rule, click to highlight a Rule within the Rules grid. Select Edit within the Application Toolbar.
The Edit Rule window appears. Navigate through the tabs and make any required/necessary changes.
When finished, click Save or Save and Close to save the new Rule and return to the Rule Management Application screen. Click Cancel to return without saving.
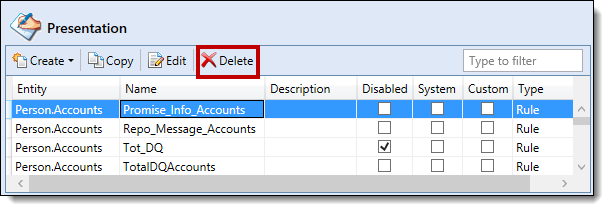
Deleting Rules
To delete a rule, click to highlight the rule within the Rules grid and select Delete within the Application Toolbar.
|
Selecting Delete permanently deletes the rule logic from the Rules Management Application. It is recommended to disable a rule from the Edit Rule window rather than permanently delete it in order to save the rule logic. For more information on how to disable a rule, please see the Creating Rules section of this topic. |
Once Delete is selected, a confirmation message displays to confirm if the rule should be deleted:
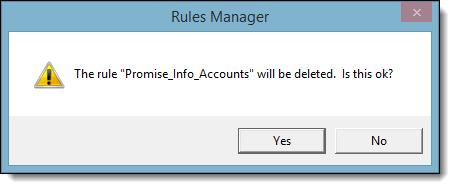
Click Yes to delete the rule or No to return to the Rules Management Application screen without deleting rule.