The Workflow Steps page allows administrators to create and manage workflow steps found within the Framework. Workflow steps can be created to work with institution-specific custom functionality. For example, if an institution uses the Framework's API functionality and creates their own webpage, a workflow step could be created to work with the website and perform a variety of actions such as updating values in the Framework or their own system. These workflow steps can be incorporated as a part of a workflow. The Framework comes with a set of “System Workflow Steps” that can be incorporated into workflows. Workflow Steps labeled under the Type column as “System” cannot be edited.
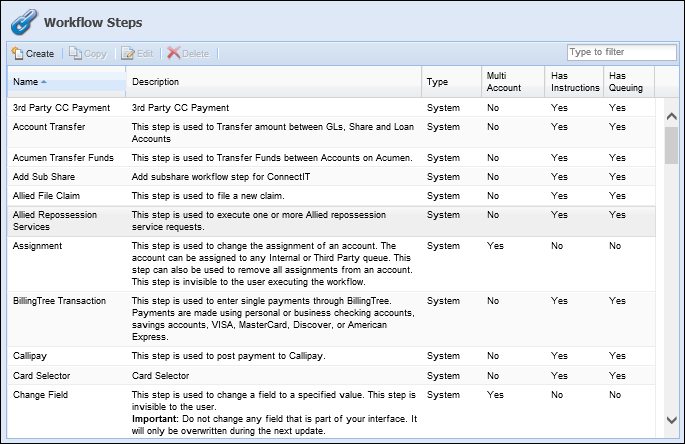
The following columns display on the Workflow Steps page:
| Column Name | Description |
| Name | The name of the workflow step. |
| Description | Description of how the workflow step is used. |
| Type | Displays whether the workflow step is a system step or custom step. |
| Multi Account | Displays whether or not the workflow step is Multi-Account capable. |
| Has Instructions | Displays whether or not the workflow step contains an Instructions tab when configuring it as a part of a workflow. This allows instructions to appear to the end-user when they are running the workflow step. |
| Has Queuing | Displays whether or not the workflow step contains a Queuing tab when configuring it as a part of a workflow. This allows administrators to assign the workflow to workflow queues. |
System Workflow Steps
Below is a list of system workflow steps that can be used within workflows. Institutions may see workflow steps in addition to the steps listed below. Please review the appropriate connector guide if the workflow step is connector-specific.
| Workflow Step | Description | Multi-Account Workflow? | Can be Automated? | ||
| Assignment | This step is used to change the assignment of an account. The account can be assigned to any Internal or Third Party queue. This step can also remove all assignments from an account. This step runs automatically and is not presented to users executing the workflow. This workflow step forces the account in the queue and overrides the queuing logic. Queue logic is ignored until the account is removed by the assignment workflow step. | Yes | No | ||
| Change Field | This step is used to change a field value to a specified value. This runs automatically and is not presented to users executing the workflow. Only fields with a one-to-one relationship to an account or case may be changed. | Yes | Yes | ||
| Contact Method | This step is used to record the contact attempts made to the account holder or other liable persons on the account(s) and/or case(s). The results of each contact attempt are recorded. All of the unique phone numbers for the liable persons associated with the accounts and/or cases in context for the workflow are displayed in the Contact Method drop down. | Yes | No | ||
| Create Case | This step is used to create a case on a person and account. This workflow step can be configured to be a manual step to allow the user to select the case type or automated so a specific case type is created automatically. | Yes | Yes | ||
| Decision |
This step runs automatically and is not presented to users executing the workflow. This workflow step is used to present a user with a Yes or No decision. Depending on the answer chosen, users are branched out into a specific path in a workflow. This step can be made automated where system administrators assign business rules to automatically guide a user down a Yes or No path.
|
Yes | Yes | ||
| Distribution | This step is used to distribute accounts over multiple queues. This uses the same concept as the Assignment workflow step to force accounts in the queues and override all queuing logic. | No | No | ||
| Execute Business Rules |
This step runs automatically and is not presented to users executing the workflow. This workflow step is used to execute business rules within a workflow. Workflow rules are configured by system administrators to execute as a workflow is run in order to automatically make a decision based on certain conditions and/or display a message regarding next actions.
|
Yes | Yes | ||
| Income Interruption End Deferment | This step is used to terminate an active deferment by selecting a deferment date from the calendar. | No | No | ||
| Income Interruption Review | This step allows users to review requests for Income Interruptions. These requests are found within the file imported from a core system into the Framework. Based off of Income Interruption rules created within Rules Manager, accounts placed in the review section need to be approved or rejected via this workflow step. | No | No | ||
| Manual Payment |
This step is used to record a payment on the account in context. If there is a promise on the account, the payment is applied to the promise. This step can be incorporated into a workflow if an institution does not have a payment import. Payments recorded through this step appear on the Payment History screen.
|
No | No | ||
| Next Contact Date | This step is used to schedule the next contact date for the account(s) in context for the workflow. Optionally, the next contact date may be applied to all of the person's accounts. | Yes | No | ||
| Post Comment | This step is used to post a comment on a workflow. This step can be automated using a predefined comment and the workflow step will not be presented to the user. | Yes | Yes | ||
| Promise to Pay | This step is used to record a promise to pay on account(s) in context for the workflow. | Yes | No | ||
| Reason | This step is used to prompt users to select the account holder's reason for delinquency from a list of available values. | Yes | No | ||
| Send Email | This step is used to send an email to an account holder and/or contact associated to the account(s) in context. This step can be manual by allowing the user to select an email template and recipient. This step can be automated by using a predetermined email template and recipient list. If the step is automated, it is not presented to the user. | Yes | Yes | ||
| Send Letter | This step is used to send one or more letters to an account holder and/or contact associated to the account in context for the workflow. Administrators can automate this workflow step to send single letters. If this step is manual, users can pick from a defined list of letter templates. | Yes | Yes | ||
| System Integration |
This step is a component of the Akcelerant Framework API. Customer-built applications can be integrated directly into workflows within the context of the Akcelerant Framework. Thus, these custom built applications can provide integration with the Host or other systems that the Framework does not currently integrate with, but also take advantage of the security, process control and auditing capabilities of the Framework. Please contact a System Administrator for directions in completing this workflow step. |
No | No | ||
| Task | This step is used to give a user a set of instructions to perform. This is used to track reasons for delinquency. Those values are configured under System Management>Workflow>Workflow Reason Codes. | Yes | No | ||
| View Screen | This step is used to display a screen in a workflow with a set of instructions. | Yes | No |
From the Workflow Steps page, administrators can create custom workflow steps, copy existing custom workflow steps, edit existing custom workflow steps and delete custom workflow steps.
Creating a Custom Workflow Step
Click Create. The New Workflow Step screen appears.
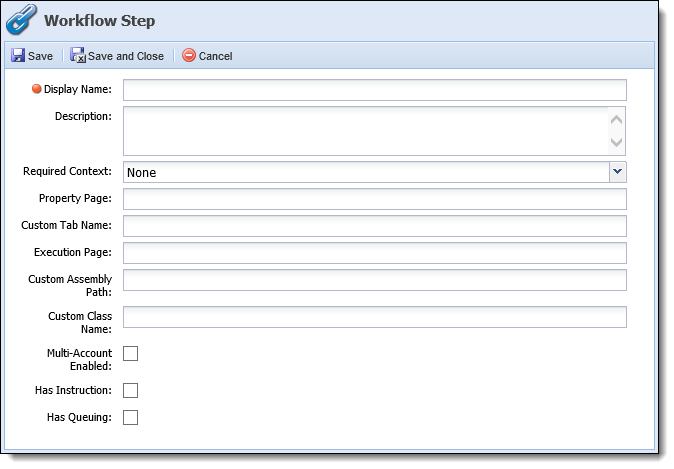
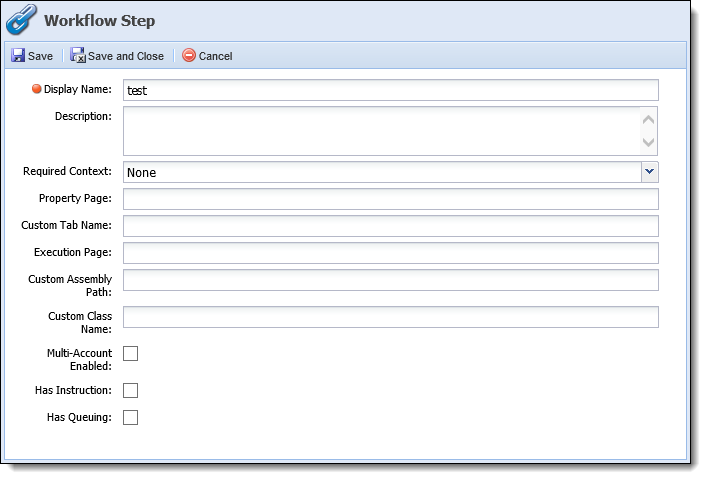
The following fields display on the New Workflow Step screen:
| Field Name | Description |
| Display Name | Enter the name as it should appear in the list of available workflow steps. This is a required field. |
| Description | Enter a description of how the workflow step is used. This is shown in the summary section when selecting which workflow step to add to a workflow. |
| Required Context | The level in which the workflow step can be run (Account, Case, Both, Calculate, None, Person). |
| Property Page | If configured, enter the URL of the Property Page. The Property Page appears when configuring a workflow step within a workflow. The URL must begin with "Custom/." |
| Custom Tab Name | If necessary, define the name of the tab that appears when configuring a workflow step within a workflow. This must be filled out if the Property Page field is filled out. |
| Execution Page | Enter the URL of the Execution Page. The Execution Page appears when the workflow is run in a workspace. The URL must begin with "Custom/." |
| Custom Assembly Path | Enter the DLL path used for reflection so an object can be examined and modified at runtime. |
| Custom Class Name | Enter the class inside of the DLL that is pulled out and used at runtime. |
| Multi-Account Enabled | If checked, the workflow can be run on Multiple accounts at a time. |
| Has Queuing | If checked, the new workflow step has the ability to be assigned to a workflow queue. |
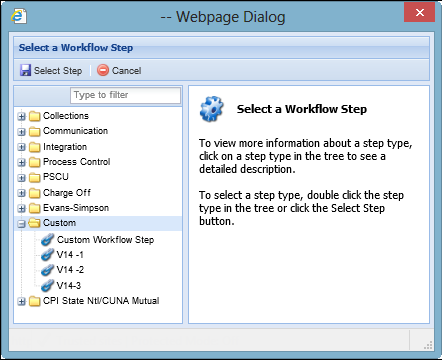
When finished entering all information, click Save or Save and Close to save the new workflow step and return to the Workflow Steps page. The new workflow step populates in the Workflow Steps page and is available when building workflows. The new workflow step is also available in the Custom folder when adding it to a workflow. Click Cancel to return to the Workflow Steps page without saving.
Copying an Existing Workflow Step
Click to highlight the workflow step to copy.
Click Copy. The Copy Workflow Step screen appears. The Display Name of the original workflow step appears with the word "Copy."
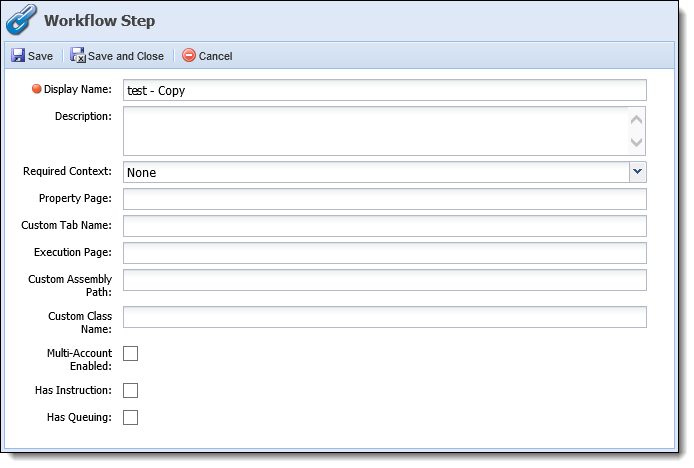
If necessary, make any changes to the copied workflow step.
Click Save or Save and Close to save the workflow step and return to the Workflow Step page. The new workflow step populates in the Workflow Steps page and is available when building workflows. The new workflow step is also available in the Custom folder when adding it to a workflow. Click Cancel to return to the Workflow Steps page without saving.
 |
System workflow steps cannot be copied. |
Editing a Custom Workflow Step
Click to highlight the workflow step that is to be edited.
Click Edit. The Edit Workflow Step screen appears.
If necessary, make any changes to the workflow step.
Click Save or Save and Close to save the workflow step and return to the Workflow Step page. Click Cancel to return to the Workflow Steps page without saving.
|
System workflow steps cannot be edited. |
Deleting a Custom Workflow Step
Click to highlight the workflow step that is to be deleted.
Click Delete. A confirmation message appears.
Click Yes to delete the workflow step. Click No to not delete the step and return to the Workflow Steps page.
|
System workflow steps cannot be deleted. |